Servis.ai stands out for its high level of customization, thanks to its flexible field system.
- Fields allow you to capture and organize exactly the information you need across all your apps.
- You can create custom fields for any purpose, from recording a contact’s birthday to assigning unique IDs to opportunities.
- With 25 field types available—including currencies, dates, and calculated values—you can structure your data to match your specific workflows.
This flexibility ensures servis.ai adapts to your processes, not the other way around.
Edition Qualifier: This feature is available in all servis.ai Editions.
User Permissions: Only the Administrator can customize Form Fields.
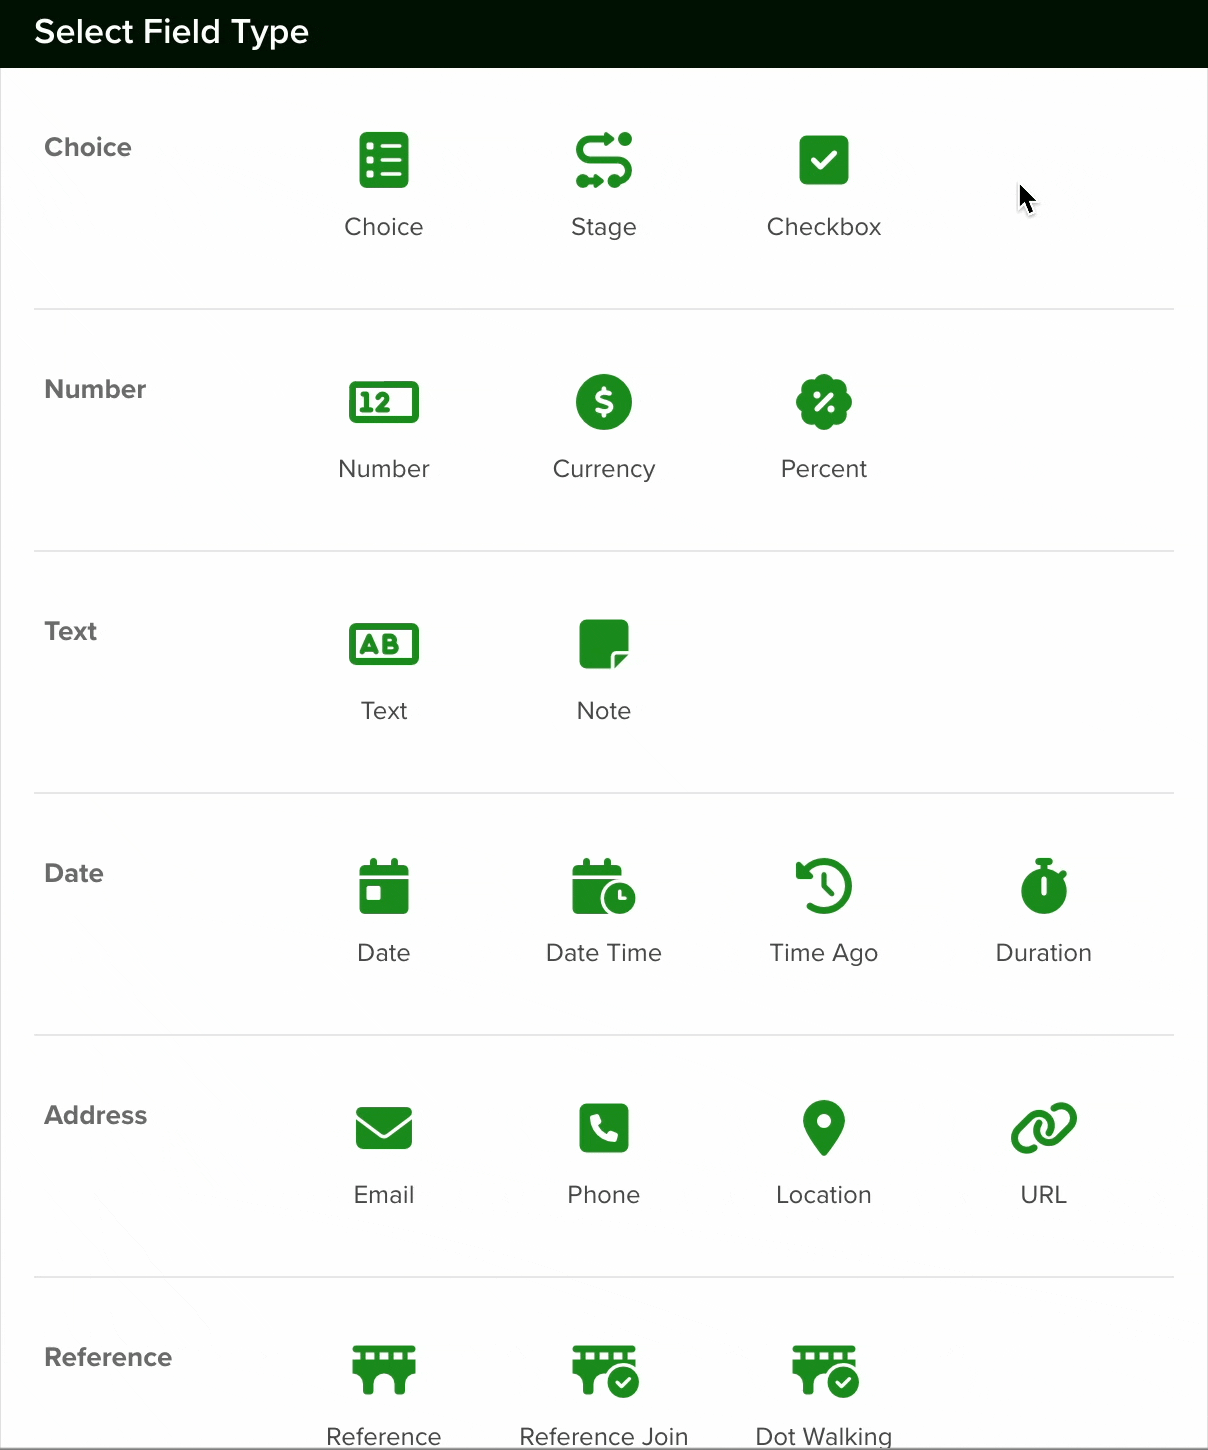
Custom Fields Types
There are several types of custom fields, depending on the type of data you want to save. To learn more about each type, please visit the corresponding tutorial:
Navigate to Form Fields
Open the menu and go to ‘Settings > Apps‘ then select your desired app and click on the ‘Form Fields’ or ‘Form Builder’ tab.
We recommend using Form Builder as it allows you to see your forms update in real-time as you add fields.
Create New Fields
- Create new fields for contacts, accounts, opportunities, tasks, or any other App.
- Edit existing fields to better match your workflows.
- Start with a set of predefined fields, fully customizable to your needs:
- Edit field details.
- Rearrange their order.
- Deactivate fields you don’t need.
- Delete fields if they’re no longer relevant.
Note: Some out-of-the-box fields can not be deleted just deactivated.
At this time, you might want to consider creating your form sections, in order to keep your form cleaner. Setting up sections is really simple, to learn more about them, visit the following tutorial:
Form Sections
Adding a Field
There are two different buttons you can use to add fields.
The first is at the top right side of the screen. Simply click ‘Add’ and then ‘Add Field’.

The second is using the options menu next to each of the section titles.

Once you click on ‘Add Field’ the field selection window will open. All of the fields are broken down by category making it easy to select the one that best suits your needs.
Once you’ve selected your field type the field creation window will then open. From here you can configure your field.
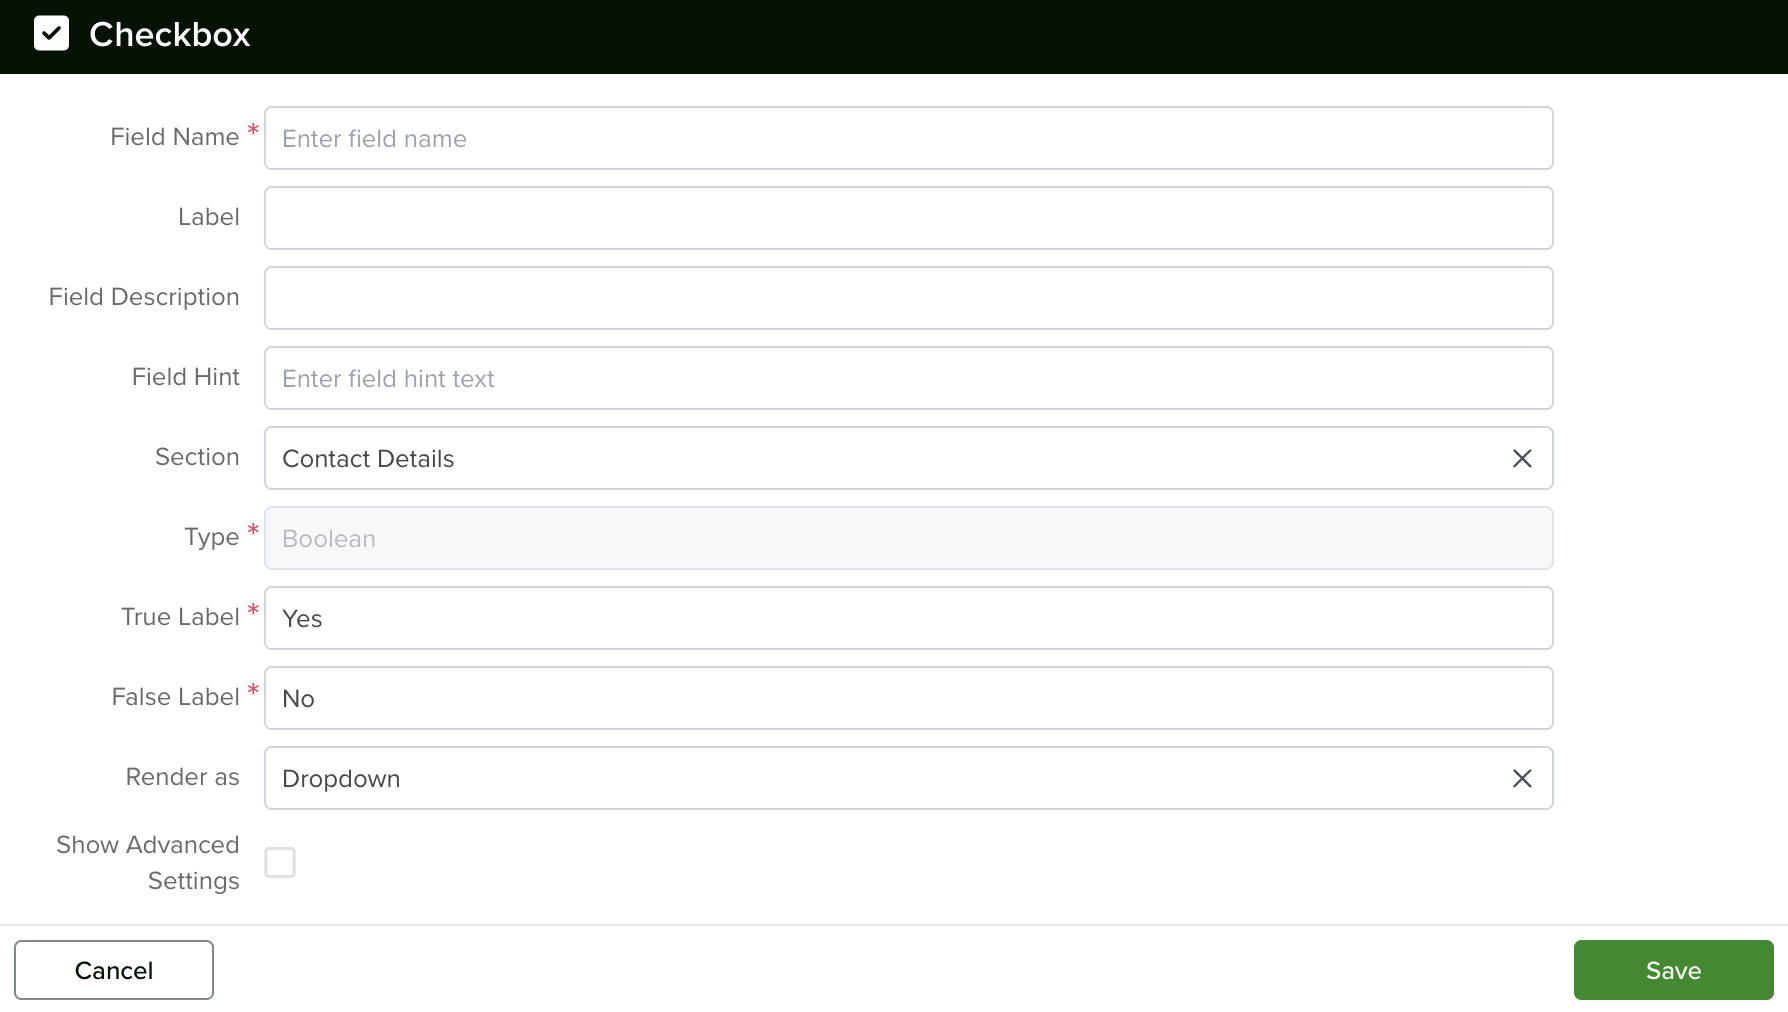
As a best practice, do not duplicate Field names. When working with these Fields, it is preferred that each Field has a unique name.
Some field types include the option to add a ‘Default Value’ when they are created.

Also, when you create or edit a field you can decide whether that field should be required, by selecting ‘yes’ or ‘no’.

You can also enable the ‘Calculated’ box to create a calculated field of the type you just selected.

If a field shouldn’t be modified after the creation of the record, you can enable ‘Lock after create’ and that field won’t be editable afterward.

Please note that some field types don’t have all the options.
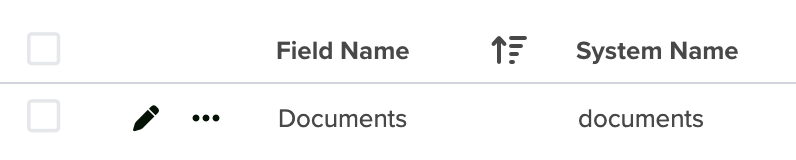
Note: All new fields are located at the bottom of the list.
Label
Labels (User-Facing Name)
-
Makes the interface readable and friendly.
-
Gives admins freedom to rename things anytime.
-
Helps users understand what data they’re entering.
-
You can change it as often as needed.
-
Supports natural language (e.g., Patient Name, Billing Email).
-
Used for:
-
Form Builder
-
Reports
-
Mobile apps
-
Table column headers
-
Lables in Action
-


Default Value
Static
In servis.ai, you can assign a default value to most field types using the Static mode. This allows you to manually enter the value you want the field to take when a new record is created.
This is especially helpful for:
- Required fields – ensures a value is always present
- Boolean fields – auto-sets Yes/No without user input
- Choice Lists – preselects a commonly used option
Example:
When creating new Opportunities, you might set the first stage to “New.” This way, every opportunity automatically starts in the correct status without needing manual input.
To use Static mode, simply type the desired default value directly into the input box when configuring the field.

Dynamic
The Dynamic mode allows you to set a default value based on a referenced field from another app. This is useful when the default value depends on a related record.
Example:
If you’re configuring a field to display the price of a Product linked to an Ticket, you’ll need to reference the Product app from within the Tickets app.
- To do this, use the dot.walking feature.
Simply enter:Product.Unit Price
Because the field is being created within the Accounts app, servis.ai will understand that you’re referencing the Product field related to each Account record.

Recommendation When Using Dot.Walking
As you begin typing the name of the reference field (e.g., Product) and add a dot (.), servis.ai will display a list of all available fields you can reference using dot.walking.

To ensure the default value works correctly, make sure the referenced field’s data type matches the field type you’re configuring.
Example:
As the Unit Price Field in Products is a Number Field Type represented as: Product.Unit Price It will only display the expected output if this is configured in a Number Field Type.
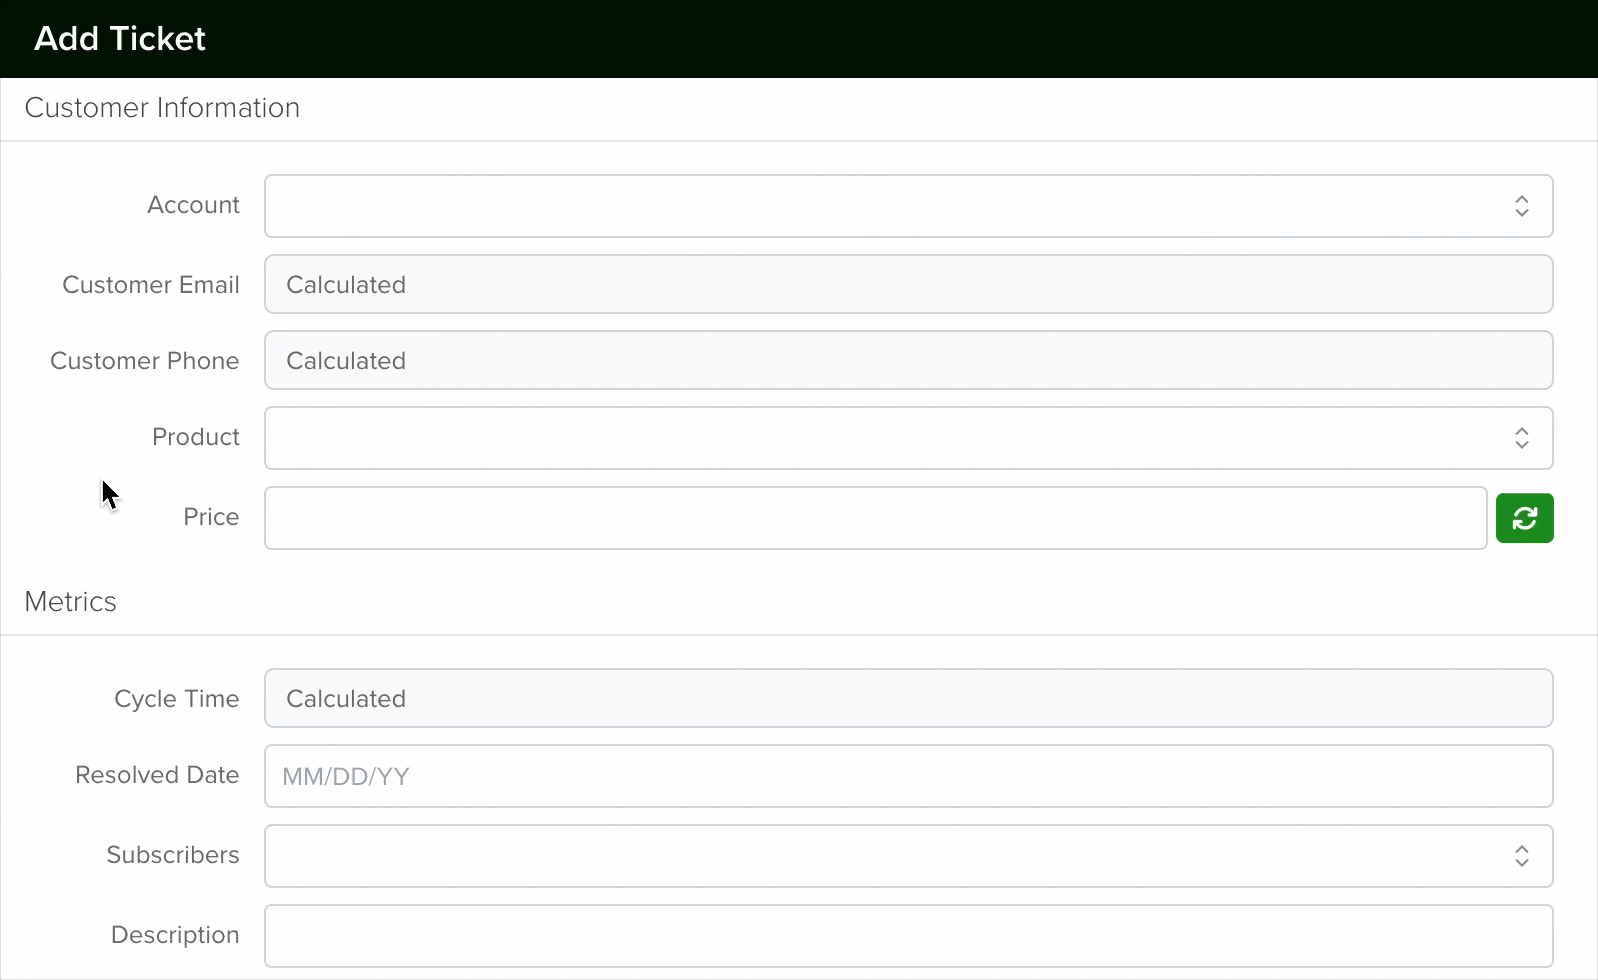
Using the Dynamic Mode for Default Value
Once you’ve configured a Default Value using Dynamic mode, you can see it in action directly from the form. This example uses a setup where the default value is set to Product.Unit Price, meaning the field depends on a Product Reference Field Type linked to the Tickets app.
- Click the + Add button to open the form.
- Locate the field you created in the appropriate section.
- Choose a Product record in the reference field:
- Click the Refresh button to load the default value based on the selected record.
- Change the selected record and click Refresh again to see how the value updates dynamically.
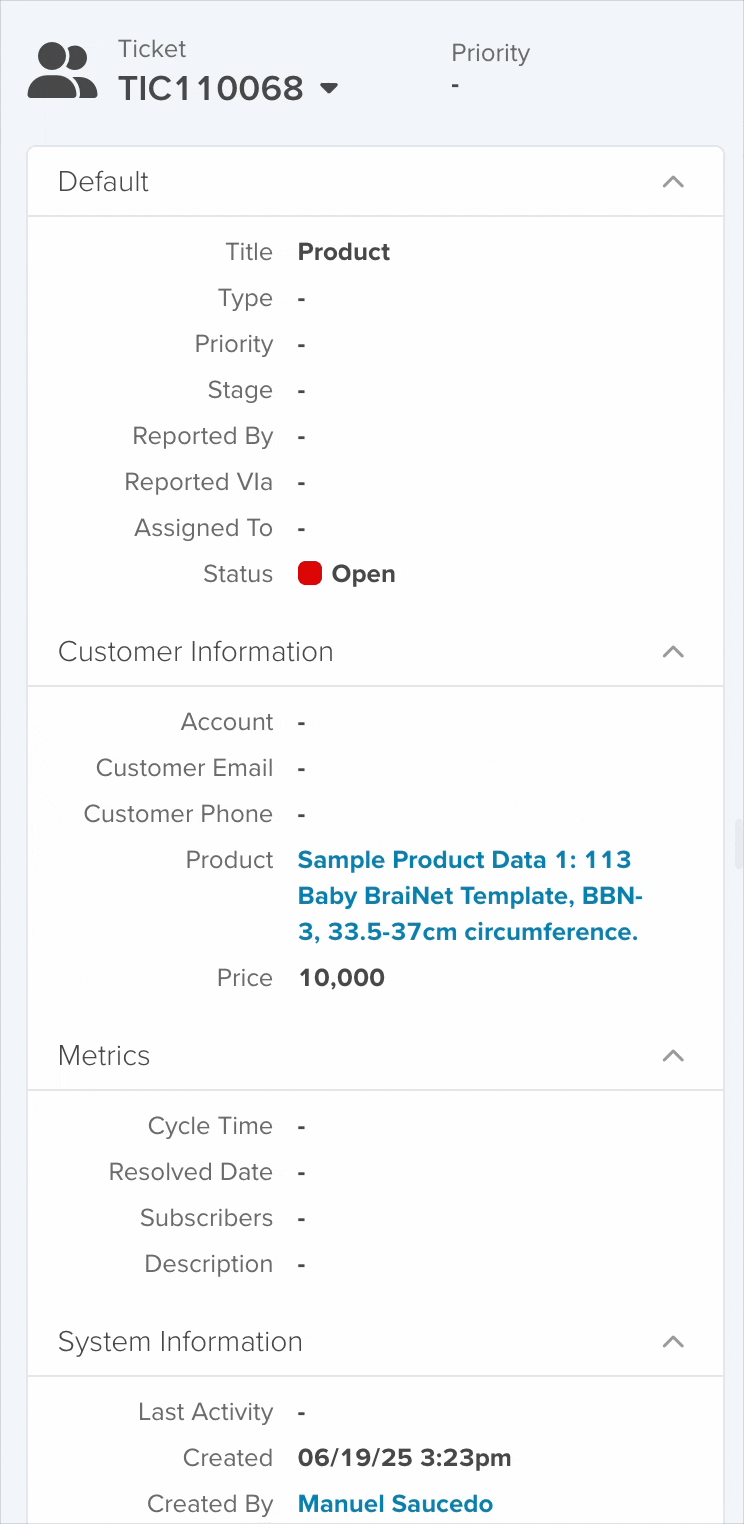
You can also change the fields value from the List or Detail View of the created record:
List
Detail
Note: You can change or remove the Default Value at any time. This won’t affect existing Records or Fields that were already populated using the previous Default Value—those values remain unchanged. Calculations based on the original default will also stay intact.
Unique Fields
No more duplicates! If you make a field ‘unique’, you will be able to block the creation of duplicated records automatically. One big plus is that you can use them as references in your import files, which means no more ID matching.
You can create a new field or edit one of your existing ones to make them unique, as long as their type is one of the following:
- Phone
- Text
- URL
To create a unique field go to Settings > Apps and then click on an application. Go to the ‘General’ tab and you’ll see a section called Unique Fields. You add one or multiple fields from your application here.

Note: If duplicated values already exist for the selected field, it won’t be possible to set it as Unique. Remove all duplicated values first.
Next time you add a record, servis.ai will use this unique field to validate if another record with the same value already exists.
Servis.ai recommends employing Unique Fields as a best practice when importing data to an App, refer here for more information on Import Your Data in servis.ai.
Note: Once your Unique Field is set up you must use this instead of the record ID in your Data Import process. If Unique Field is not enabled, continue with record ID.
If you want to know more about Managing Unique Fields, check this article.
Existing Duplicates
When you mark a field as Unique, servis.ai checks all existing records in the App to ensure there are no duplicates.
- After clicking Save, if duplicates are found, an error message will appear.
- A window will display the duplicated values along with the number of times each one appears.
Changing a Field’s Type
In servis.ai, once a field is created, its type (e.g., text, number, date, boolean) cannot be modified directly. This limitation helps ensure data consistency and prevents errors that could arise from incompatible data formats.
If you need to change the type of an existing field, you’ll need to follow these steps:
- Create a New Field: Go to the Form Fields tab on your App’s Settings and create a new field with the desired type (for example, switching from a text field to a number field).
- Deactivate the Old Field: Once the transition is complete, you can choose to delete the original field or simply hide it from views to avoid confusion.
Enable Subscribers
The Subscribers field allows multiple users to view the same record, even if they have individual access settings. You can add specific team members to a record, making it easier to collaborate while maintaining access controls. This field is available for any object in the system.
How to Enable Subscribers:
- Go to the Form Fields screen.
- Check the Show Deactivated box in the upper right-hand corner.
- Find the Subscribers field, click the options menu next to it, and select Activate.

Add Subscribers to a Record
After activating the Subscribers field, you can assign team members to any record. Assigned users will have full access to the record, including the ability to edit it, view the Activity Timeline, and see all Related Lists.
To add subscribers:
- Open and edit the record.
- Select one or more team members from the Subscribers dropdown.

You can assign as many team members as you need here. Their access level is not relevant here, as long as you add them to the Subscribers Field, they will have access to the record.
Add Subscribers to Multiple Records
You can bulk edit records to add subscribers to several at once. This is especially helpful when using filters to quickly assign team members to the right records.
To do this:
- Apply any necessary filters and select the records you want.
- Click Edit.
- In the Subscribers field, choose the team members you want to assign.
- Save your changes without modifying other fields.
Subscribers will appear in the List View, and assigned users will have full access to the selected records.
Rearrange Fields
You can re-order fields in the ‘Form Sections’ tab.
Deactivate/Activate Fields
In order to Deactivate a field, it is important that you make sure that it isn’t still in use by the app it’s created in or being referenced in other applications.

If you would like to reactivate fields you need to select ‘Show Deactivated’ in the ‘Form Fields’ tab by clicking on the box in the top right-hand corner of the screen.

Then click on the ‘Options’ menu for the field you would like to reactivate and select ‘Activate’.

