is now

Company Settings

Last update: June 30, 2025

Picture of Corey Wilson
Corey Wilson

Technical Writer

In this article:

One other way in which Servis.ai is fully customizable involves your Company Profile. Here you can make Servis.ai your own by aligning it with your company branding. 

User Permissions: Only the Administrator can use this features.

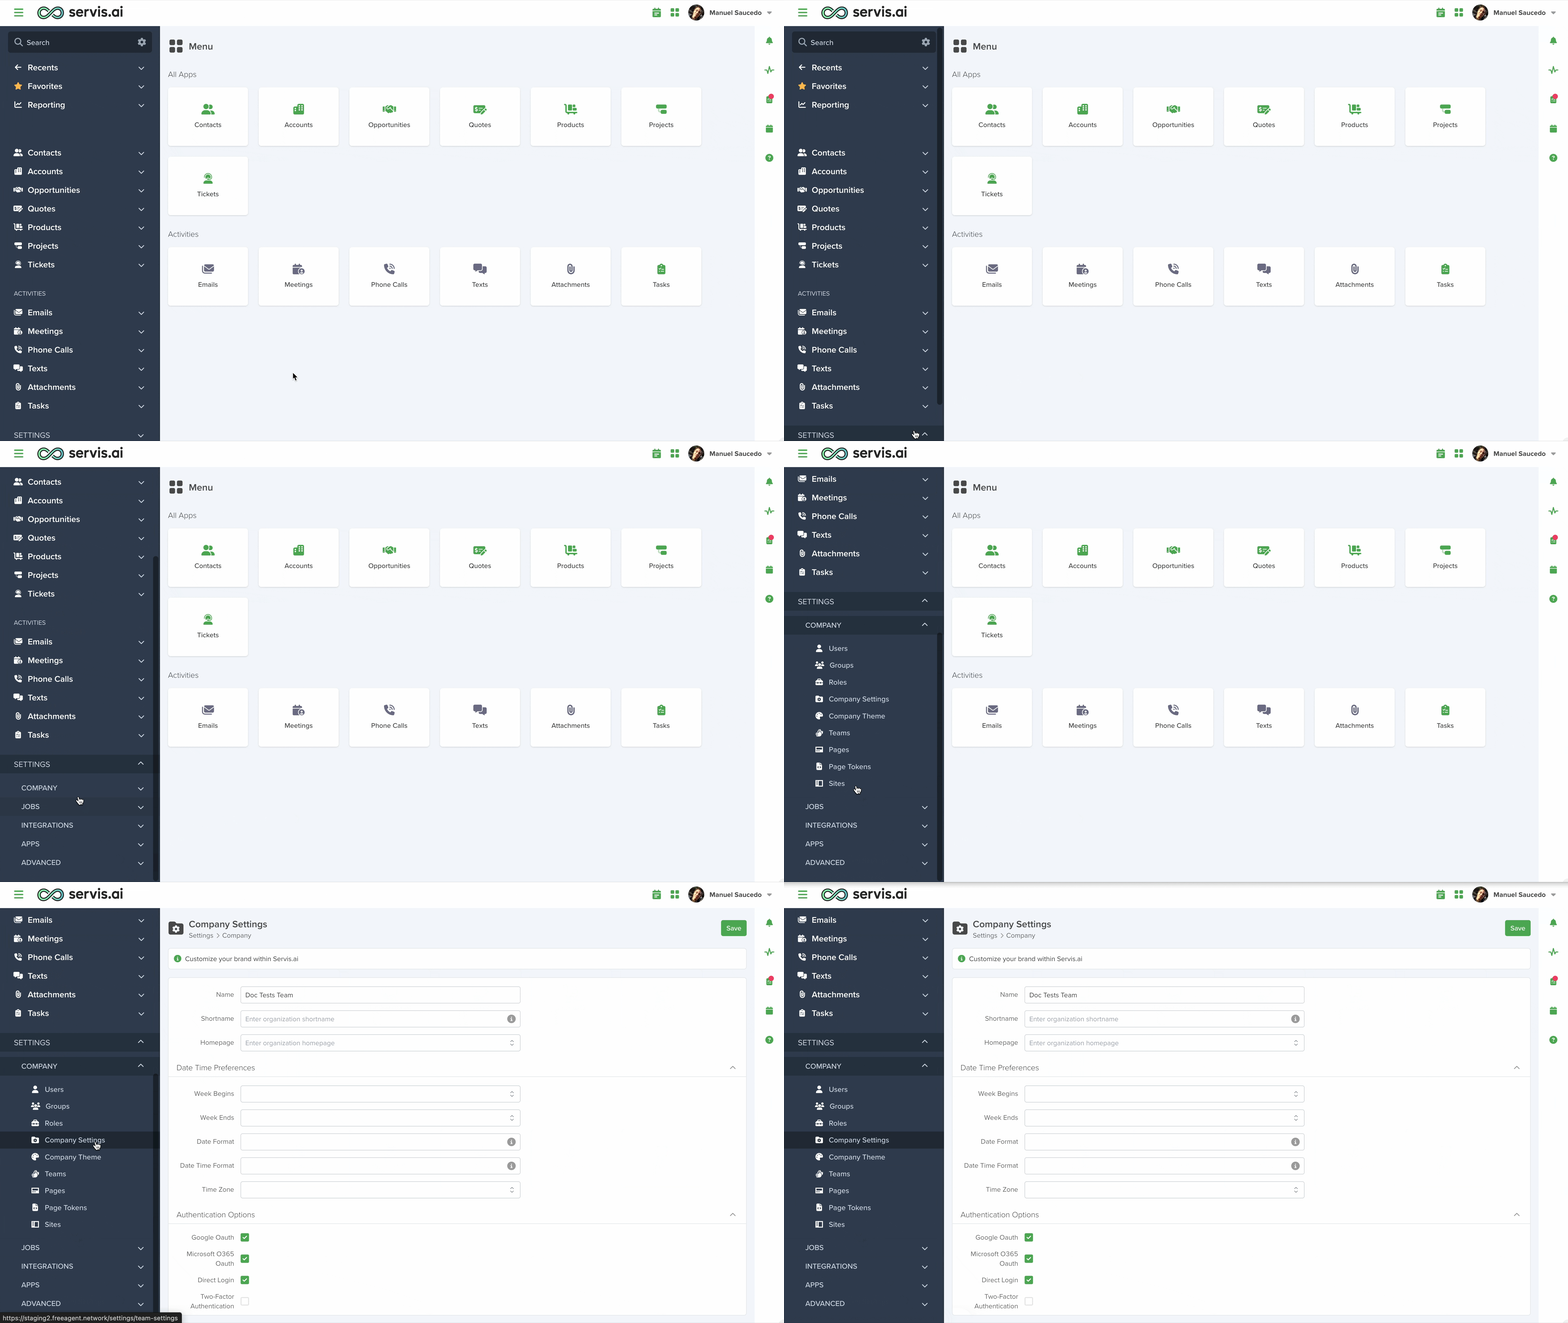
Navigate to Company Settings

Open the menu and go to Settings > Company > Company Settings.

You can also use the search function to get there faster, just start typing ‘Company Settings’.

Let’s go through all of the options available. 

company_settings.png

1. Name

This is simply for the name of your organization.

The field below labelled ‘Shortname’ is used to shorten URL’s to key pages throughout Servis.ai.

2. Homepage

By default, the home screen for Servis.ai is the main Application page. However, you can change it to a different location here. This will apply to all Users.

Date/Time Preferences

3. Work Week

Select the day of the week when your workweek begins and when it ends. This is especially useful for automations, it will help you prevent having Tasks assigned on a Sunday for example if it is not a working day. 

4. Set up Date and Time Preferences

It is not necessary that you configure everything. If you don’t want to change the date format just leave those fields empty.

These formats can also be tailored to your specific needs, as when you are creating reports you can set your preferences to offer only the most pertinent information.  This can make your reporting process more efficient. 

Depending on your specific needs, basically, any format can be achieved.  For example let’s use the example date of January 1st, 2022 at 2:00 PM and 30 seconds.  

Use Case Format
If you need all this information January 1st, 2022 14:00:00:30
If only the date is needed in a minimized format 1/1/22

Date and Date Time Format

These formats will be used across the entire system for date and date time fields. Here is a list of the formatting options available. Servis.ai uses the Moment.js system to configure formats, below is a table featuring some of the options.

Note: Your organization’s date format e.g. DD/MM/YYYY or MM-DD-YYYY is not only used to display dates and times but for actual data entry to help standardize date formats for your reporting needs.

 
Date Format Value Result
Month M 1 2 … 11 12
  Mo 1st 2nd … 11th 12th
  MM 01 02 … 11 12
  MMM Jan Feb … Nov Dec
  MMMM January February … November December
Quarter Q 1 2 3 4
  Qo 1st 2nd 3rd 4th
Day of Month D 1 2 … 30 31
  Do 1st 2nd … 30th 31st
  DD 01 02 … 30 31
Day of Year DDD 1 2 … 364 365
  DDDo 1st 2nd … 364th 365th
  DDDD 001 002 … 364 365
Day of Week d 0 1 … 5 6
  do 0th 1st … 5th 6th
  dd Su Mo … Fr Sa
  ddd Sun Mon … Fri Sat
  dddd Sunday Monday … Friday Saturday
Day of Week (Locale) e 0 1 … 5 6
Day of Week (ISO) E 1 2 … 6 7
Week of Year w 1 2 … 52 53
  wo 1st 2nd … 52nd 53rd
  ww 01 02 … 52 53
Week of Year (ISO) W 1 2 … 52 53
  Wo 1st 2nd … 52nd 53rd
  WW 01 02 … 52 53
Year YY 70 71 … 29 30
  YYYY 1970 1971 … 2029 2030
  YYYYYY -001970 -001971 … +001907 +001971
Note: Expanded Years (Covering the full time value range of approximately 273,790 years forward or backward from 01 January, 1970)
  Y 1970 1971 … 9999 +10000 +10001
Note: This complies with the ISO 8601 standard for dates past the year 9999
Era Year y 1 2 … 2020 …
Era N, NN, NNN BC AD
Note: Abbr era name
  NNNN Before Christ, Anno Domini
Note: Full era name
  NNNNN BC AD
Note: Narrow era name
Week Year gg 70 71 … 29 30
  gggg 1970 1971 … 2029 2030
Week Year (ISO) GG 70 71 … 29 30
  GGGG 1970 1971 … 2029 2030
AM/PM A AM PM
  a am pm
Hour H 0 1 … 22 23
  HH 00 01 … 22 23
  h 1 2 … 11 12
  hh 01 02 … 11 12
  k 1 2 … 23 24
  kk 01 02 … 23 24
Minute m 0 1 … 58 59
  mm 00 01 … 58 59
Second s 0 1 … 58 59
  ss 00 01 … 58 59
Fractional Second S 0 1 … 8 9
  SS 00 01 … 98 99
  SSS 000 001 … 998 999
  SSSS … SSSSSSSSS 000[0..] 001[0..] … 998[0..] 999[0..]
Time Zone z or zz EST CST … MST PST
Note: as of 1.6.0, the z/zz format tokens have been deprecated from plain moment objects. Read more about it here. However, they *do* work if you are using a specific time zone with the moment-timezone addon.
  Z -07:00 -06:00 … +06:00 +07:00
  ZZ -0700 -0600 … +0600 +0700

Once you are done, click the ‘Save’ button, and your Date Time Preferences will be enabled across your entire organization. 

Note: Team members may use a format mask to help customize their preferred date and time preferences in number fields.  e.g. setting a shorter format such as 5/9/22. 

Authentication Options

5. Choose your login authentication methods

You have a few different options for how you would like your user to be able to access Servis.ai.

Google Auth

Microsoft 365 Oath

Direct Login

Two-Factor Authentication

login.png

The options will show up on your login screen.

Note: In order to use two-factor authentication you need to ensure that ‘Direct login’ is also selected. 

Two-factor authentication gives you an added layer of security when using the Direct Login option. 

2fa.png

System Preferences

These settings will allow you to select the way Servis.ai behaves when you click on the App Actions to Email or Call within your records. 

6. Native Click to Call/Native Click to Email

By default, these options are set to ‘No’, which means that Servis.ai will take care of those processes. For example, If you click the button to Send Email it will open the Servis.ai Email editor. It will do the same for phone calls. Everything will be handled within Servis.ai.

For the above to work you need to have your Email and Phone Number paired. To learn more about pairing your phone and email, please visit the following tutorials:
Pair Phone
Pair Email

However, if you haven’t paired your phone and email and you want to use your Computer’s default apps, such as Outlook or Mail, for these processes then change both Native Click to Call and Native Click to Email to ‘Yes’. 

Email Preferences

You can choose which applications will be allowed to import emails and meetings from other sources. 

Smart Sharing

Smart Sharing allows users to associate emails with multiple records across all apps through a dropdown selection. This feature ensures that the selected records include the email in their Activity Timeline, improving tracking and accessibility.

By default, the email is linked to the primary Contact receiving it. However, users can extend visibility by assigning the email to additional relevant records, providing a more comprehensive reference within the system.

smart sharing emails.png

Phone Preferences

Choose the format you would like to use for your phone number fields. 

phone_preferences.png

These are the supported formats in Servis.ai.

  1. E.164: This is the most widely used phone number format, recommended by the International Telecommunication Union (ITU). It consists of a country code followed by a national destination code and subscriber number.

    For example, a phone number in the United States might be represented in the E.164 format as +1 555 1234567, where “+1” is the country code for the United States, “555” is the area code, and “1234567” is the subscriber number.

  2. National Format: Each country typically has its own national phone number format, which may vary in length and structure. National format numbers include the country code and the local area code, followed by the subscriber number.
    For example, a US phone number in national format would be (XXX) XXX-XXXX.
  3. International Phone Number Format: This format is similar to E.164 but without the plus sign (+) at the beginning. It includes the country code, national destination code (if applicable), and the subscriber number. For example, a US phone number in international format would be 1xXXXXXXXXX.

Smart Sharing

Smart Sharing enables users to associate phone calls with multiple records across all apps using a dropdown selection. This ensures that the selected records have the call logged in their Activity Timeline, enhancing tracking and accessibility.

By default, the call is linked to the primary Contact being called. However, before making the call, users can extend visibility by assigning it to additional relevant records, providing a more complete reference within the system.

smart sharing on phone.png

Languages

9. Language

With this feature, you will be able to add support for multiple languages across your organization so that each of your team members can choose the one they would like to use for their Servis.ai account. 

languages.gif

This section is available at the bottom of the page. The default language for Servis.ai is English, however, you can add as many languages as you need to make sure everyone at your organization works with the one they feel more comfortable with.

To add another language, click “Add New”. Then select the desired language from those available on the list and click the “Ok” button. Make sure you save your changes. 

Once you have added Multiple Languages, all your users will be able to change the language in their Preferences. 


🙄

😐

😊

😍

Welcome to servis.ai Free Edition

Link your email to begin

Continue with Google

Continue with Microsoft

By continuing, you agree to servis.ai Terms of Use. Read our Privacy Policy.

Get Started with servis.ai

30-minute demo where you see servis.ai in action.

Unlock the essential servis.ai features at no cost.

How can I be of servis?