User Permissions: Only Administrators or App Admins can customize apps.
Navigate to App Settings
There are two ways to access App Settings:
1. From the Navigation Menu, go to Settings > Apps, then select the app you want to edit.
2. From the Apps Home Page, hover over an app icon until the gear icon appears in the top-right corner, then click it to open the App Settings.

Main Actions
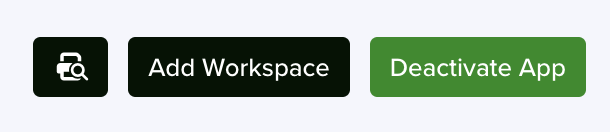
All apps include the following actions in their settings—available from any tab:
Deactivating an app does not delete it or its records—it simply disables access. You can manage deactivated apps under Settings → Apps → Deactivated Apps.
General App Settings
When you enter App Settings, you’ll be taken to the General App Settings tab.

From here, you can edit the app’s appearance, name, and description, as well as configure access controls, privacy preferences, and more.
Let’s go through each section of this tab.
General
In the General section of the General App Settings tab, you can update the Name, App Icon, Color, and Description of the selected app.

Name
The Name field lets you set or update the name of your app.
- Choose a name that clearly describes the type of records the app will manage.
- Use the plural form to indicate it holds multiple entries (e.g., Contacts, Accounts).
- This is a required field (*), so complete it before saving.
Singular Version of Name
The Singular Version of Name field defines what a single record in the app is called.
- Use the singular form (e.g., Contact for Contacts).
- This helps users understand what each record represents.
- This is a required field (*), so ensure it is completed before saving.
App Icon
The App Icon field allows you to select a visual icon for your app.
- Clicking it opens a library of icons.
- Choose an icon that reflects your app’s purpose (e.g., a person for Contacts, a building for Organizations).
A relevant icon makes the app easier to identify at a glance.
The icon appears in the Navigation Menu and Apps Home Page, and can also be used in the Web Card.
This is a required field (*).
Custom Color
The Custom Color field lets you assign a color to your app for organization and branding.
- Select a preset color or enter a HEX code.
- The color appears in the Navigation Menu and app home page.
- Use colors to group apps visually:
- Primary color for Sales apps like Contacts and Opportunities
- Secondary color for Activity apps like Tasks, Emails, and Phone Calls

Description
The Description field lets you describe the type of records stored in the app.
This appears when hovering over the app icon on the Apps Home Page.
Note: Keep descriptions short—no more than one or two sentences.
Access Control
In the Access Control section, you define who can access the app.
Access controls determine who can view or interact with apps, records, or fields. Learn more in the Users article in the servis.ai Knowledge Base.

Enforce Individual Access
When enabled, users with an Individual Access Level can only view records assigned to them.
This gives more control over data but can increase admin work and reduce collaboration.
Use this setting carefully.
UI Preferences
In this section, you can control how records appear and behave:
- Title and Subtitle: Define display fields.
- Show Stage Progress: Display progress indicators.
- Enable Features:
- Link Actions
- Quick Add
- Speed to Lead

Title Field
The Title Field lets you choose which field will serve as the main title for each record in the app.
- You can select any existing field in the app using a dropdown menu.
- For example, in the Contacts app, you might use Name, First Name, Last Name, or Title.
- The selected field appears as the record title at the top of the record page.

Subtitles
The Subtitles field works like the Title Field and allows you to select additional fields to display next to the record title.
Click + Add Subtitle and choose a field from the dropdown. You can add up to four subtitles.

Show Stage Progress
If your app includes a Stage field, you can enable this to display progress visually.
This shows how long a record has stayed in each stage. Hovering over a stage provides additional details.


You can also define stages as positive or negative outcomes.
Positive outcomes appear as green bars, while negative outcomes appear as red bars.


Enable Link Action
- Lets users link a record to another record in a Related List.
- Helps connect data without duplication.
- Disabled by default to reduce complexity and prevent unnecessary links in your servis.ai instance.
Note: For sensitive data (e.g., PHI), disabling link actions can help reduce unauthorized access.
Enable Quick Add
- Allows users to create records directly from a Related List.
- Example: Create a Contact while viewing an Account.
- Enables “Fields for Smart Quick Add” to define required fields.

You can also use Quick Add Custom Code to enforce additional required fields.

Note: To use Quick Add for a record type, it must be enabled in that app’s settings.
Speed to Lead (only in the Contacts app)
Speed to Lead measures how quickly a sales rep responds to a lead.
When enabled, the following fields become available:
- Speed to Call
- Speed to Text
- Speed to Email
- Speed to Lead
- First Call
- First Text
- First Email
- First Response
These fields are automatically populated and can be used in Saved Views.
Note: Speed to Lead is only available in the Contacts app.
Form Script
Form Script allows servis.ai admins to customize Form Rules for Form Fields using code-based actions.
Note: Use the standard Form Rules section when possible. Form Script is best for advanced use cases.
Sort
The Sort section lets you define default sorting rules for the app.

Sort By
The Sort By option allows you to organize records using available fields.
- For example, in the Contacts app, you can sort by fields like First Name, Last Name, or Contact Owner.
- Use + Add Sort to create multiple rules for more precise ordering.
- Remove a rule by clicking the trash icon next to it.
Direction
The Direction setting determines how records are sorted:
- Ascending: A → Z or lowest → highest
- Descending: Z → A or highest → lowest
Example: Sorting Contacts by Last Name in ascending order shows A → Z; descending order shows Z → A.
Unique Fields
The Unique Fields section allows you to prevent duplicate values in specific fields across your servis.ai apps.

- Once marked as unique, a field cannot contain duplicate values—whether added manually or via import.
- Add a field using the Fields dropdown.
- You can define multiple unique fields.
- Remove a field by clicking the X.
Note: When importing data, you can reference the unique field name instead of the field ID.
Learn more about importing with Unique Fields here.
For more on managing Unique Fields, read this article.
Search Preferences
The Search Preferences section lets you control which fields are used in the Global Search bar.

- Improves performance by limiting searchable fields.
- Each app includes default searchable fields.
- Add fields via the Fields dropdown.
- Remove fields by clicking the X.
Recalculate Search Preferences
Recalculate Search Preferences refreshes your search configuration after data updates.
- Changes from imports or bulk edits may not appear immediately—this is expected.
- Use this feature to ensure search results reflect the latest data.
- It updates indexed field values used in search logic.

Deactivated Apps
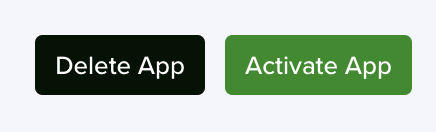
This section lists all apps that have been turned off. The same settings are available, but the app remains inactive until reactivated.
- Delete permanently: Removes the app completely.
- Activate: Restores the app for normal use.
Important: You must deactivate an app before deleting it.
Note: This also applies to custom apps.
