A Webform is an interactive tool that allows users to input and submit information, making it essential for collecting data such as contact details, feedback, or registration details.
Webforms are widely used across various online activities, including:
- Online shopping
- User registrations
- Surveys
- Contact forms
They provide a structured and efficient way for websites to gather user information, enhancing communication and interaction.
With servis.ai, Webforms streamline data collection, making it easier to capture valuable information from employees or customers.
User Permissions: Only Admins can use this feature.
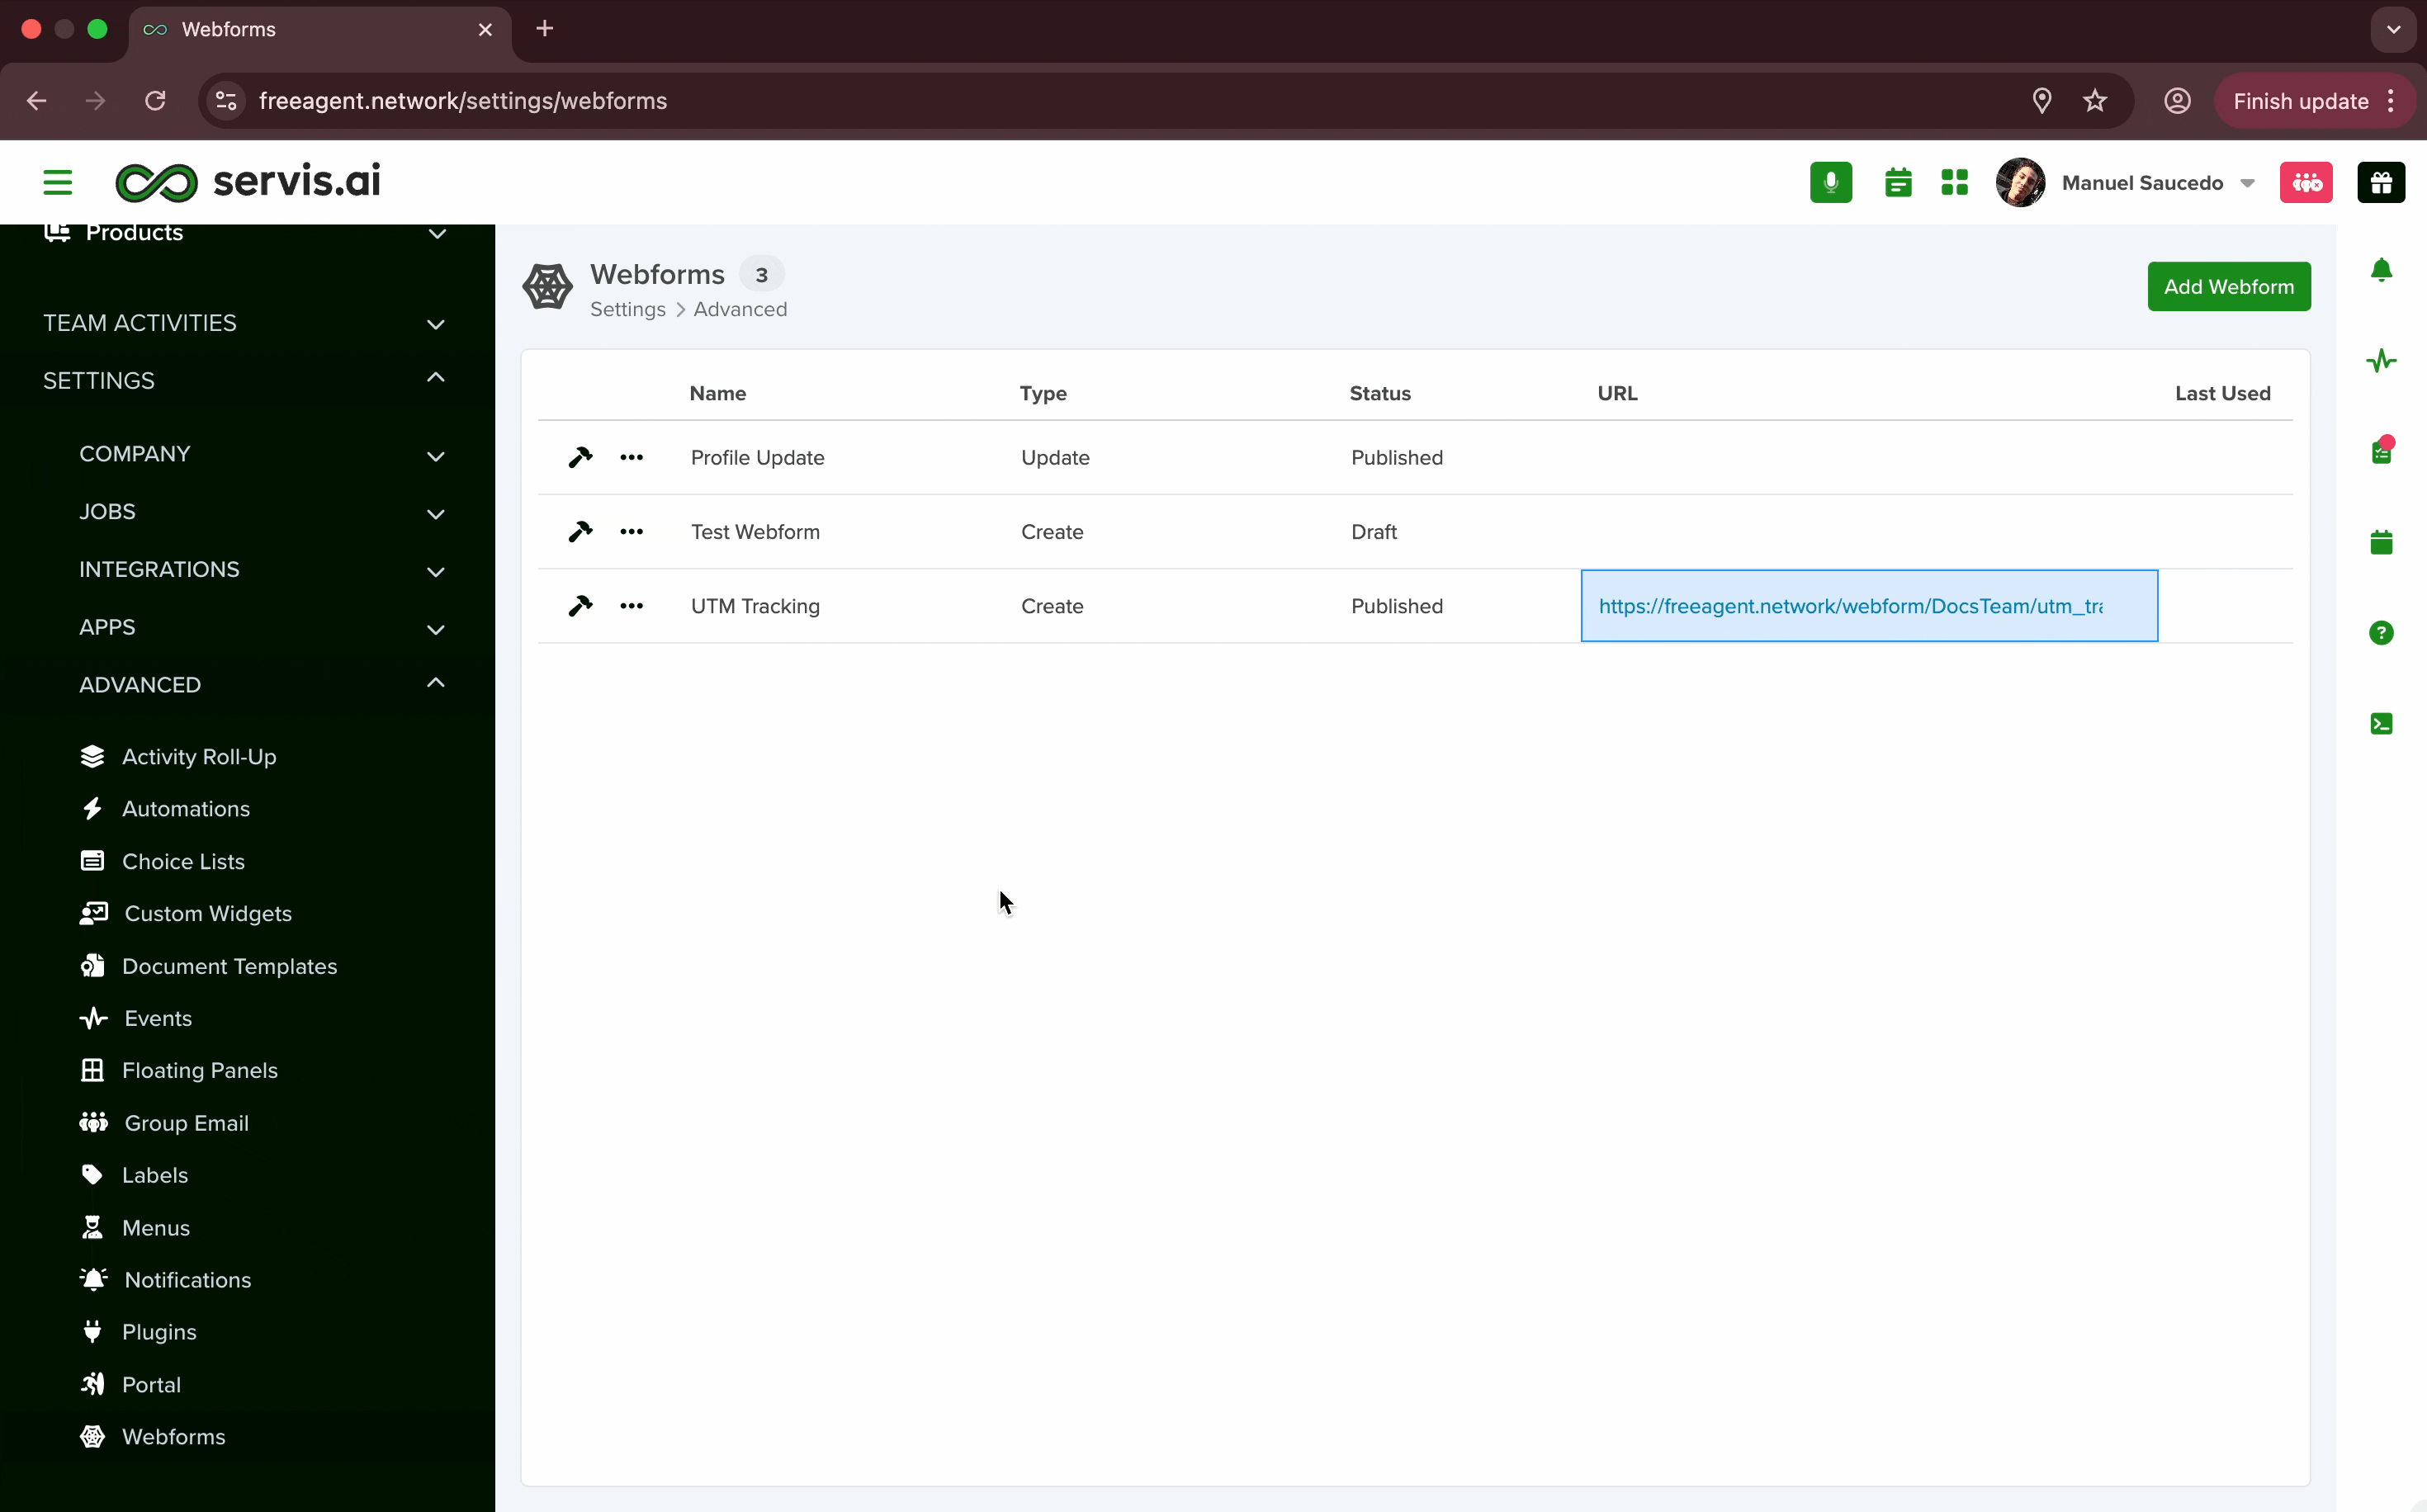
Navigate to Webforms
Add a New Webform
Click on “Add Webform” in the top right corner of the screen. Then choose the Webform type. Create or Update.
Create: This type is for creating new records within servis.ai.
Update: This is for when you would like to use Webforms for updating existing data within servis.ai.

Then give your new Web Form a name.
Form Builder
Once you’ve clicked on save you’ll be taken to the Form Builder. Just like with applications in servis.ai, you need to add Fields and Sections to build your form.

1. Add
If you’ve spent any time building your forms in your applications you’ll feel right at home. All of the Field types you can use in your Applications are available for your Webforms. For more information on Fields and Sections please see the following articles:
2. Reorder Sections
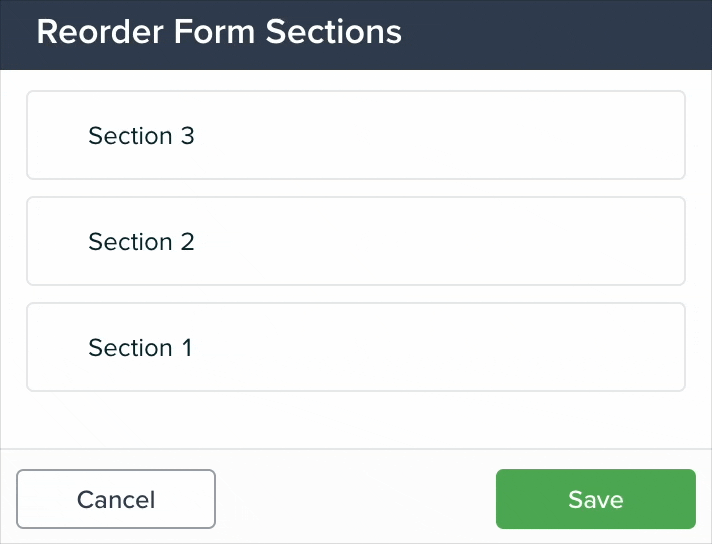
You can rearrange the order of the sections you’ve created for your form.
3. Settings
From Settings, you can alter the layout of your Webform. Move from a one-column layout to two and alter the style from vertical to compact.

Publish Settings
When your webform is ready hover your cursor over the “…” menu on the left and select “Settings”.

You’ll then be taken to a new settings page with a number of different options. Let’s go through each one.
1. Webform Name
You can change the name of your Webform to identify it.

2. Include Form Title

You can change the title of your Webform and choose the alignment of the title.
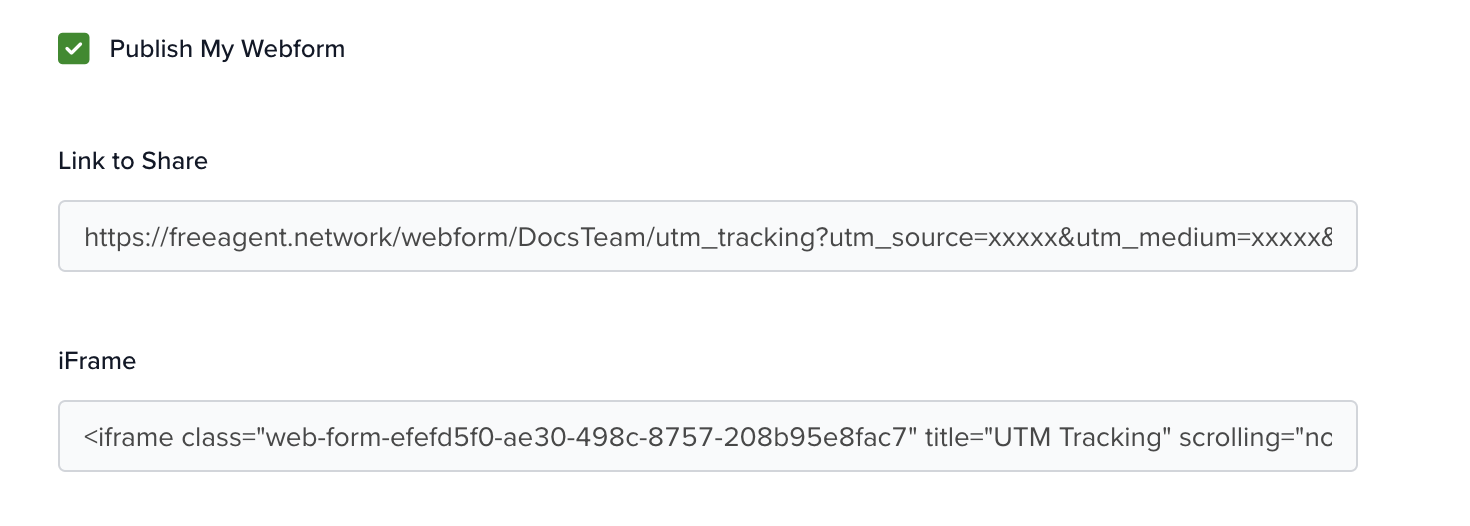
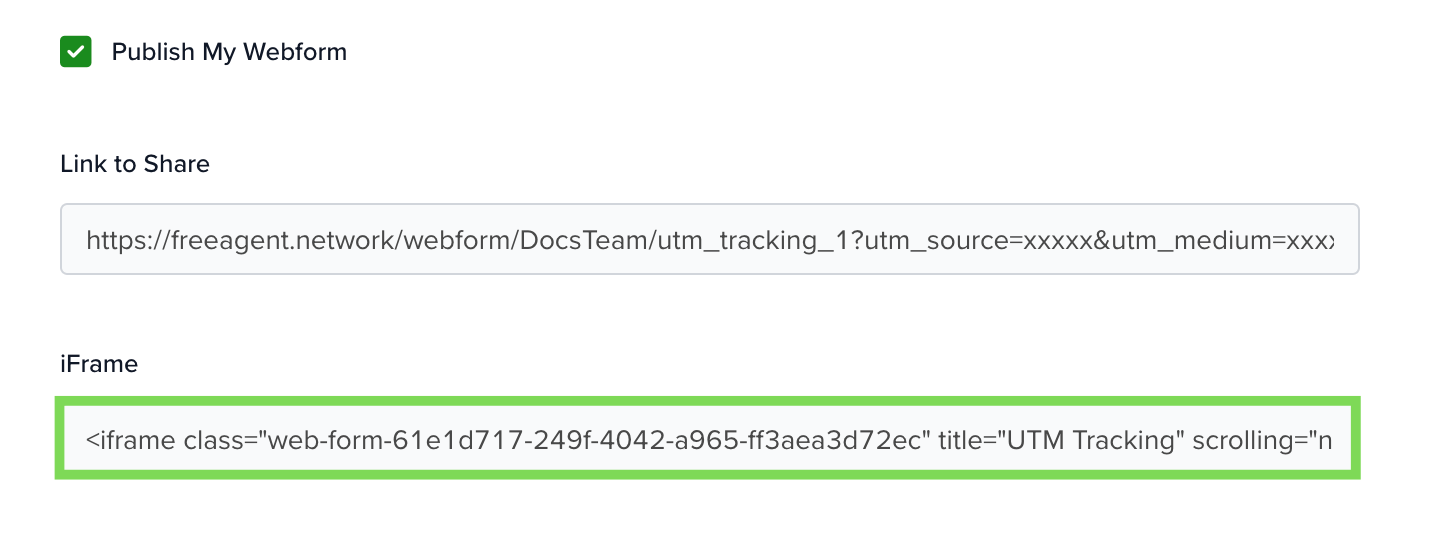
3. Publish My Webform
Note: this option is only available when choosing the “Create” Webform

You’re provided with two URLs when you publish your Webform.
Link to Share: You use this link to share your webform with others that you like to have access to it.
iFrame: an iFrame is used to embed your form online. An example would be embedding your Webform on your company website for capturing information in servis.ai.
4. Custom Submit Button
If you don’t want to use the default you can change the name, the alignment, and the colors of your submission button.

5. Custom Thank You
Create a custom message that will appear when someone submits information using your Webform.

6. Enable Create/Update Automation
Enabling this allows you to populate fields within a chosen application in servis.ai. We’ll look at the options for both types.
Create Webform
After you checked the ‘Enable Create Automation’ a dropdown called ‘Automation’ in wich you could select any automation previously created involving the Webforms App.
You can also edit the Automation from here.

Want to learn more about Automations? Check the article right here.
Update Webform
Almost everything is the same for an Update Webform. There is one difference.
Pre-fill Form checkbox
This checkbox should be used if you’re planning on using App Actions and Automatons to update your records.
To learn more about App Actions and Automations see the following articles:

Example of using “Pre-fill Form” with App Actions
Let’s go over an example of the App Action and Automation that we created to make this work.
This is an App Action that we’ve created to add a button to the detail view of any record within the Contacts app. The button is called “Send Profile Webform”. When this button is clicked it will run the automation called “Update Profile”.

A. Ensure the type is set to automation.
B. For updating records it’s best to place your app action button on the detail page of the record you intend to update.
C. This is where you point your App Action to the Automation you would like to run when the button is pressed.
Now let’s take a look at the automation.

Select “Email WebForm” as your action.

A. Choose the Update Webform you would like to use. It needs to be an “Update” webform type for this to work.
B. Choose who the Webform will be from when sent.
C. Choose who would you like to send the Webform to.
D. Create a subject line for the Webform email.
E. Create a message for the email.
F. Give the button for the webform a name. Choose something that will help people understand the purpose of the form.
6. Update if Duplicate
If you’ve picked a unique field to use in your webform and a user creates an entry that is identical to one that already exists; servis.ai won’t create a new contact. Instead, it will update the contact with the matching web form data.

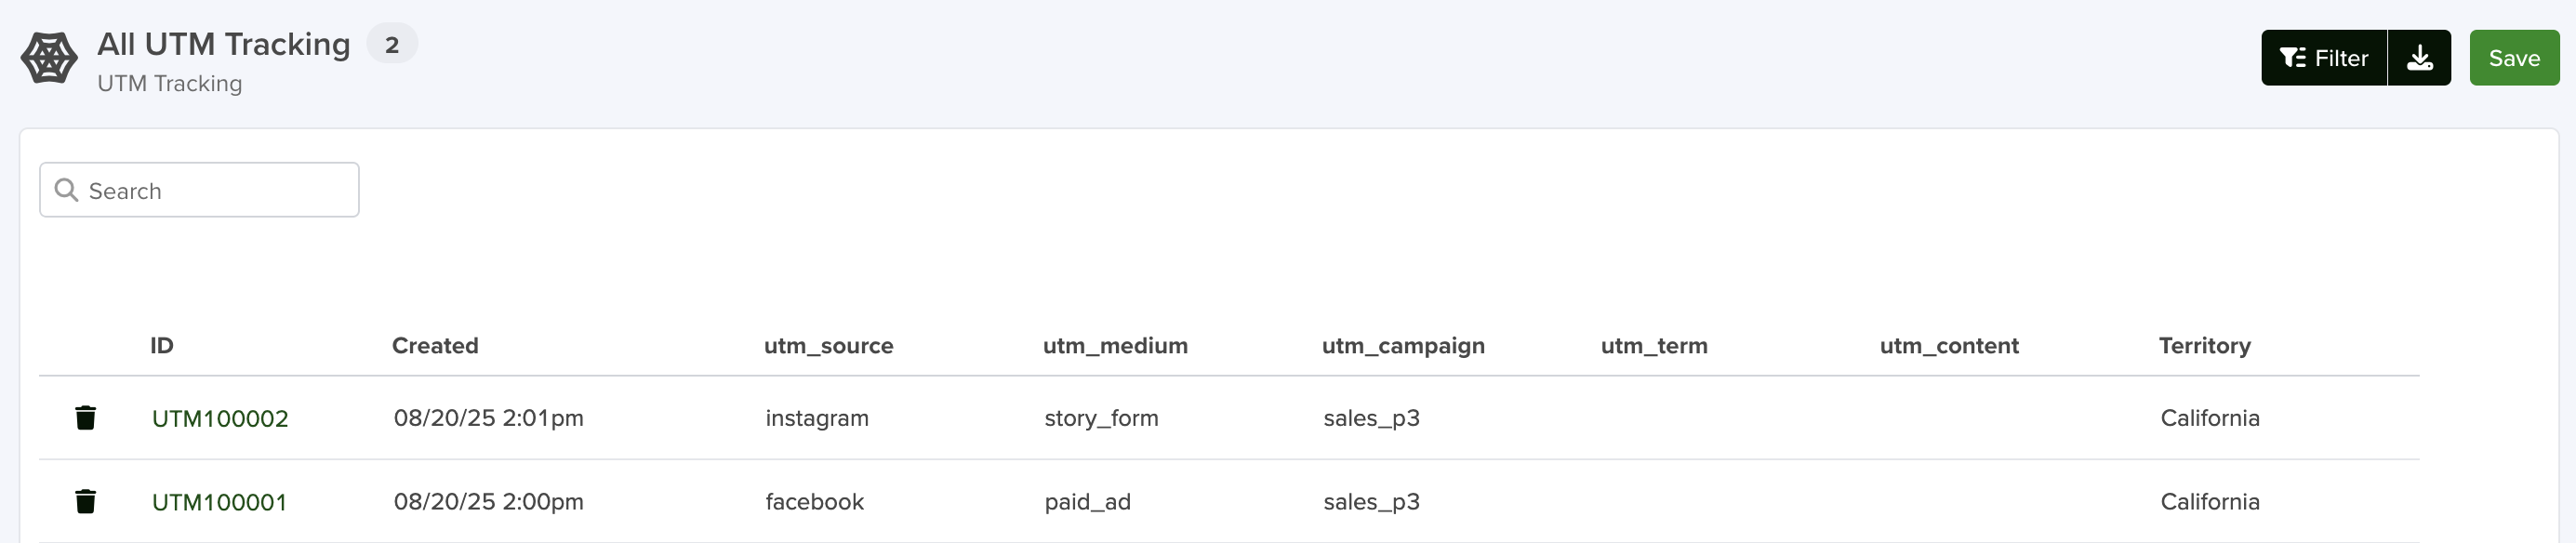
7. Enable UTM Tracking
-
A newsletter email vs. a promotional email

-
Source: Where the traffic originated (google, facebook, newsletter)
-
Medium: The type of channel (cpc, email, social)
-
Campaign: The campaign name (summer_sale, product_launch)
-
Term: Keywords (useful for paid search ads)
-
Content: Variations in links or creatives (like A/B tested ads)
Use Cases
-
Patient Awareness Campaigns
-
UTM Example:
-
utm_source=facebook
-
utm_medium=paid_social
-
utm_campaign=flu_vaccine_drive
-
-
Tracks which platform drove more signups for vaccine appointments.
-
-
Dealer/Distributor Tracking
-
Distributors embed the same form on their websites, with query params identifying them.
-
utm_source=distributor
-
utm_medium=partner_site
-
Viewing the UTM Parameters
Initial Values
You can prefill fields in your webform by passing initial values directly through the URL using query parameters. This can also be combined with UTM tracking.
How it Works with Query Parameters
-
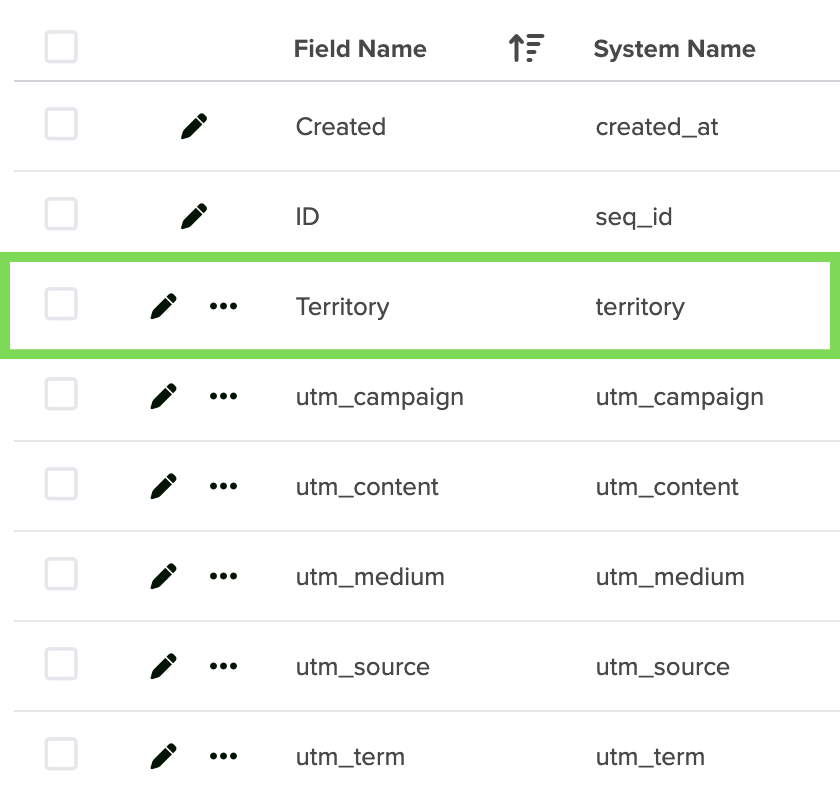
Suppose your form has a field called Territory.
-
You want to track UTM parameters but the value for Territory changes depending on the desired tracked values.
-
To overcome this, create a URL for each territory and include the field’s system name, followed by
=and the desired value. -
When the webform loads in the browser, the field will already display the corresponding value.
The URL will have this structure:
utm_tracking_1?territory=California
The system name of your field can be obtained if you go to Options Menu > Form Fields
iFrames – UTM
<iframe
  class="web-form-61e1d717-249f-4042-a965-ff3aea3d72ec"
  title="UTM Tracking"
  scrolling="no"
  allowtransparency="true"
  onLoad="window.parent.scrollTo(0,0)"
  allowfullscreen="true"
  style="height:539px;width:100%;left:0;right:0;top:0;bottom:0;border:none;"
  allow="geolocation; microphone; camera"
  src="https://freeagent.network/webform/DocsTeam/utm_tracking_1?utm_source=xxxxx&utm_medium=xxxxx&utm_campaign=xxxxx&utm_term=xxxxx&utm_content=xxxxx">
</iframe>
iFrames – Initial Values
<iframe
  class="web-form-61e1d717-249f-4042-a965-ff3aea3d72ec"
  title="Customer Tracking"
  scrolling="no"
  allowtransparency="true"
  onLoad="window.parent.scrollTo(0,0)"
  allowfullscreen="true"
  style="height:539px;width:100%;left:0;right:0;top:0;bottom:0;border:none;"
  allow="geolocation; microphone; camera"
  src="https://freeagent.network/webform/DocsTeam/customer_tracking_1?territory=California">
</iframe>
Hidden Fields
Once you have created your custom fields, you can populate them using initial values with the query parameters, due to its repetitive function you may want to hide them.
Inbox
Clicking on the “inbox” will open a new tab that will allow you to look through all of your Webform Submissions.

Simply click on the ID for the submission you would like to view and a window will open showing you the details.


