Through integration with QuickBooks Online, you can create and send invoices directly from servis.ai.
User Permissions: Only users with a QuickBooks Online account can use the QuickBooks Online integration.
For help setting up your QuickBooks Online integration in servis.ai, see our article QuickBooks Online Integration.
FAQs
How do I authorize my QuickBooks Online account?
See our QuickBooks Online Integration article for instructions on authorizing and enabling your QuickBooks Online account.
Creating an Invoice in servis.ai
There are two ways to create an invoice in servis.ai.
Note: Creating an Invoice in servis.ai will also create a corresponding Invoice in QuickBooks Online.
Creating an Invoice in the Quote/Order App
When setting up the QuickBooks Online integration, you designate an app as your Quote/Order App. See our QuickBooks Online Integration article for details.
To create an invoice, open a record in the Quote/Order App and click the Create QBO Invoice button in the top-right corner.
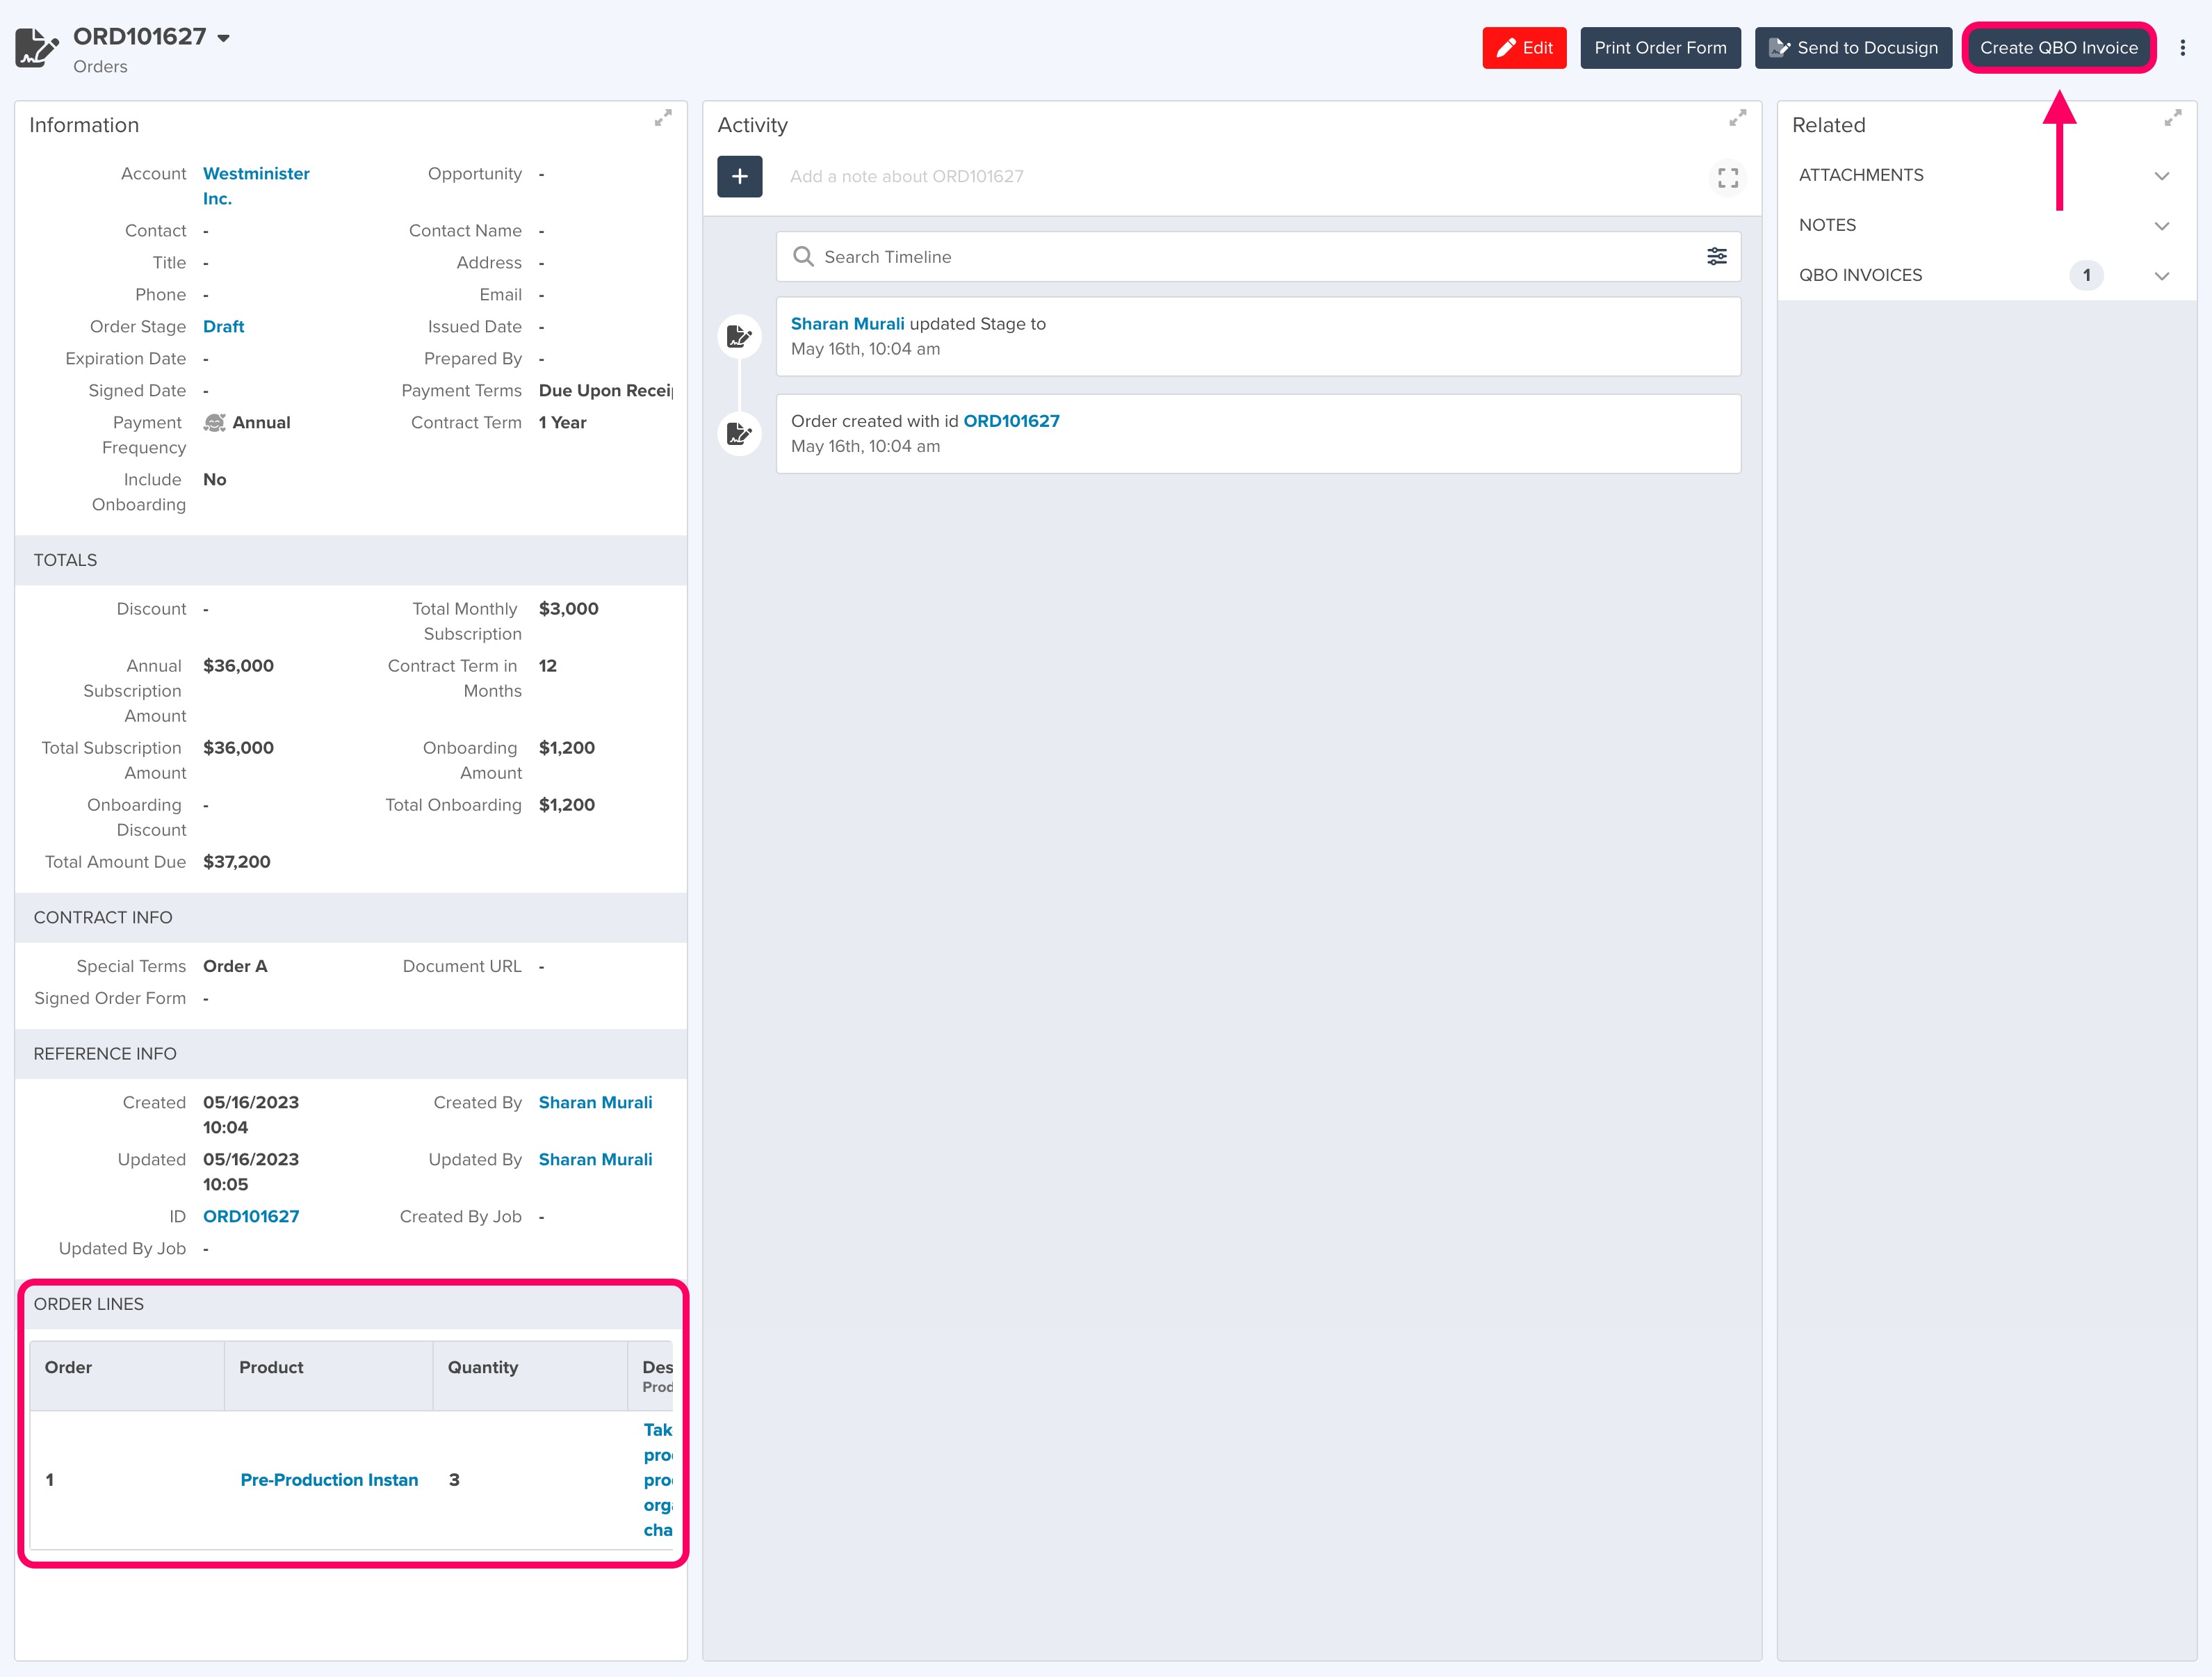
In this example, the Quote/Order App is the Orders app, selected because it includes Lines for storing product information.
After clicking Create QBO Invoice, the QBO Invoice Creation Window will appear.
Because the invoice was created from the Quote/Order App, most fields will be automatically populated. Simply click Save in the bottom-right corner to complete the process.
The invoice will then be saved in the QBO Invoices App.
Creating an Invoice in the QBO Invoices App
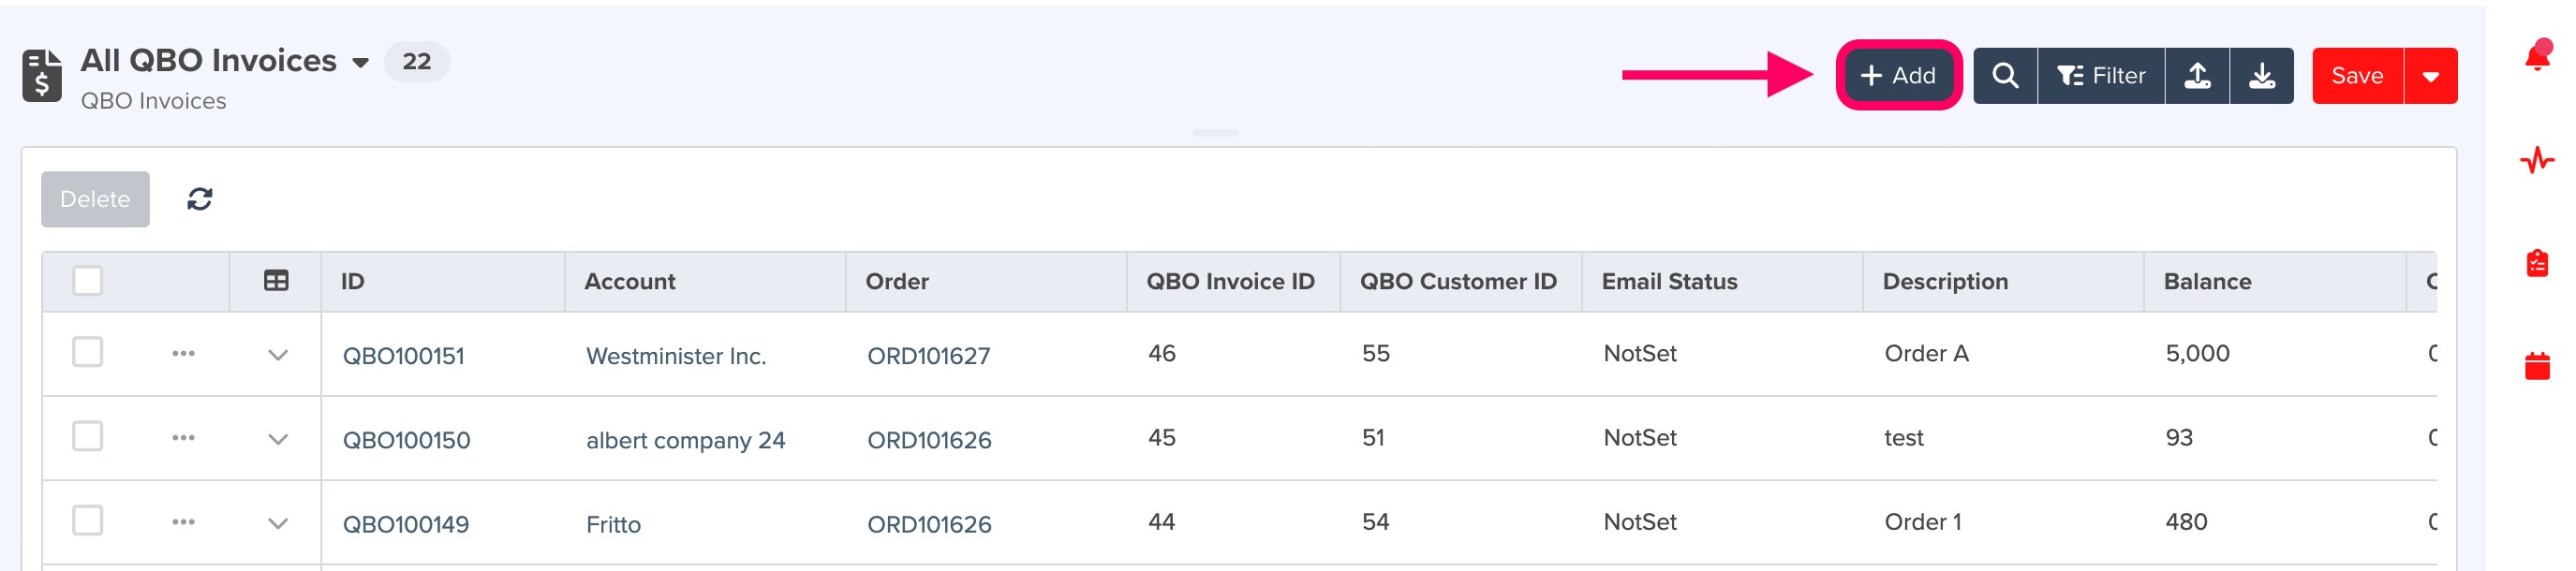
When you enable the QuickBooks Online integration, the QBO Invoices App is automatically created. You can create invoices directly from this app.
Navigate to the QBO Invoices App and click the +Add button in the top-right corner.
After clicking +Add, the QBO Invoice Creation Window will appear.
QBO Invoice Creation Window

Most fields in the QBO Invoice Creation Window are auto-calculated. They populate when you select the Account and Order.
Next, enter product details in the QBO Invoice Lines section, including Product ID and Quantity.
Finally, click Save in the bottom-right corner. The invoice will be saved in the QBO Invoices App.
Sending an Invoice from servis.ai
You can send an Invoice directly from servis.ai using the QBO Invoices App.
Open the detail view of an invoice and click the Send Invoice button.
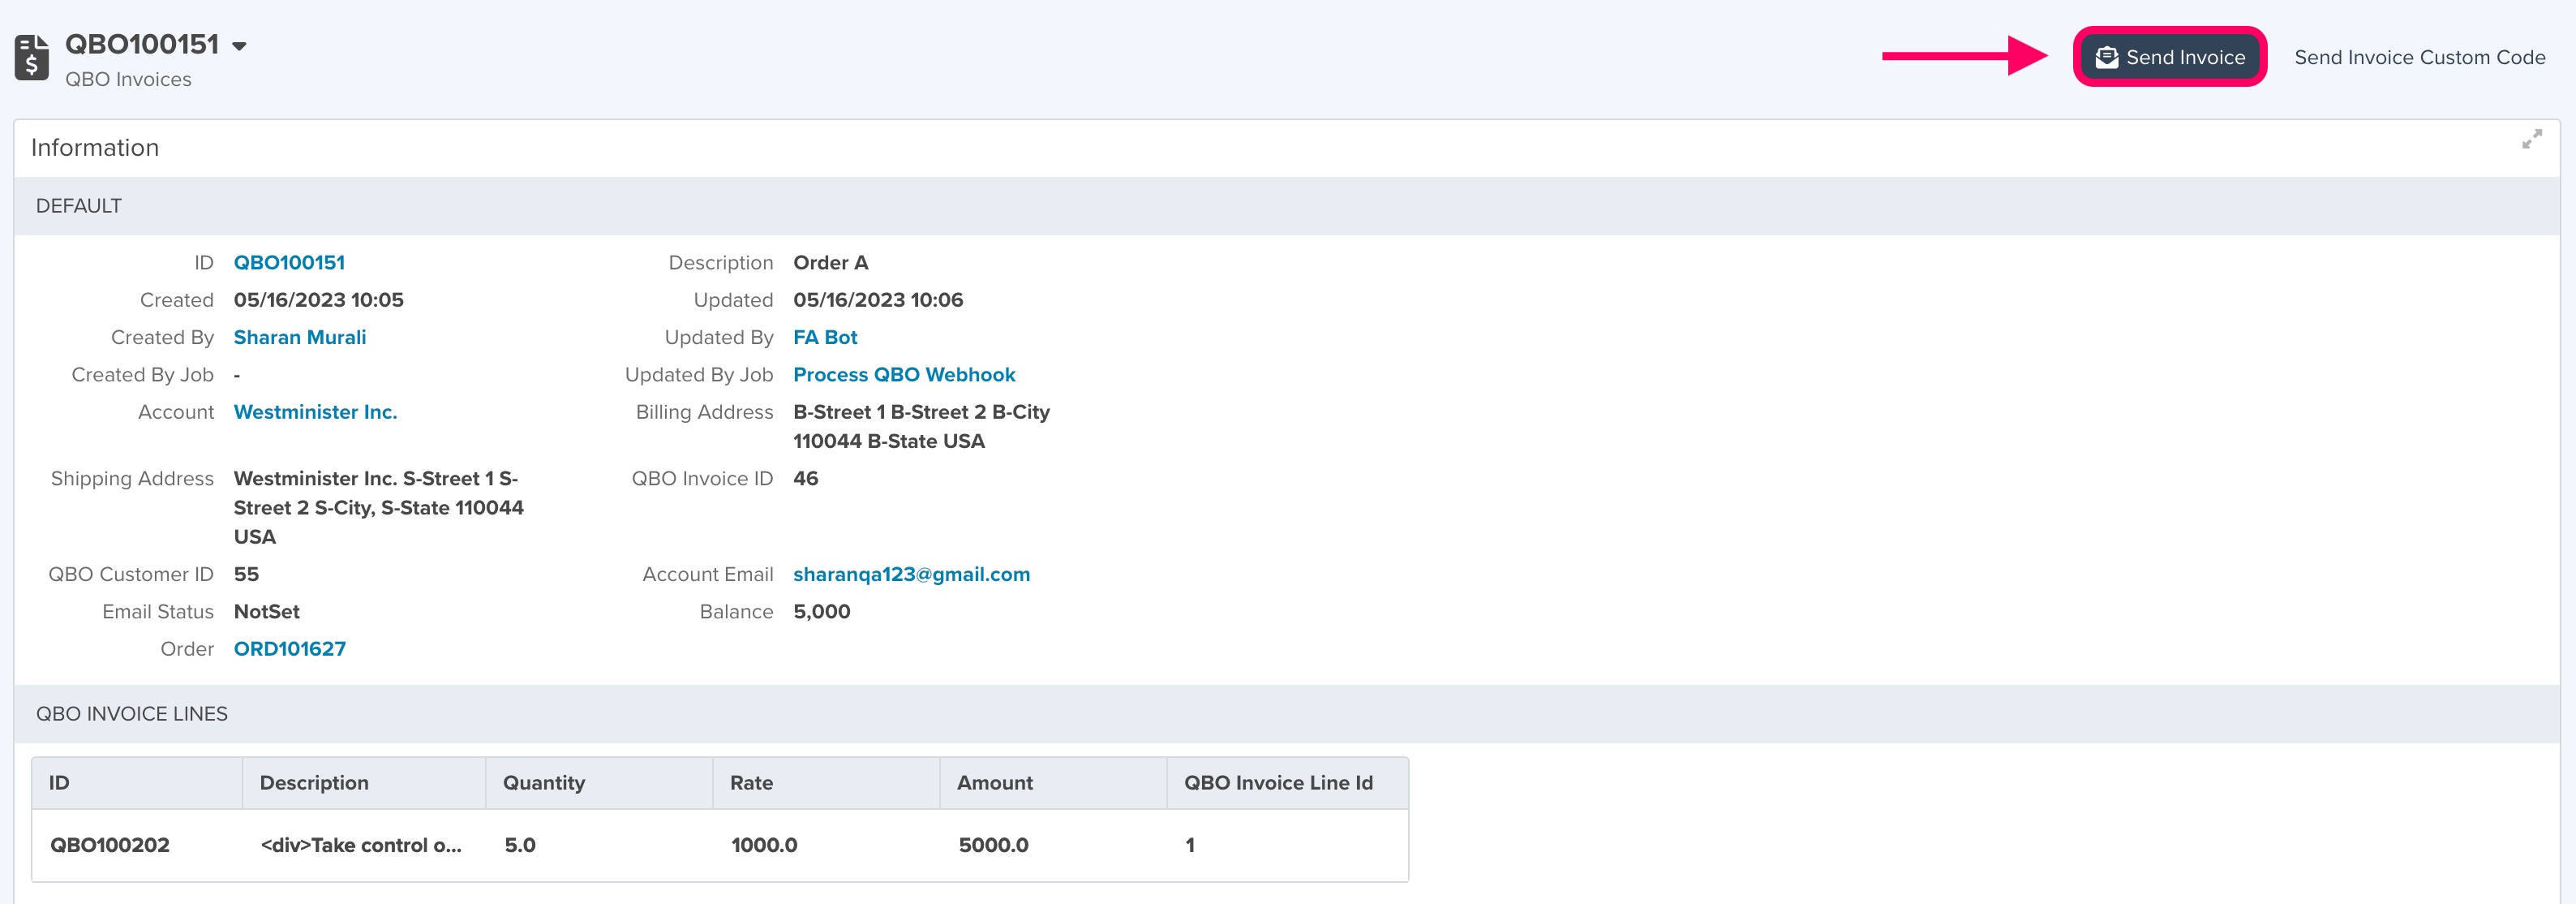
This action triggers an email from QuickBooks Online that includes the formatted Invoice. The email is sent to the address associated with the account on the invoice.
