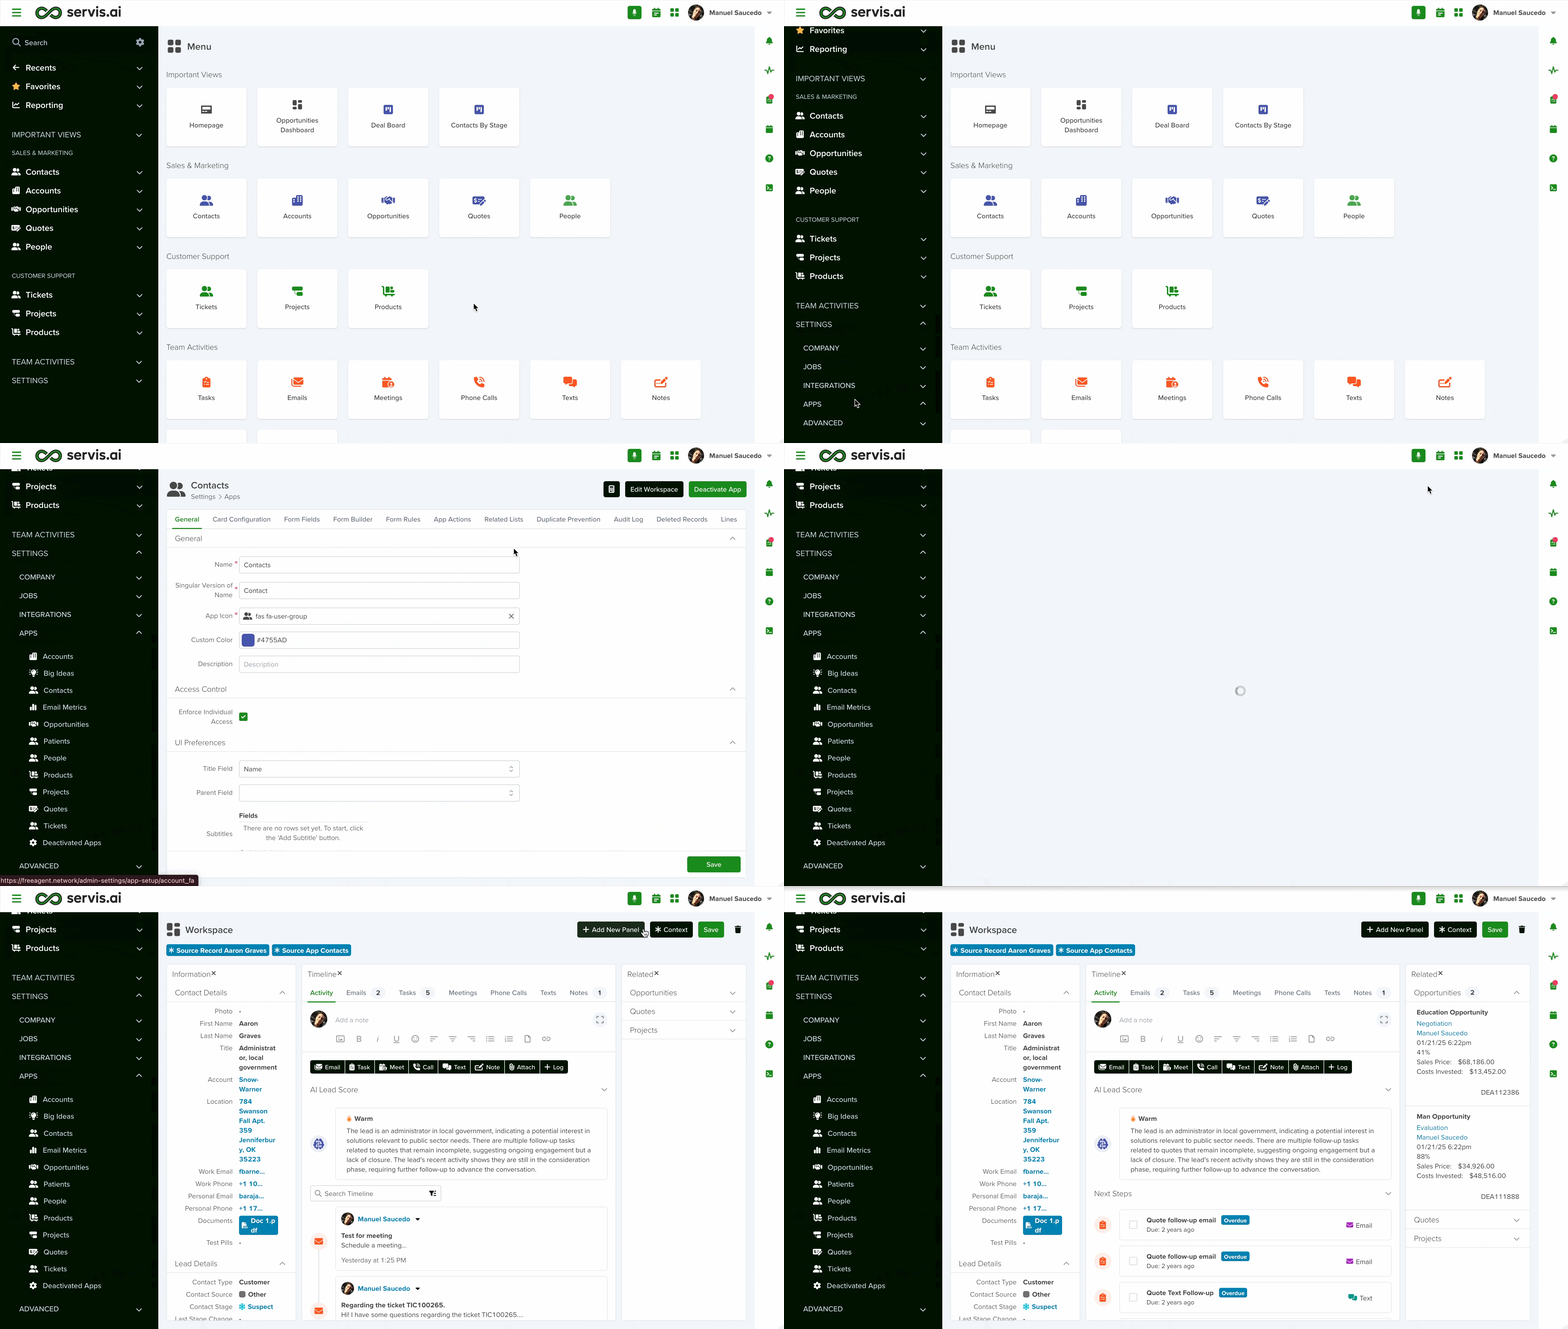
Admins can edit the existing layouts for the detail page of each existing App to create a custom Workspace.
A Workspace can include any of the existing Widgets: Form, Activity Timeline, Related Lists, and Charts, among others. Refer to our library to see all the out-of-the-box widgets available to you in servis.ai. Let’s get started!
User Permissions: Only Administrators and App Admins can use this feature.
Navigate to Workspace
Open the menu and go to Settings > Apps, then select your desired app. Once you’re in your chosen app you’ll see a button in the top right-hand corner labelled ‘Edit Workspace’.
Create a New Workspace
Creating a new workspace is a simple 3-step process.
Step 1 – Add New Panel
Now it’s time to set up your Workspace. Here’s how to tailor it to your needs:
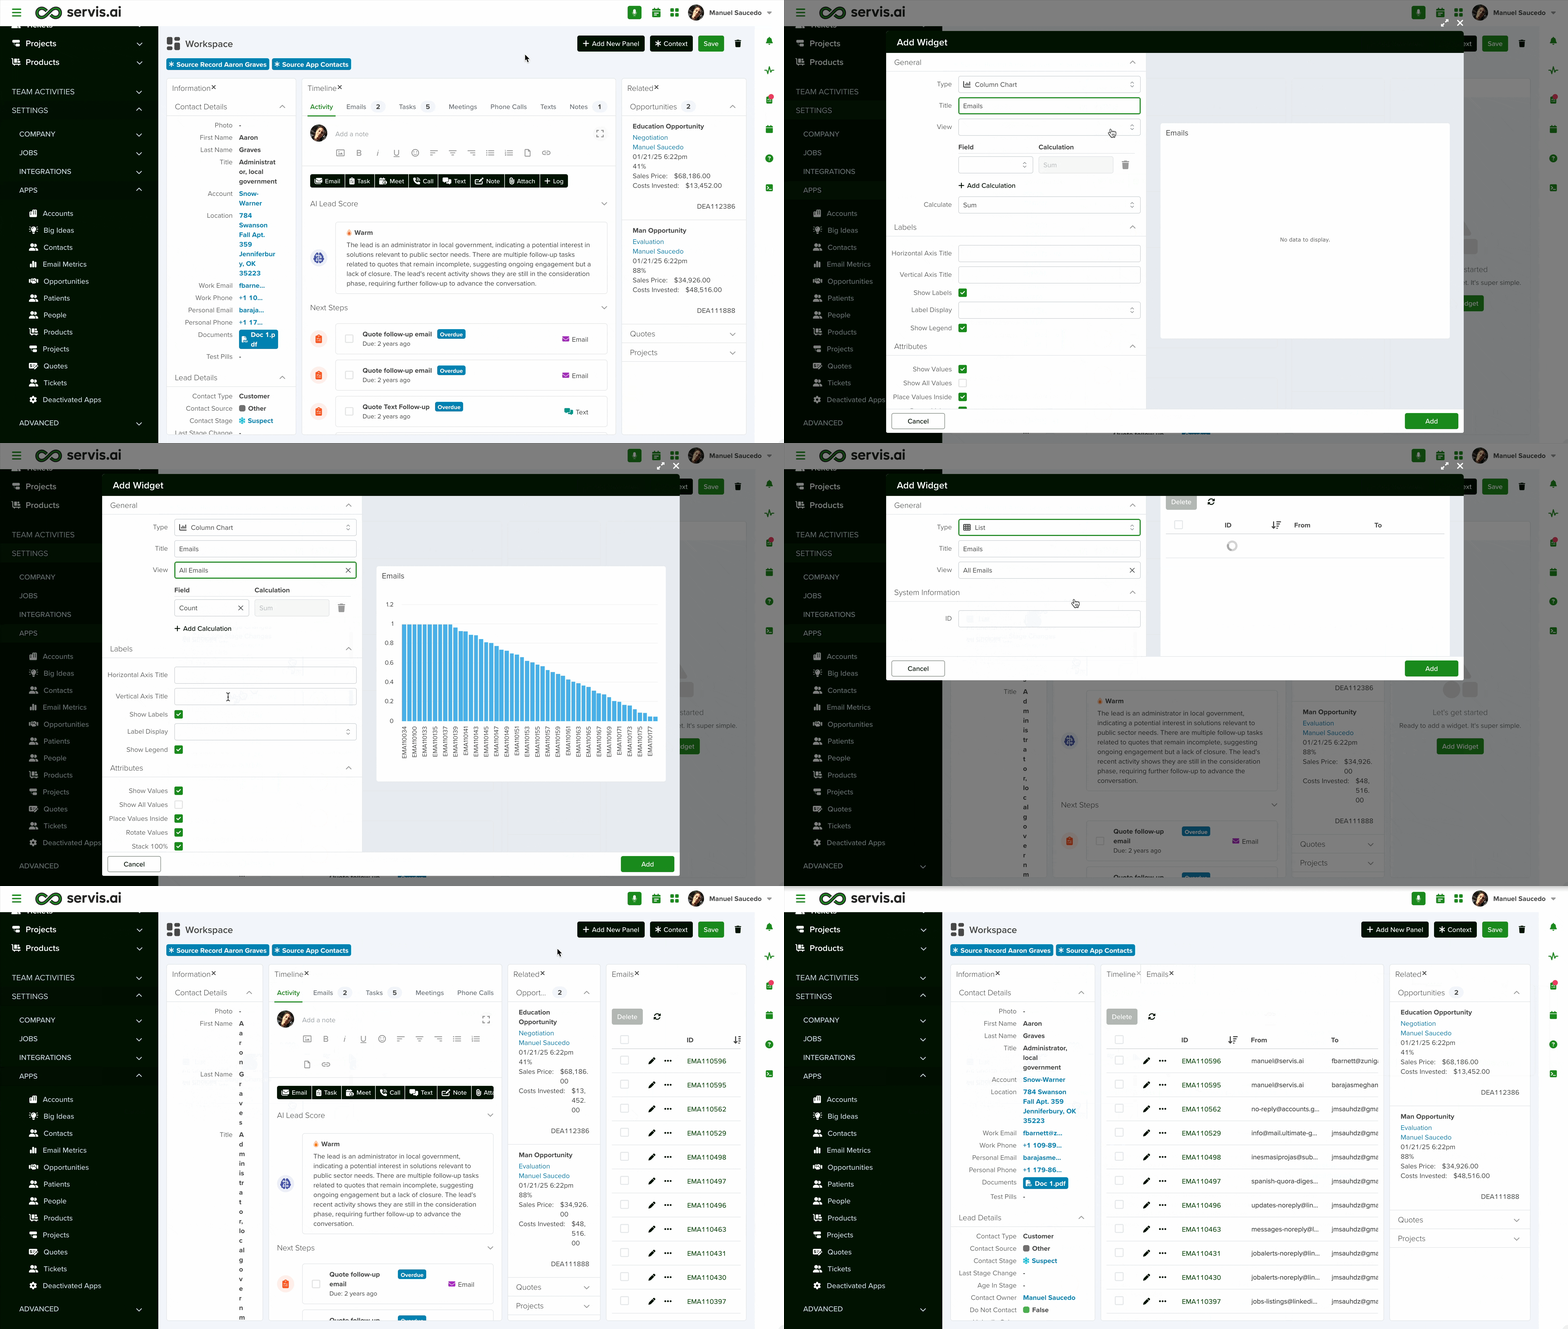
- Add Panels: Click the ‘Add New Panel’ button in the upper-right corner to begin. Each panel serves as a dedicated space for a Widget you’ll choose in the next step.
- Rearrange Panels: Easily drag and drop panels into place to suit your preferred layout.
- Layout Options: Choose between split-screen, tabs, or a combined view to organize your panels.
- Resize Panels: Adjust the size of each panel to create a layout that works best for your workflow.
Note: to drag the panels you need to click and hold on the title of the panel you would like to move.
Step 2 – Add a Widget
Once you have added a new panel you will need to select a Widget. The required information will vary according to the Widget type you select. For most of them, all you need to do is specify the following information:
| FIELD | DESCRIPTION |
| Type | Attachments, Meeting, Phone Call, Note… |
| Title | Name that will be displayed on the detail page. |
| Frame ID | This ID can be anything that will help you identify your Widget, as long as it doesn’t contain any spaces. |
| Integration | Select one of your available integrations if the widget should interact with it. |
For the full list of Widgets, you can add to your panels, refer to our: Widget Library
Step 3 – Save
After adding all the necessary widgets to your Workspace:
- To save your setup: Click ‘Save’ to apply the changes. Your updated Workspace will be instantly available for you and your team.
- To discard changes: Navigate away from the page. If prompted with the ‘Unsaved Changes’ warning, click ‘Don’t Save’ to exit without keeping the updates.


