Servis.ai gives you full control over your Users. Add, edit, suspend, or activate members of your team at any time.
User Permissions: Only the Administrator can use this feature.
Navigating to Users
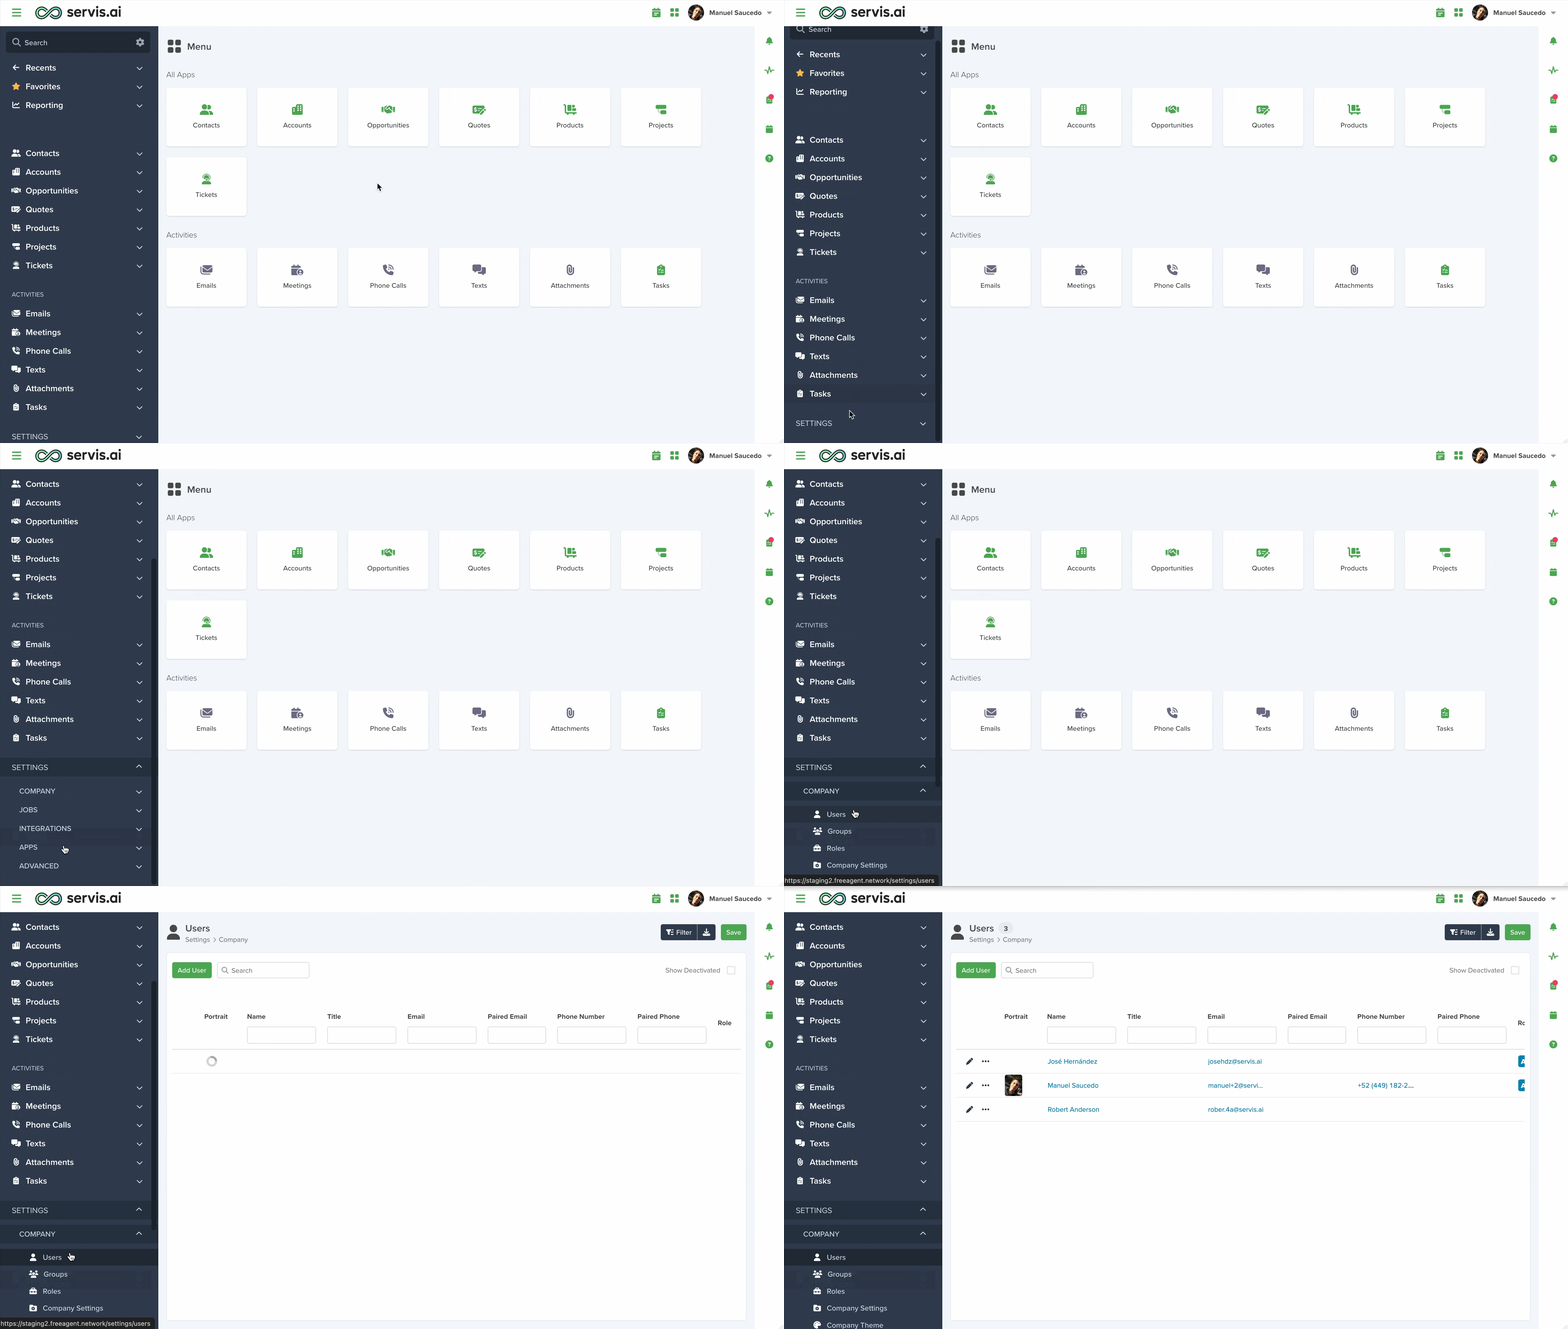
Open the menu and navigate to Settings > Company > Users. You can also use the search function to get there faster, just start typing ‘Users’.
Creating And Managing
Adding a New User
To add a new user, click the ‘Add User’ button in the top right-hand corner.
- To add a user, simply enter their email address.
- Optionally, include their title, role, and access level.
- If assigning them to a team, you can specify the team details.
- Click Save to complete the process.
Inviting a New User
After adding the new user you’ll need to send them an invitation so that they can create a password for their new account. You do that by accessing the options menu next to the account you’ve just created.
Note: When a new user is created their setting for “blacklist emails” is set to YES by default to ensure that all internal user-to-user emails are not being tracked with your system.
Access Levels
There are three different access levels:
| ACCESS LEVEL | DESCRIPTION |
| Company | These users can see and edit all records in the system across all Apps. |
| Team | Enables users to see and work with all records associated with their team. |
| Individual | Allow users to see/edit records assigned to them. Managed in the Owner Field. |
Note: When inviting a new user, the email address provided needs to be unique. If a user with the same email address already exists, you won’t be able to create it.
Assign a Role to a User
A single user can be added to multiple roles at the same time. Roles grant the user the ability to perform actions in servis.ai. To learn more about Roles, please visit this tutorial:
Roles
Assign Users to a Team
A single user can only be assigned to one team at a time. This is especially useful if you have defined teams for your organization. To learn more about Teams, please visit the following tutorial:
Teams
Edit
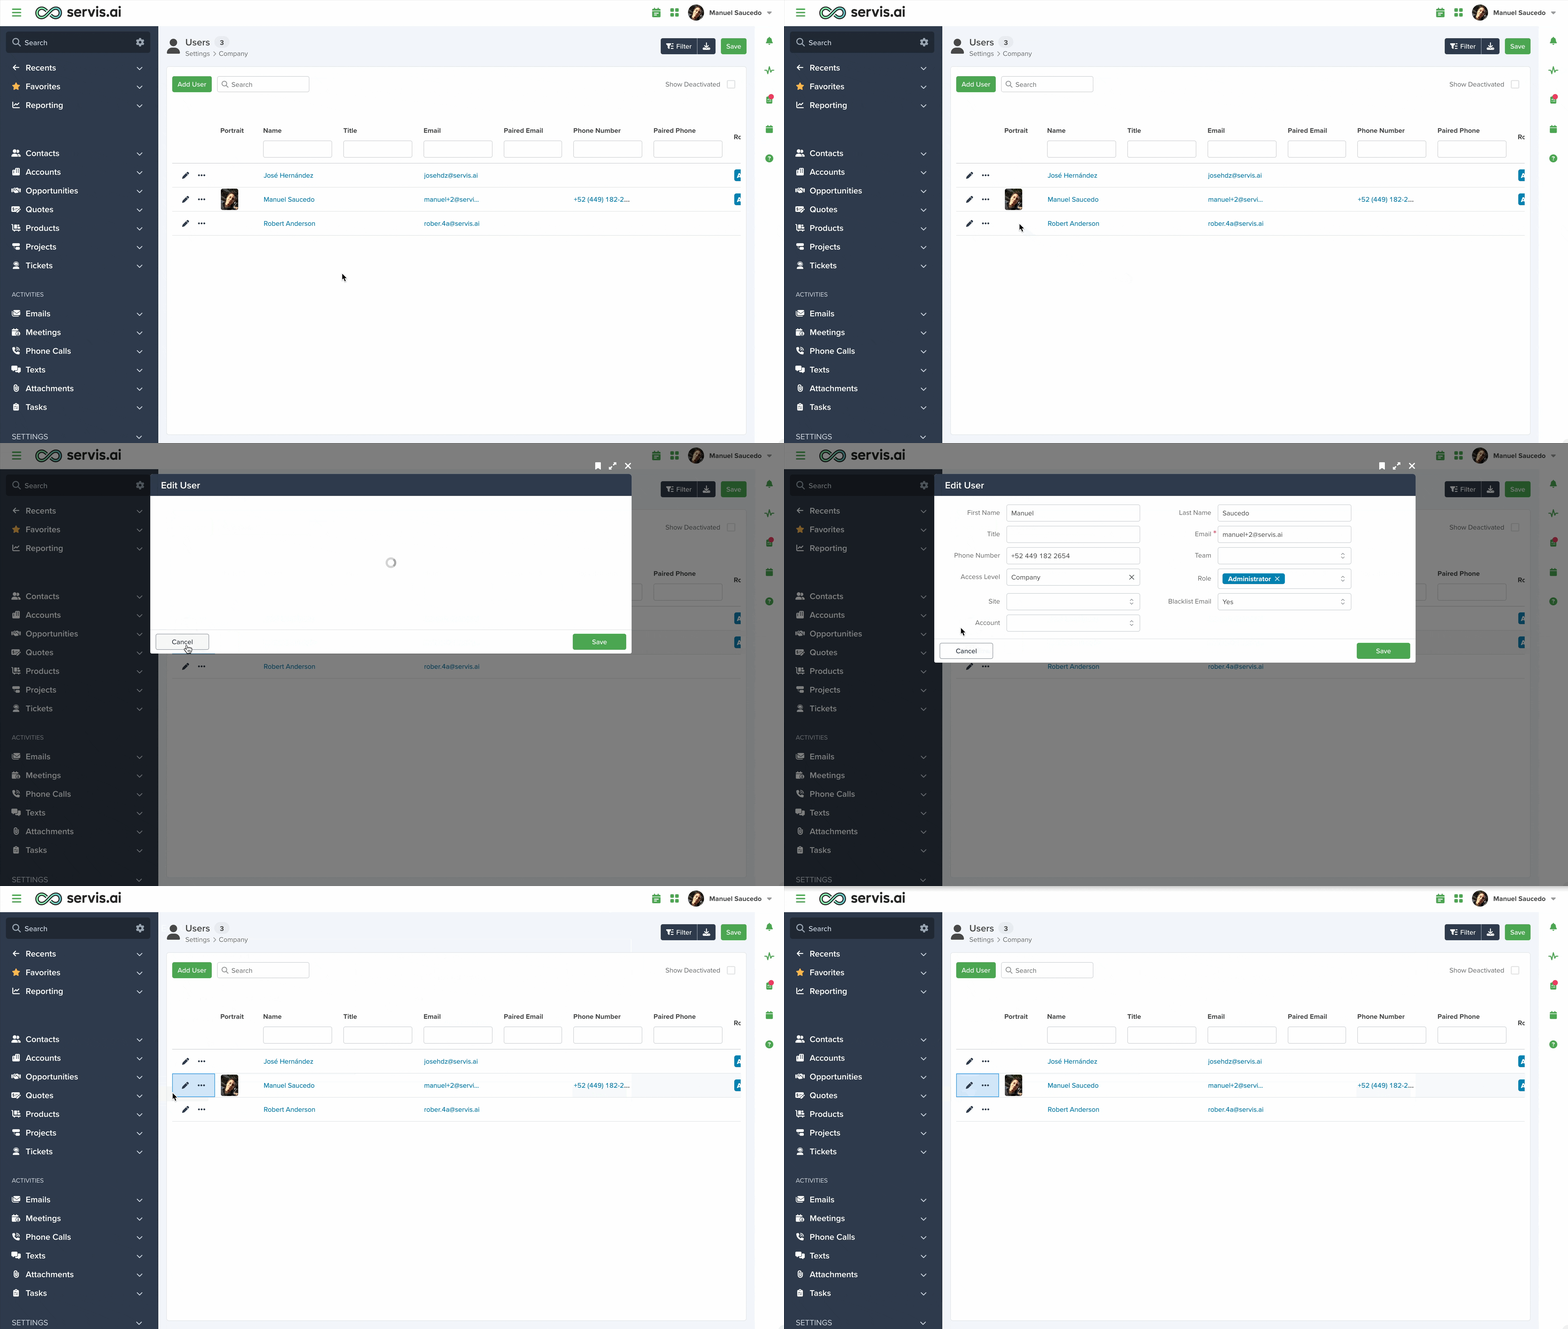
You can edit all user details, including their email address and password. After making any changes, be sure to click Save.
Changing the Email Address
- A user will need to log in with the new email after it’s updated.
- Email addresses must be unique—if the one you enter is already in use, the change won’t be possible.
Resetting the Password
You can change a user’s password in two common situations:
- They’ve forgotten it.
- You want to restrict their access.
In either case, make sure to share the new password with them for their next login.
Security Tip: After logging in with the new password, users should change it immediately to ensure their account stays secure.
More Options
Clicking on the ‘Options’ button will give you numerous options for managing your Users.
1. Preferences
Admins can edit individual user preferences as well.
You can make adjustments to anything that would show up in their individual user settings. Admins can edit any value in any of the tabs. Just click save once you’re finished making changes.
2. Mobile Location
If you’re using our mobile app you can track the location of your users. In order for this to work the users must be logged in to the FeeAgent mobile app and have enabled location services on their phone.
3. Deactivating/Activating Users
You can manage user access by deactivating or reactivating accounts individually.
Deactivating a User
- Select the user and click Deactivate.
- Deactivated users will no longer be able to log in to servis.ai.
- All their previous data—such as call logs, notes, and emails—will remain intact.
Reactivating a User
- Click Show Deactivated to view all inactive users.
- Select the user you want to reactivate and click Activate.
4. Pull Email
This is useful if any of your users are having issues will all of their emails being synced with servis.ai. If they think some emails are missing you can set a time frame and servis.ai will attempt to pull in emails from that time frame.
5. Send Invitation
This will send the welcome invitation email that includes a link for the new user to set up their servis.ai account.
6. Reset Password
Use this to reset the password for individual users. After you click on ‘Reset Password’ a dialogue box will appear asking you to enter the new password for this user.
7 & 8. Unpair Email or Phone
This will simply unpair the email or phone number from the selected user. This is useful in troubleshooting situations where a user may be experiencing issues with their email or phone number in servis.ai.


