The Update Record action simplifies data management by automatically modifying existing records within an app. This ensures information stays accurate and up to date without manual effort.
Records can be updated based on specific triggers, helping streamline workflows and improve efficiency. You can select the relevant app and choose whether to update the triggering record or a different one, giving you precise control over how data is maintained.

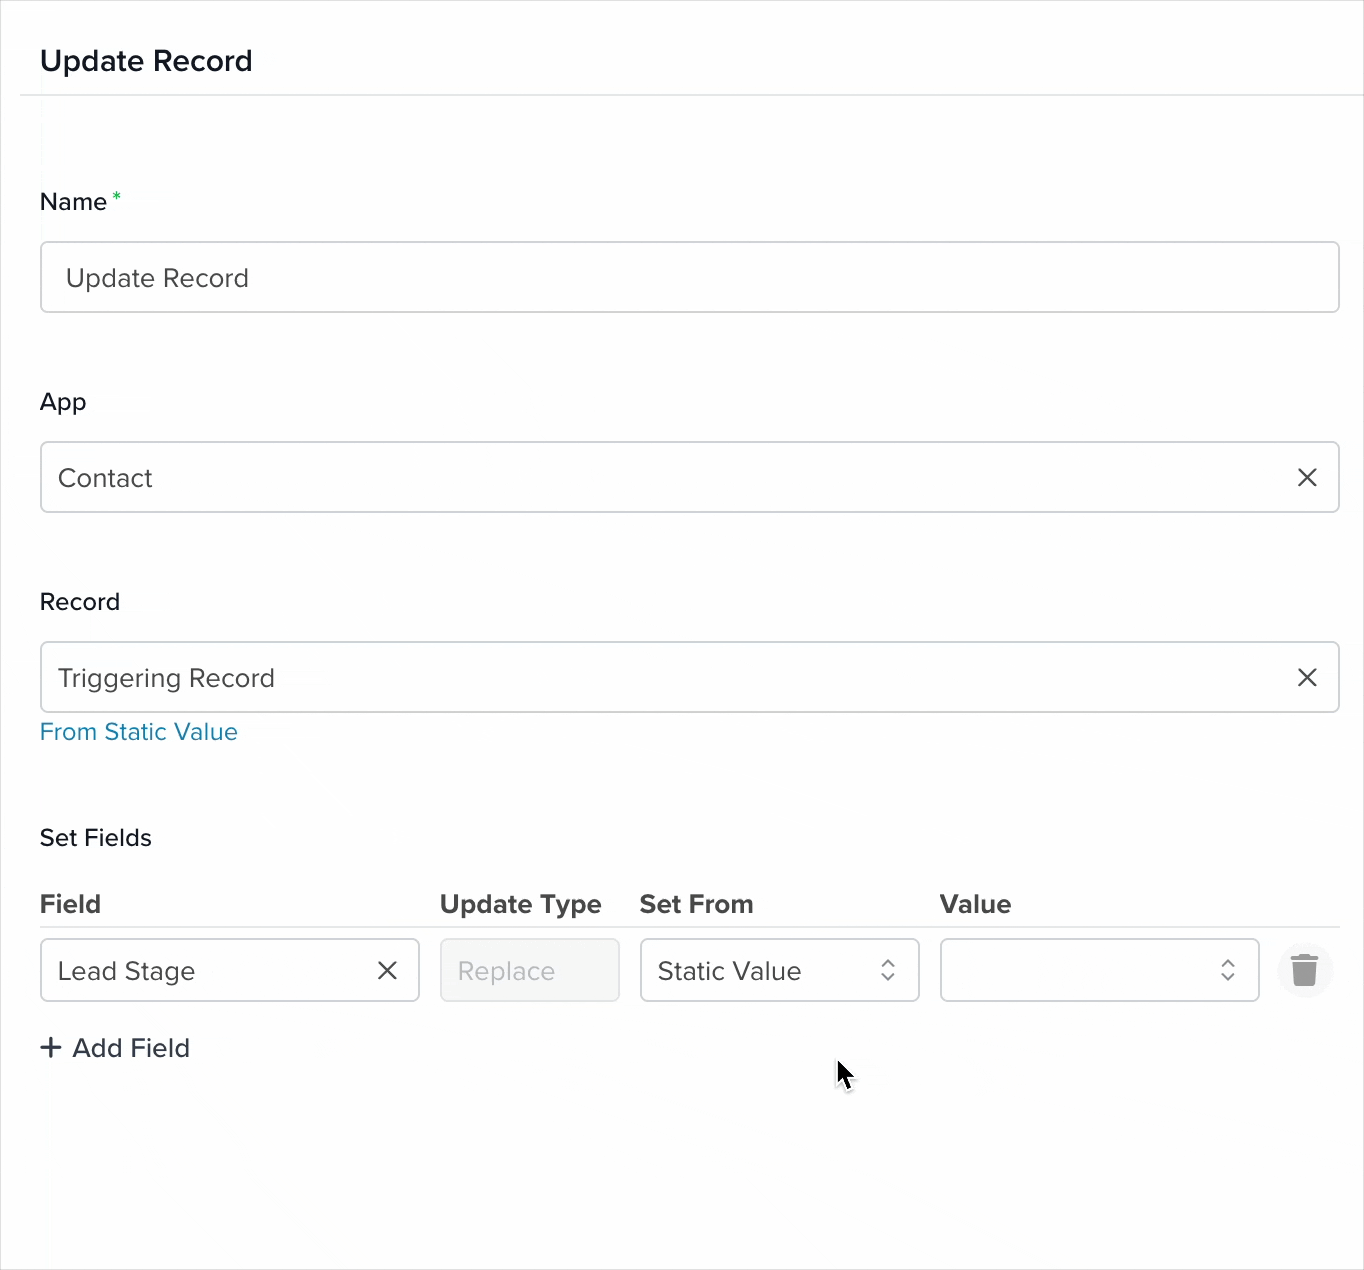
Start by naming your action and selecting the app. This step determines what appears in the Record dropdown.
Next, choose which record to update. There are two modes:
1. From [Selected App]
In this mode, selecting Triggering Record updates the same record that triggered the automation. This record is defined in the Start step.

For example, if the automation starts in the Contacts App, the update will apply to the same record that triggered it.
2. From Record
This mode allows you to select a specific record manually from the chosen app. The dropdown displays available records so you can clearly define which one will be updated.
3. Set Fields
In this section, choose which fields to update and provide their new values. Add as many fields as needed, but focus on those relevant to your workflow.

- Field: Select the field you want to update from the app.
- Update Type: Controls how the update is applied. By default, Replace overwrites the existing value with the new one.
- Set From:Determines the source of the value. This becomes available after selecting a field:
- Static Value: Choose a predefined value configured in the app.
- Triggering Record: Use the value from the record that initiated the automation.
- Value: The available options depend on the selected Set From method.
Learn more about automation actions: Read this article.
