You can learn how to create a new Form Field from this article.
The Time Ago field calculates the time that has passed since a specific date, making it useful for tracking durations. For example, it can help determine how long an individual has been a customer.
To use this feature, you can set the Time Ago field to reference a Date field containing the date a person became a customer. The field will then display the elapsed time in a readable format, such as “X years ago.” This allows for easy tracking of time-based metrics within your servis.ai instance.
Navigating to Form Fields
Go to Settings > Apps, select the app you’d like to add the field to and select the ‘Form Fields’ tab.
Configuring a Time Ago Field
To set up a Time Ago field in your app, follow these steps:
- Add a New Field: Click the Add Field button to open the Field Type selection window.

- Select Choice Type: From the list of available field types, choose the Time Ago option.
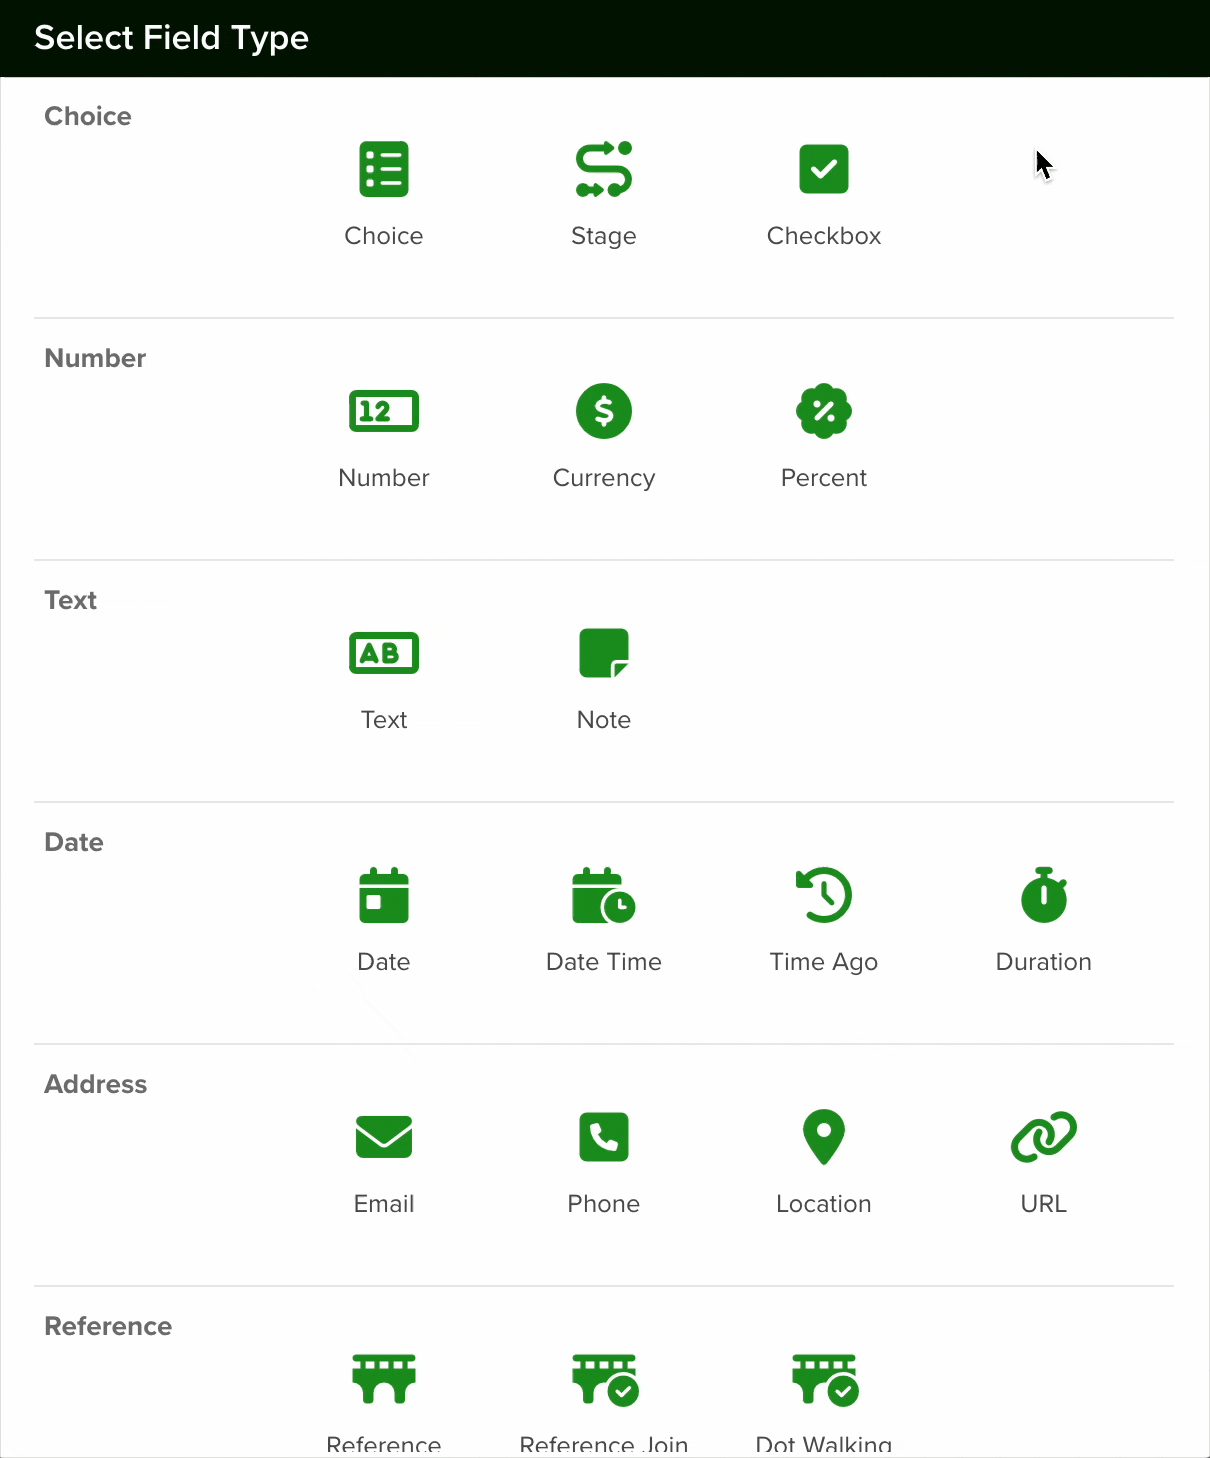

- Configure the Field: After selecting the Time Ago, proceed with the configuration settings as needed.
Give your field a name and add a field hint if desired. You can then select the section in which the field will be created or keep the default option.
The field type must be set to ‘Time Ago’.
The you can follow this steps to configure it:
-
Choose a Reference Date Field: Select the specific Date field that the Time Ago field will use to calculate elapsed time.
-
Determine the Appropriate Date Field: Depending on your application, you may have multiple date fields to choose from. For instance:
- Customer Duration: To find out how long a customer has been with your company, select the “created” date of their account.

While configuring the Time Ago field, consider the following options:
-
Required Field: Enable this option to ensure users must enter a date when creating a new record.
-
Lock After Creation: Activate this setting to prevent edits to the field after the record is saved.
Once you are done setting your field, click the save button.
Note: All new fields are added at the bottom of the form.
Show Advanced Settings
Click on the “Show Advanced Settings” checkbox to reveal the “Duration Format” field.

This will determine the format in which the time will be displayed. Here are your options:

Changing a Field’s Type
In servis.ai, once a field is created, its type (e.g., text, number, date, boolean) cannot be modified directly. This limitation helps ensure data consistency and prevents errors that could arise from incompatible data formats.
If you need to change the type of an existing field, you’ll need to follow these steps:
- Create a New Field: Go to the Form Fields tab on your App’s Settings and create a new field with the desired type (for example, switching from a text field to a number field).
- Deactivate the Old Field: Once the transition is complete, you can choose to delete the original field or simply hide it from views to avoid confusion.
