In servis.ai, views let you tailor how each app displays information—using your own filters, sorting rules, and layout preferences. You can even add specific dashboards for deeper insights. Now, all these personalized views are available in the mobile app, so you can access your customized setup on the go.
Access to the Saved Views
Tap the Reporting icon in the Navigation Menu, then select the Views tab.
You can also quickly access your saved views and favorites for any app by:
-
Going to the home page of the app.
-
Tapping the menu icon.
-
Long pressing on any app icon.
This action will open a panel showing all saved views and favorites linked to that specific app.
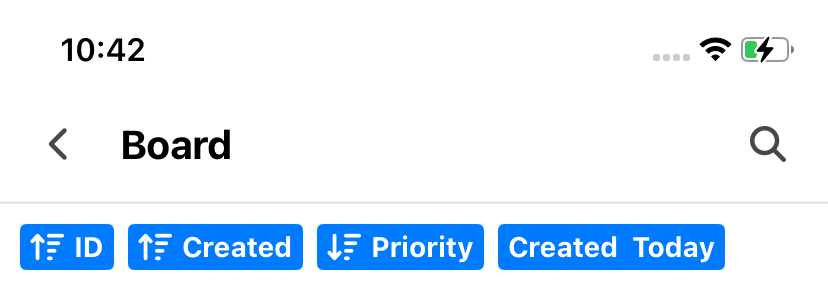
Here you can view all the saved views from the servis.ai web app, along with the applied filters and sort rules shown as pills at the top of the screen.