Organizations are a hierarchical data-partitioning feature in servis.ai that lets you structure your team’s data the same way your real business is structured. Think of them as labeled buckets that group records – Contacts, Deals, Tasks, and any custom app – so that each user only sees the data relevant to their part of the company.
Set Up
Enable Organizations
- Go to Settings > Company > Company Settings > System Preferences > Enable Organizations.

-
A new Organizations app appears in the sidebar.
-
Start with an empty view and add your org layers.
Define the Hierarchy
The hierarchy is the tree structure that represents your company. You build it by creating Organization records and linking them together with a Parent and a Level.
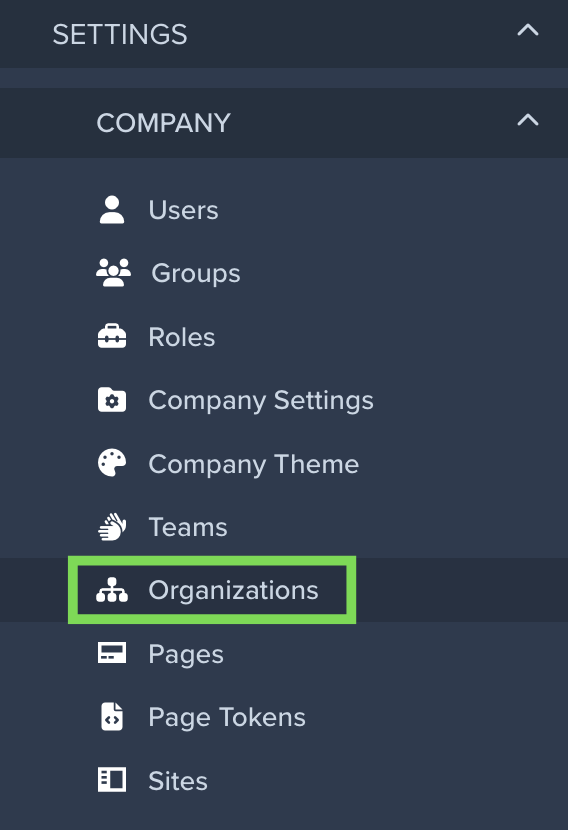
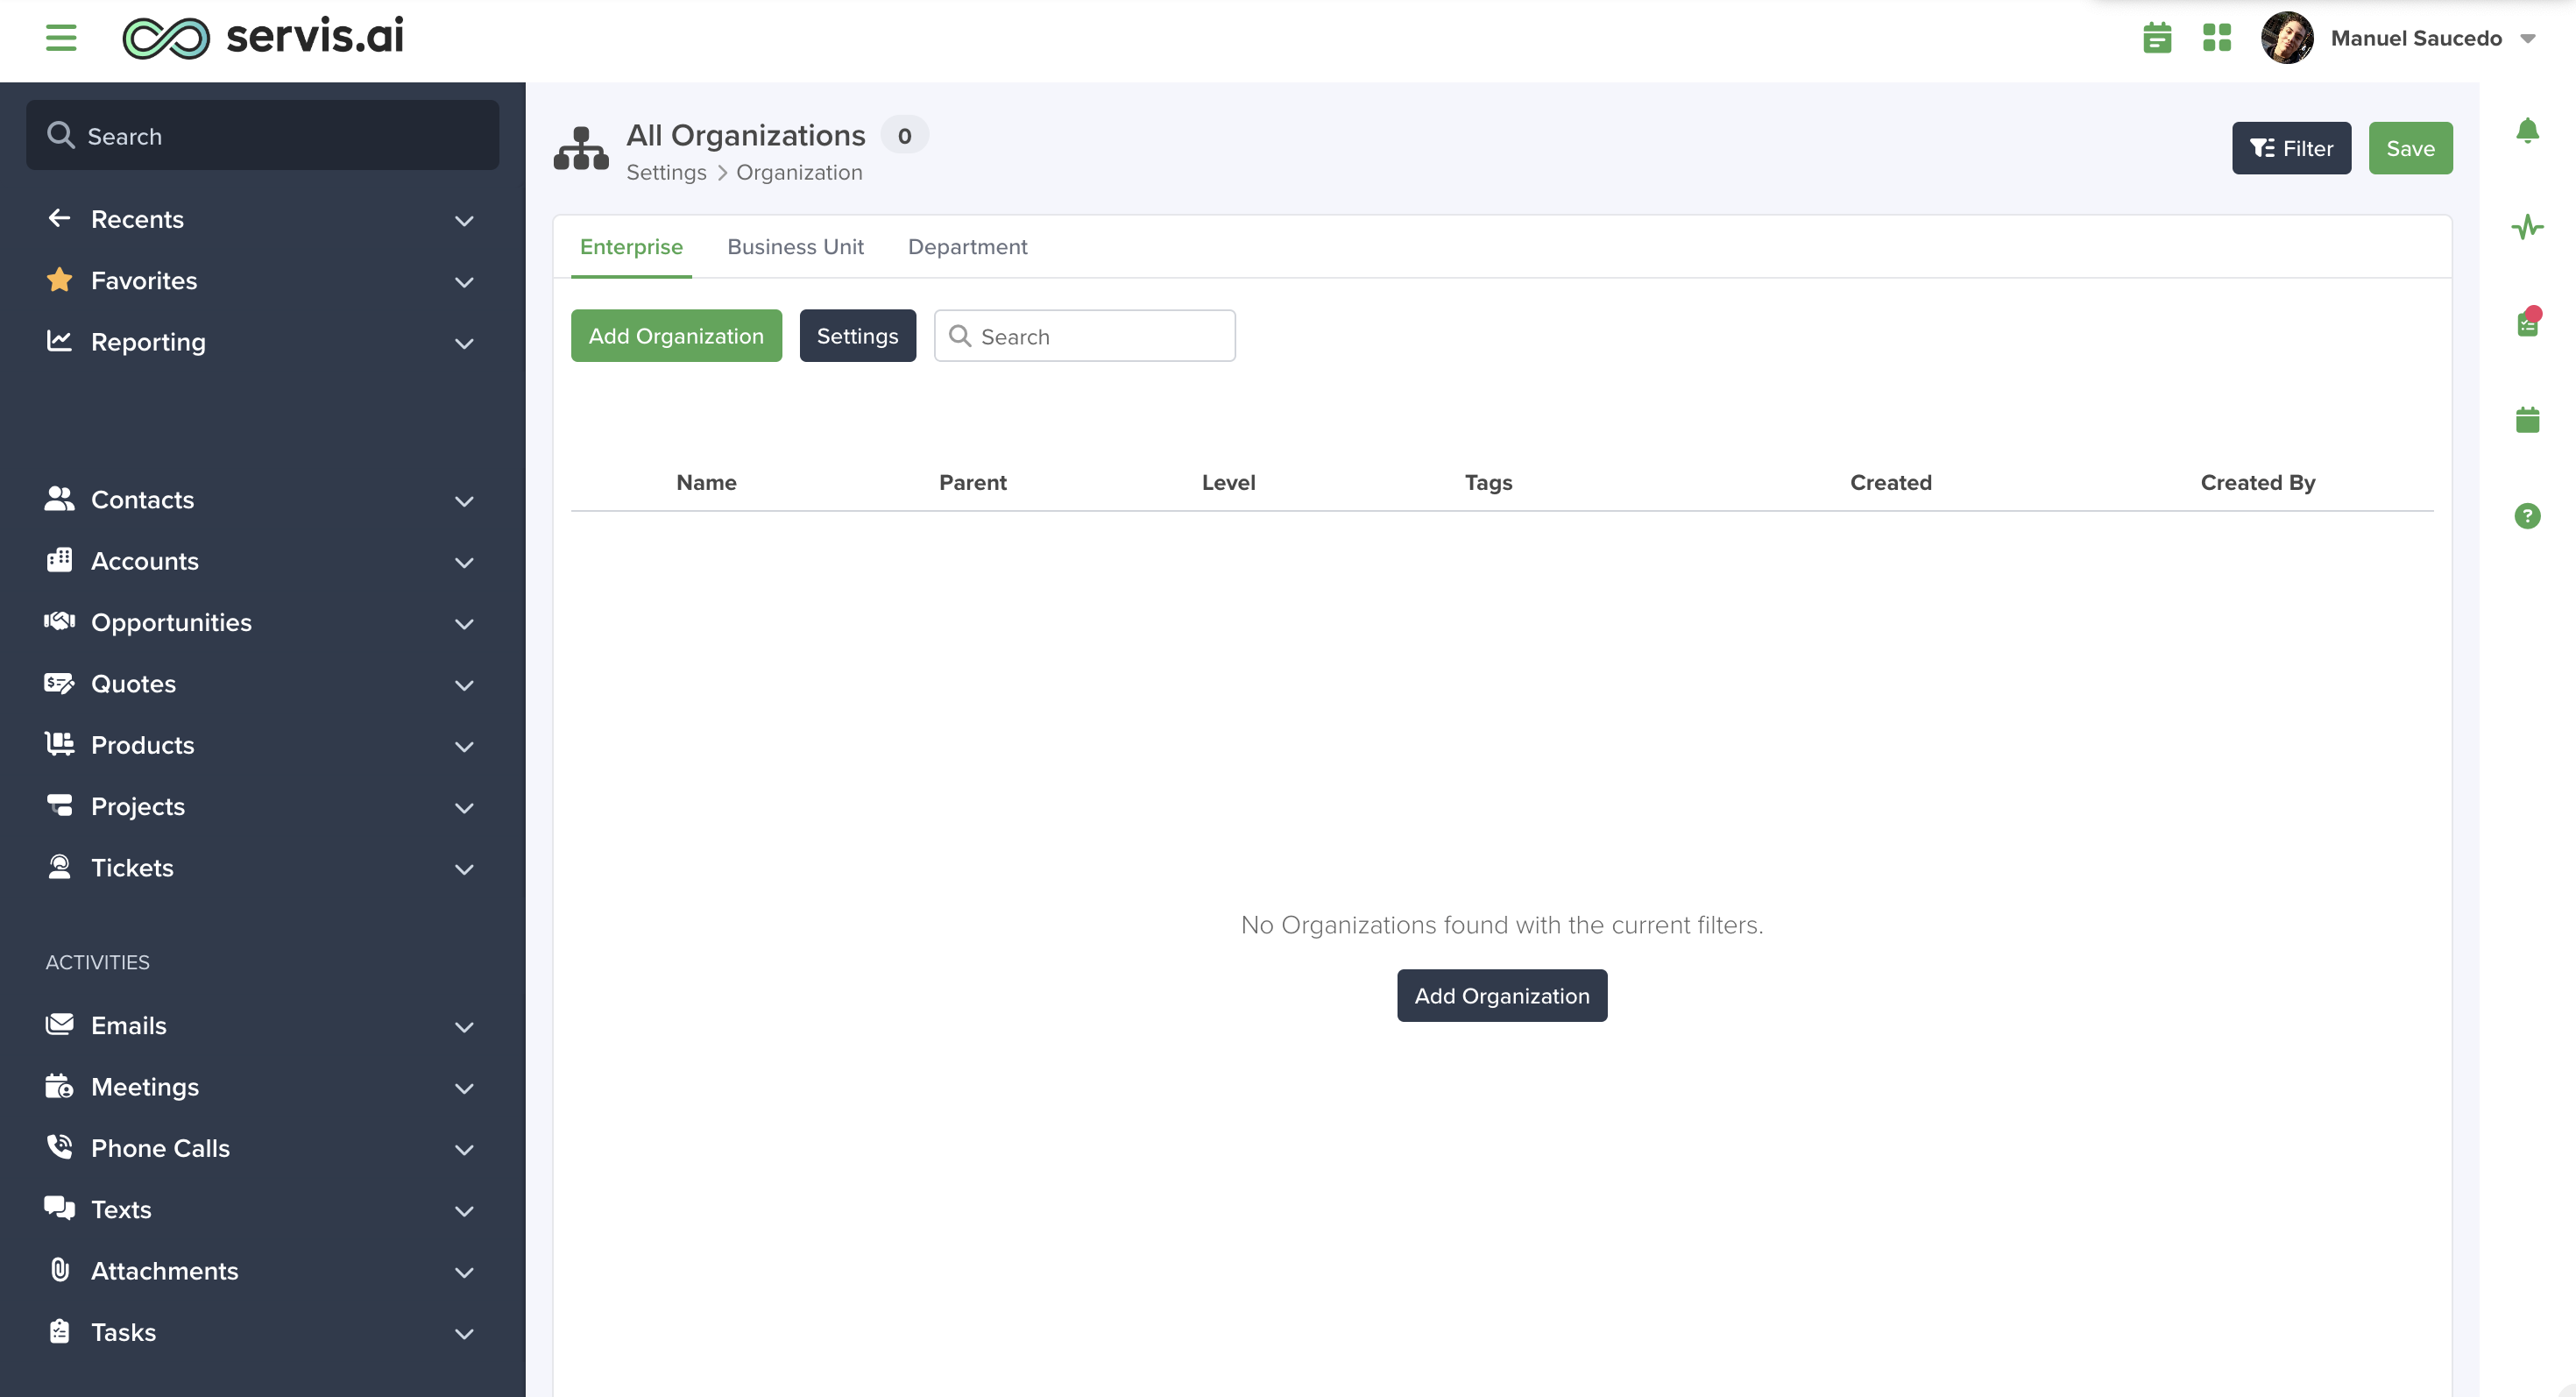
- Navigate to Settings > Company > Organizations.
- Click the Add Organization button (the primary action in the top-right).
- Fill in the form:
- Name – The display name (e.g., “North America”, “Sales Department”, “Acme Corp”).
- Level – Choose from the predefined levels: Enterprise, Business Unit or Department. These levels determine the tier in the tree.
- Parent – Link this Organization to one above it. Top-level nodes have no parent.
- Address (optional) – Add a location (country, state, city, street, zip code, latitude, longitude).
- Click Save.
Example Hierarchy
Acme Corp (Enterprise)
|-- North America (Business Unit)
|   |-- Sales (Department)
|   +-- Marketing (Department)
+-- Europe (Business Unit)
    |-- Engineering (Department)
    +-- Support (Department)

Assign Users
- Open the user’s profile or navigate to the Organization Users related list on an Organization record.
- Add a row in the Organization field set with:
- Organization – Select the Organization node this user belongs to.
- Role – Select the role the user holds within that Organization (this ties into your Roles & Permissions Setup).
- Save.
- Including every Organization the user is directly assigned to.
- Traversing up all the ancestor nodes.
- Traversing down to all the descendant nodes.

Note: Only the Administrator role has access to everything on the CRM independently of the organization.

Enforce Access (Global)
- Go to Settings > Apps > Your App > General tab and open the App you want to restrict (for example, “Deals”).
- In the App configuration, find Enforce Organization Access and toggle it ON.
- Repeat for every App where you want data partitioning.
What this Toggle Does
- When a user has an Organization selected in the global dropdown, list views, searches, lookups, and filters on that App will only return records whose Organization field matches the selected node or any of its descendants.
- Activity Apps (Notes, Emails, Tasks, Meetings, Calls, SMS, Fax, Attachments) and the Contacts app are always enforced – they inherit Organizations filtering automatically. You do not need to toggle those on.
- Admins get special behavior: when no Organization is selected in the global dropdown, admins see all records (no filtering). Non-admin users always have filtering applied based on their assigned Organization tree.
- This acts like a global ACL layer—no need to replicate ACLs per app.

Settings

Manage Levels
|
Level
|
Order
|
Purpose
|
|---|---|---|
|
Enterprise
|
1
|
Top of the tree (e.g., company or holding)
|
|
Business Unit
|
2
|
Major division (e.g., region or subsidiary)
|
|
Department
|
3
|
Functional team (e.g., Sales, Engineering)
|

- Click Settings > Manage Levels in the Organizations view.
- A choice-list editor opens where you can:
- Rename existing levels (e.g., change “Business Unit” to “Region”).
- Add new levels (e.g., “Team” at order 4).
- Deactivate levels you don’t need.
- Save your changes.

Manage Fields
- Click Settings > Manage Fields in the Organizations view.
- A field configuration panel opens where you can:
- Reorder existing fields.
- Add new custom fields (text, number, date, reference, etc.)
- Edit field properties (labels, visibility, required status).
- Save your changes.

How It Works Across Apps
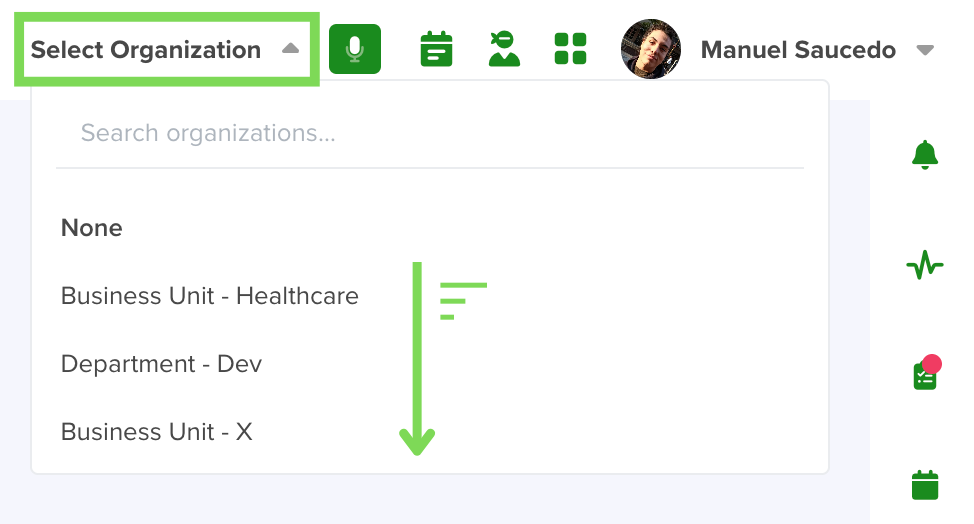
Global Organization Dropdown
How to Use It
- Click the dropdown.
- Search or scroll to find the Organization you want to work in.
- Click to select it.
- The page will reload and you’ll now be operating within that Organization’s context.
Key Behaviors
- Your selection is remembered – it persists across sessions using local storage.
- Non-admin users only see Organizations they are assigned to.
- Admin users see an additional “None” option at the top, which removes all Organization filters and shows everything.
- Each entry shows the Organization name and its full path (breadcrumb) for easy identification.
- If a user belongs to multiple Organizations, the first matching Organization is used by default on record creation.
Data Model Integration
- When a record is created, the system automatically stamps it with the currently selected Organization from the global dropdown. If no Organization is selected, it falls back to the first Organization in the user’s assigned tree.
- When a record is viewed or listed, the system filters results based on the selected Organization and the App’s “Enforce Organization Access” setting.
- Lookups and reference fields also respect Organizations. When a user searches for a Contact in a Deal form, for example, they will only see Contacts within their Organization scope.
- Line items and stage-based Apps inherit Organization access from their parent App. If a parent Deal is Organization-restricted, its items will be too.
Record Creation Behavior
- The system checks the global Organization dropdown selection.
- If an Organization is selected, then the record is automatically tagged with that Organization ID.
- If no Organization is selected and the user is an admin, then the record is created without an Organization tag (visible to all).
- If no Organization is selected and the user is not an admin, then the system assigns the first Organization from the user’s personal Organization tree.
Visibility Examples
|
Scenario
|
User Role
|
Selected Org
|
What They See
|
|---|---|---|---|
|
Sales rep in “Sales” department
|
Standard User
|
Sales
|
Only records tagged to Sales
|
|
Sales manager in “North America” BU
|
Standard User
|
North America
|
Records tagged to North America + Sales + Marketing (all children)
|
|
VP viewing from “Acme Corp” enterprise
|
Standard User
|
Acme Corp
|
All records in the entire tree
|
|
Admin checking data quality
|
Admin
|
None
|
All records across all Organizations
|
|
Admin working in a specific BU
|
Admin
|
North America
|
Only records in North America and its children
|
Organization-to-Role Filtering
Roles
|
Dimension
|
What It Controls
|
Where It’s Configured
|
|---|---|---|
|
Roles
|
Which Apps a user can access and what actions they can perform (read, create, update, delete)
|
Settings → Roles
|
|
Organizations
|
Which records within those Apps the user can see
|
Settings → Organizations + App-level Enforce toggle
|
How They Combine
- A user must have a Role that grants access to an App AND be within the Organization scope of a record to see it.
- The Organization User records link a specific User + Organization + Role together, creating a precise mapping of who can do what, where.
- When users select an Organization in the global dropdown, their available Roles are filtered to only those associated with that Organization and its ancestors. This prevents a user from exercising enterprise-level permissions when working in a department-level context.
Example
- Alice has an “Enterprise Admin” role on “Acme Corp” and a “Sales Rep” role on “Sales” department.
- When Alice selects “Sales” in the dropdown, she only operates with the “Sales Rep” role (the “Enterprise Admin” role is outside the “Sales” ancestor chain).
- When Alice selects “Acme Corp,” she operates with the “Enterprise Admin” role.
Setting Up Roles
- The Role field must be left blank.
- The roles are applied from the Organizations Settings.

- If you want a user to have multiple roles within the same Organization, click the Add Organization Role text and select the same Organization with a different role.
Best Practices
-
Start simple. Begin with two levels (e.g., Company → Department) and expand as needed. You can always add levels later.
-
Name Organizations clearly. Use names that make sense to everyone, like “US Sales” instead of “BU-3-NA-SL.” Remember, users see these names in the global dropdown every day.
-
Assign admins to the top. Make sure admin users are assigned to the top-level (Enterprise) Organization so they can switch to “None” and see everything, or select any sub-Organization as needed.
-
Enforce before you populate. Toggle “Enforce Organization Access” on your Apps before importing large datasets. This way, records get tagged as they’re created rather than requiring a bulk update afterward.
-
Use the Parent field carefully. The Parent field defines the tree structure. Changing a Parent reorganizes the entire subtree, which immediately affects visibility for all users under that branch.
-
Check the global dropdown often. Your current Organization selection is shown in the top navigation. Always verify you’re in the right context before creating records — that’s what determines their Organization tag.
-
Non-admin users and lookups. When non-admin users search for records in reference fields, results are filtered by their Organization scope. If they can’t find a record, it might be in a different Organization branch.
