Events
Create your own events to get custom logs in your Timeline in any of your Apps. Events can be used to track when new records are created, updated, or deleted, among other many useful ones.
You can even edit Timeline events after they are created. This is a great way to keep you and everyone on your team up-to-date on everything that happens in a specific record.
User Permissions: Only the team’s Admin or App Admin can create new Events.
Navigate to Events
Navigate to Settings > Advanced > Events.
Create New Event
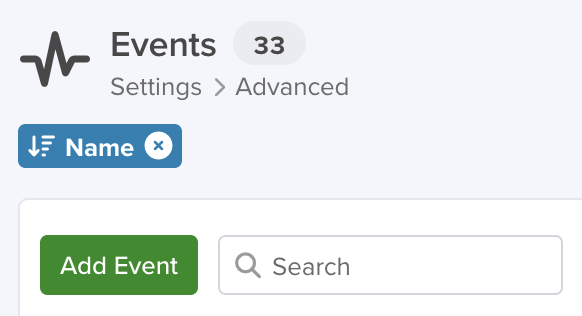
In order to create a new event, click the ‘Add Event’ button. Then add the following information:
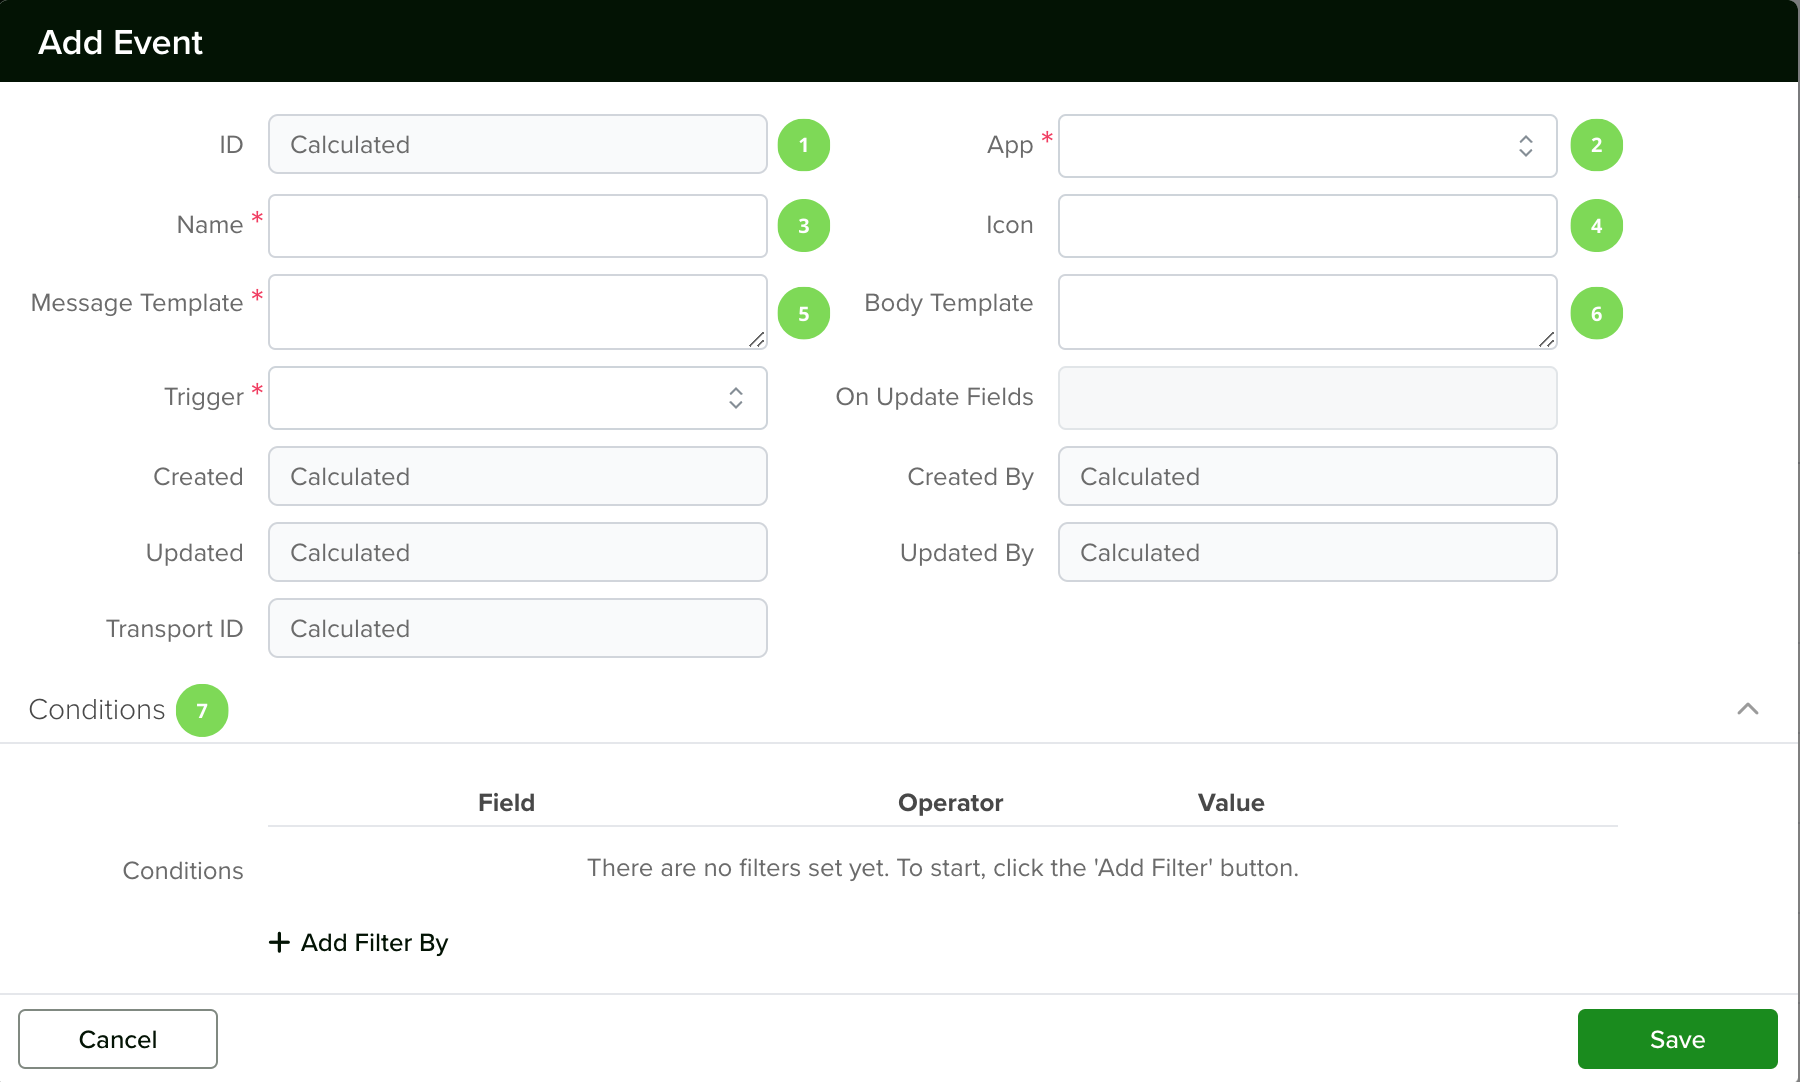
1. Name
Give your event a name.
2. Icon
If you’d like, you can select an icon for your event from those available.
3. Message Template
This will be the message displayed in the Timeline widget, as the title of the card, once the event occurs. If you want to add the name, Id, or any other information about the record, type {{ and select the desired option from those available.
4. Body Template
This will be the body displayed on the event card. You can customize it. To add the name, Id, or any other information about the record, type {{ and select the desired option from those available.
5. Trigger
There are 3 different triggers available:
After Create – The notification will occur if the conditions are met after a new record on the selected App is created.
After Update – The notification will occur if the conditions are met after a record on the selected App is updated.
On Create or Update – The notification will occur if the conditions are met once a record is created or updated.
6. On Update Fields
Only available when the trigger is either ‘After Update’ or ‘On Create or Update’.
Select the field that needs to be updated in order for the notification to occur.
7. Conditions
You can specify as many conditions as necessary for your notifications. All of these will need to be met in order for the notification to trigger.
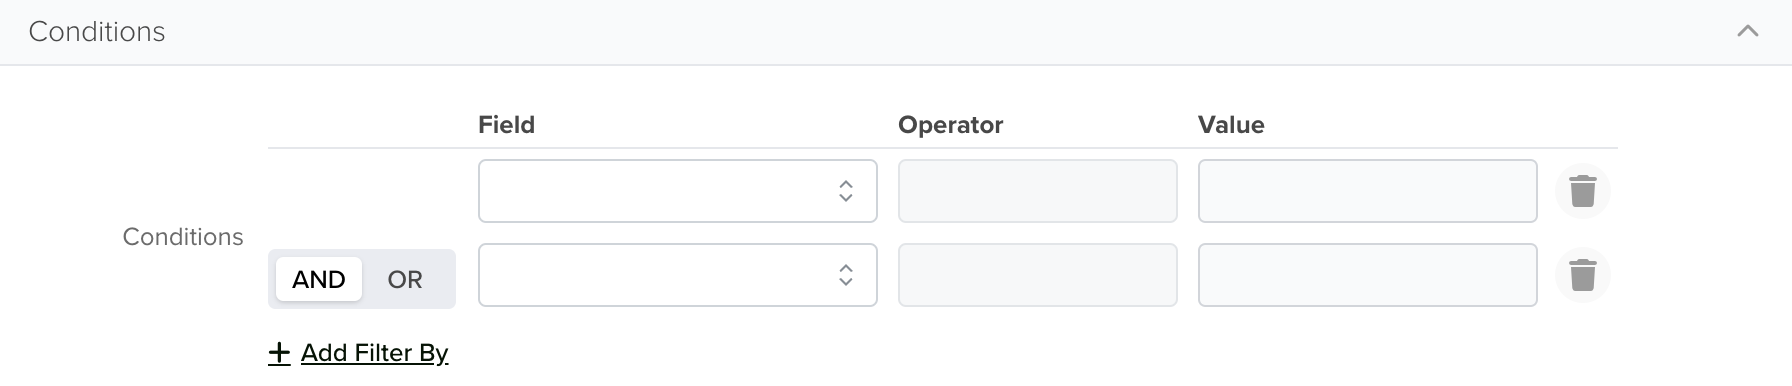
Field
Select the fields that will have an impact on the notification.
This usually includes the field selected under ‘On update Fields’ when you are expecting a specific value.
Operator
Select from the available options. The operators available will depend on the type of selected field.
Value
Select the value required for the condition to be met.
The options available will vary according to the field type.
Once you have added all the information required for your Event, click the ‘Save’ button.
If the conditions for the Event are met, then you will see a new event log under the Timeline widget, as well as in your Right Menu.
Out-Of-The-Box Events
From the moment a new App is created, there are some really useful events already included for them, here is a list of some of the most popular ones per App:
| EVENT | DESCRIPTION | APP Availability |
| Created | Once a new record on any App is created, there will be an event logged in the Timeline. | All Apps |
| Stage Change | When the Stage field of a record is updated, there will be an event logged in the Timeline. | Existing Apps with Stage Field enabled. |
| Assigned | When a Team Member is selected under the Owner field, whether it is when the Record is created or updated, there will be an event logged in the Timeline. | Existing Apps where the Owner field is in use. |
Lines
Lines are a super-sized enhancement to your Apps that will allow you to give them a boost of capabilities. With them, you can create invoices or quotes with ease right inside servis.ai without using any other system.
User Permissions: Only the Administrator can customize Lines.
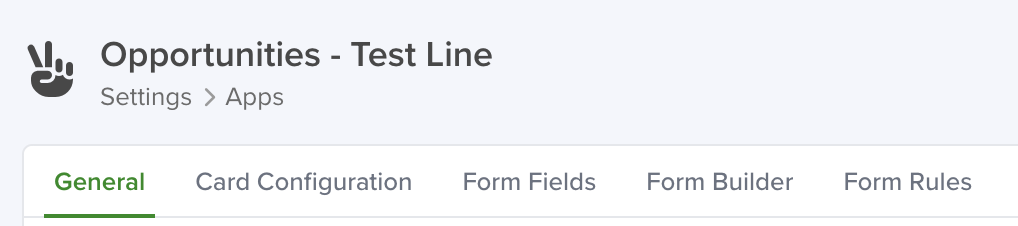
Navigate to Lines
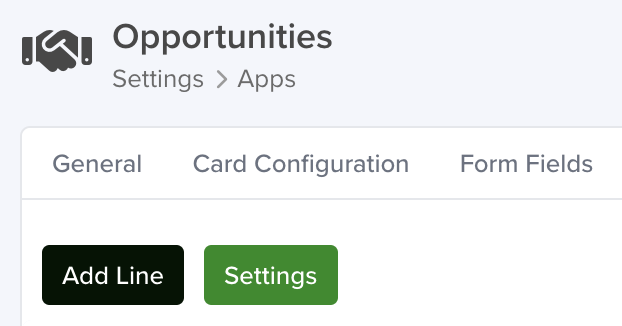
Navigate to Settings > Apps. Select your desired App, then select the ‘Lines’ tab from the menu options. You can also use the search function to get there faster, just start typing ‘Lines’.
Create Lines for Your App
To create a Line, simply click the ‘Add Line’ button.
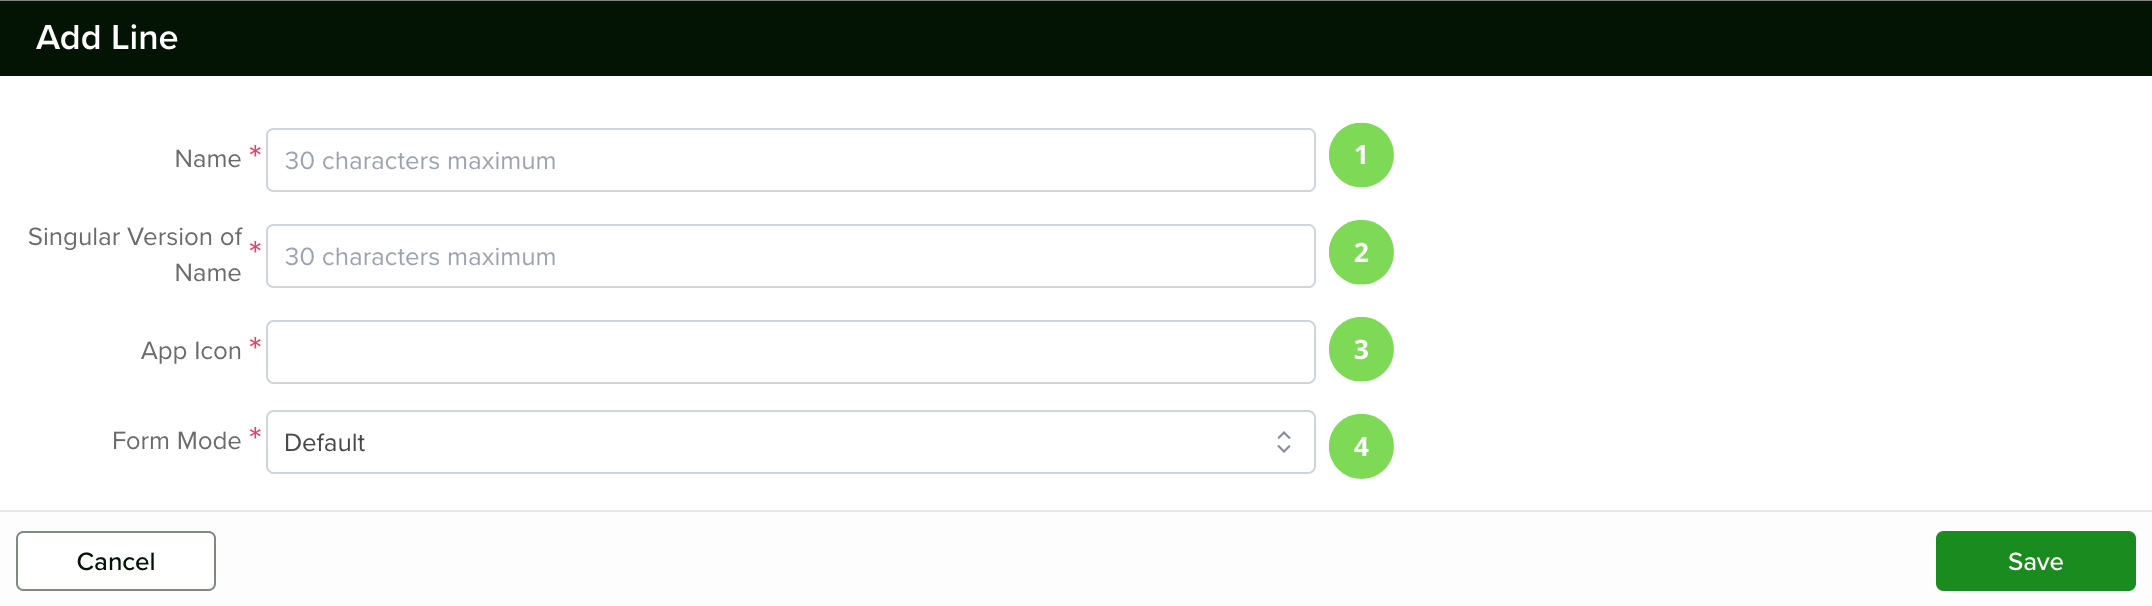
1. Name
Here you will need to add the name of your Line.
2. Singular Version of Name
For example, the name for the line is ‘Prices’ for the singular must be ‘Price’, the singluar name is needed to identify the records inside the line.
3. App Icon
You also have the option to select a unique icon for your Line. There are a few options for you to choose from.
4. Form Mode

Lines can now be edited directly wherever they appear in an app, making data management more efficient.
How to Enable Inline Editing
- When creating or editing a Line, locate the ‘Form Mode’ field.
- Click into the field and select ‘Inline.’
- Click Save to apply the changes.
When to Use Inline Mode
- Ideal for quickly adding and editing data, such as SKUs and other grouped information.
- Best for line columns that share similar structures.
If your line types vary significantly and require structured form fields for data entry, it’s recommended to stay in Default Mode instead.
Note: When in Inline mode, any fields added to the Line will not show their Field Hint. Quick Tip: Think of the Lines as a “child app” of your main app.
As soon as you click the ‘Save’ button the Line will be created and it will be available right next to Lines in the top menu.
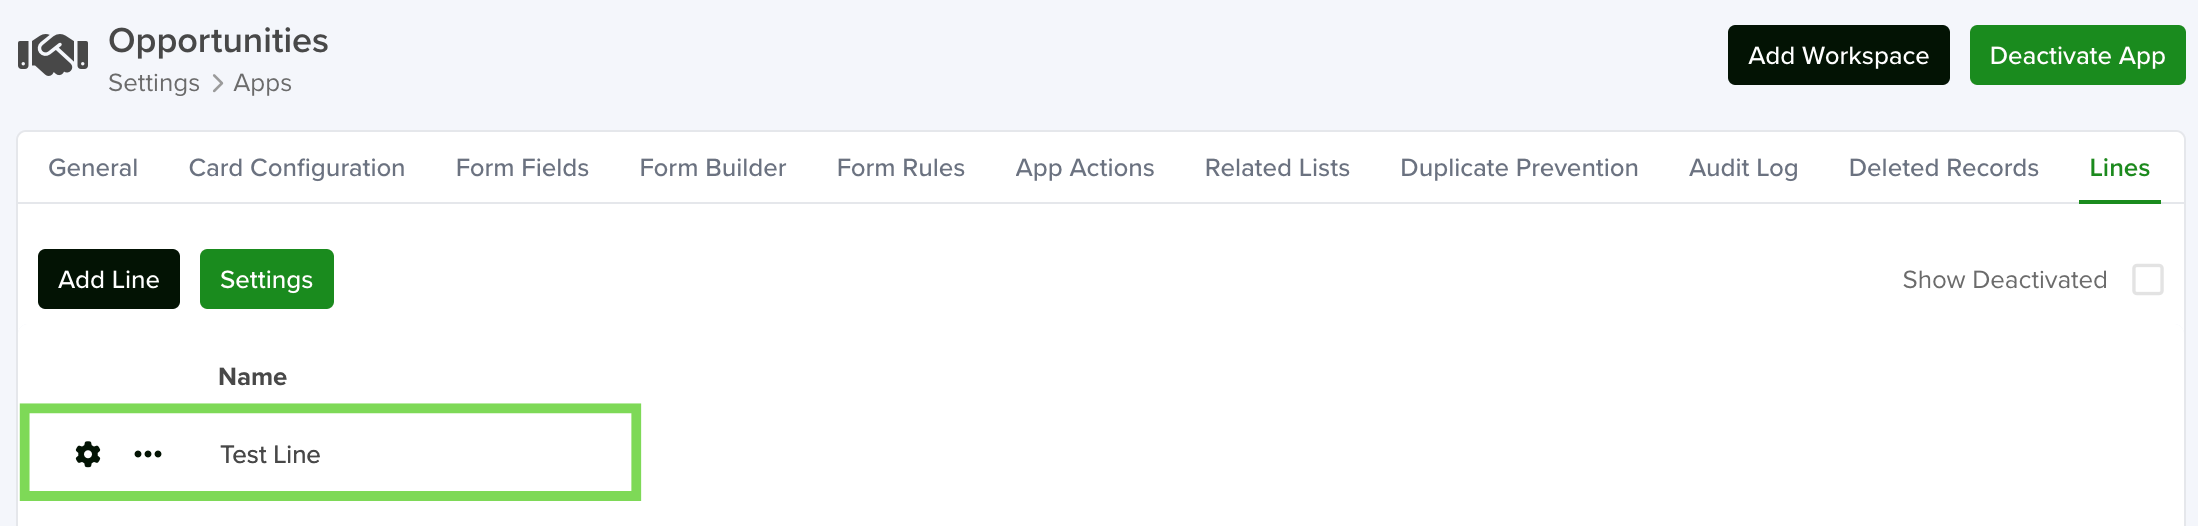
Click on the ‘Configuration’ icon to start adding fields to your Line and view the additional components to your line configuration – Form Fields, Form Sections, Card Configuration and Form Rules.
Configuring Your Line
Configuring your Lines is very similar to setting up your applications. You’ll notice very similar tabs at the top of your screen. Use these articles on configuring your applications to get an idea of what you can do in each tab:
Create Fields for your Line
Configuring your Lines is very similar to how you add Fields to your Apps. Click the ‘Add Field’ button to get started. To learn how to create fields and what type of fields you have available, we recommend the following tutorial:
Form Fields
Form Scripts for Lines
Individual Lines can now support custom Form Scripts. Form scripts within lines will work with the Form Script of the parent App to utilize the Rules dictated in the custom code.
When creating or editing a Line you will now see a Form Script section, click into the ‘Form Script’ field and select ‘Yes.’ The Script window will then become editable. Add or edit code lines and then click Save.
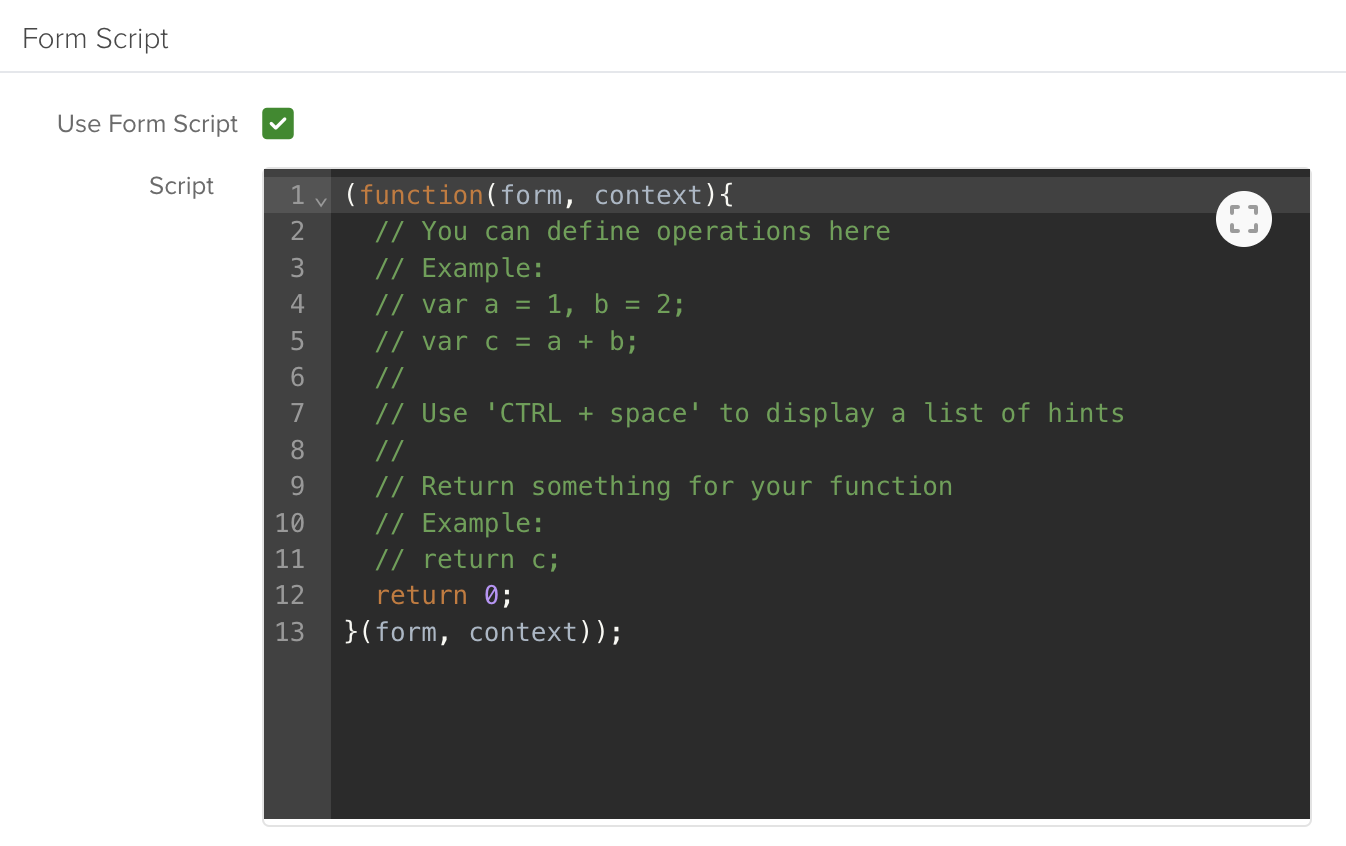
Note: For best results, use Line Form Scripts in conjunction with the parent App Form Script.
Pro-Tips
Grid View
Lines are now displayed in a List View, making it easier to create and manage line records. This update, combined with Inline Edit Mode and Form Scripts, enhances workflow efficiency—especially for apps that rely heavily on lines, such as Quotes.
Key Benefits
- Simplified Management: View and organize line records in a structured list.
- Quick Additions: Add new Lines with a single click.
- Seamless Editing: Make real-time updates without leaving the Lines section.
- Customization: Configure lines to follow Form Rules for better control.
Note: Servis.ai recommends less than 50 Lines per Parent Record to optimize performance within a given App.
Use Reference Join Fields Where Possible
Lines are primarily used to establish dependency relationships between apps, often in a parent-child structure. To make data entry more efficient, it’s best to use Reference and Reference Join fields to pull in existing data instead of entering it manually.
Why Use References?
- Avoid duplicate data entry by linking existing records.
- Ensure accuracy and consistency across related apps.
- Streamline workflows by automatically pulling relevant information.
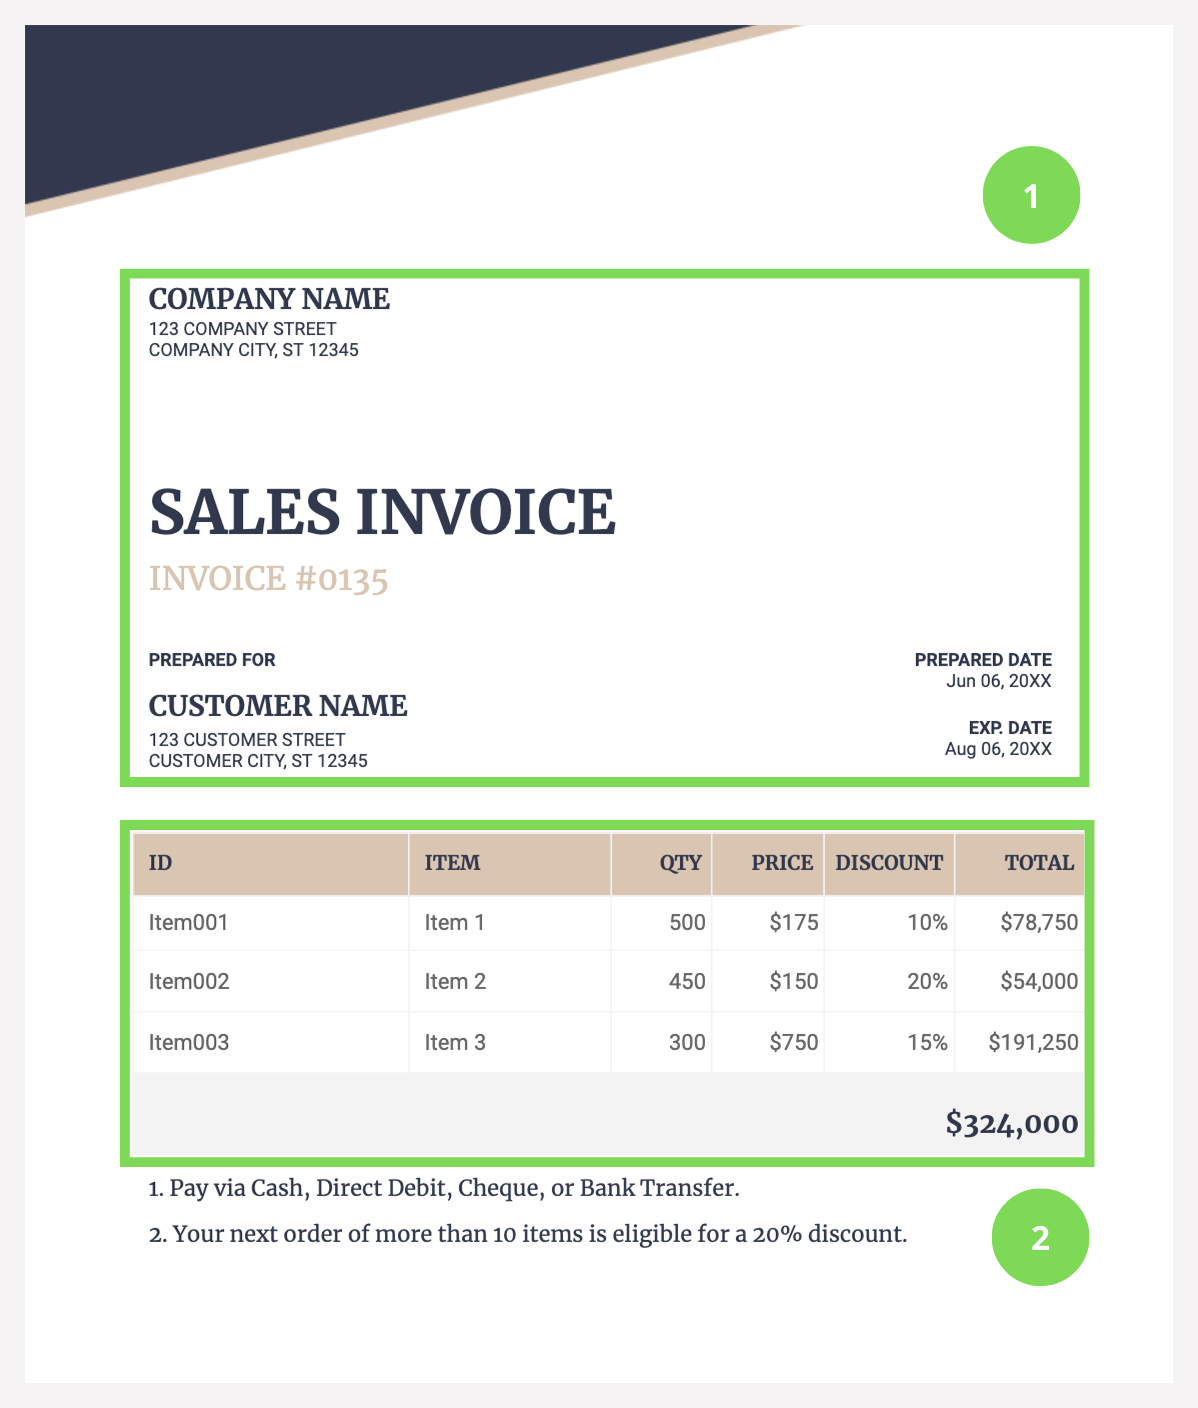
Example: Creating an Invoice App
Instead of manually entering Account Name and Address in an invoice:
- Create a Reference Field to select the Account from the Account App.
- Use a Reference Join Field to auto-fill the Account Address in the Invoice.
By leveraging these fields, you enhance data accuracy and save time when working with Line-dependent apps.
Create Field Sections to Keep your Forms Nice and Clean
If you are planning on adding multiple fields to your Line, we recommend that you create Form Sections to organize your fields and data.
Configure your Card
You can change the configuration of the cards for your Lines as well. To learn more about Card Configuration, please visit the following tutorial:
Card Configuration
Identify which Elements Should be Part of the App, and Those that Should be Added to the Line
To explain this, let’s use an Invoice as an example. There are elements in the invoice that are part of the high-level information (1), meaning the App, while there are others that belong to the table (2) inside the invoice, those correspond to the Line.
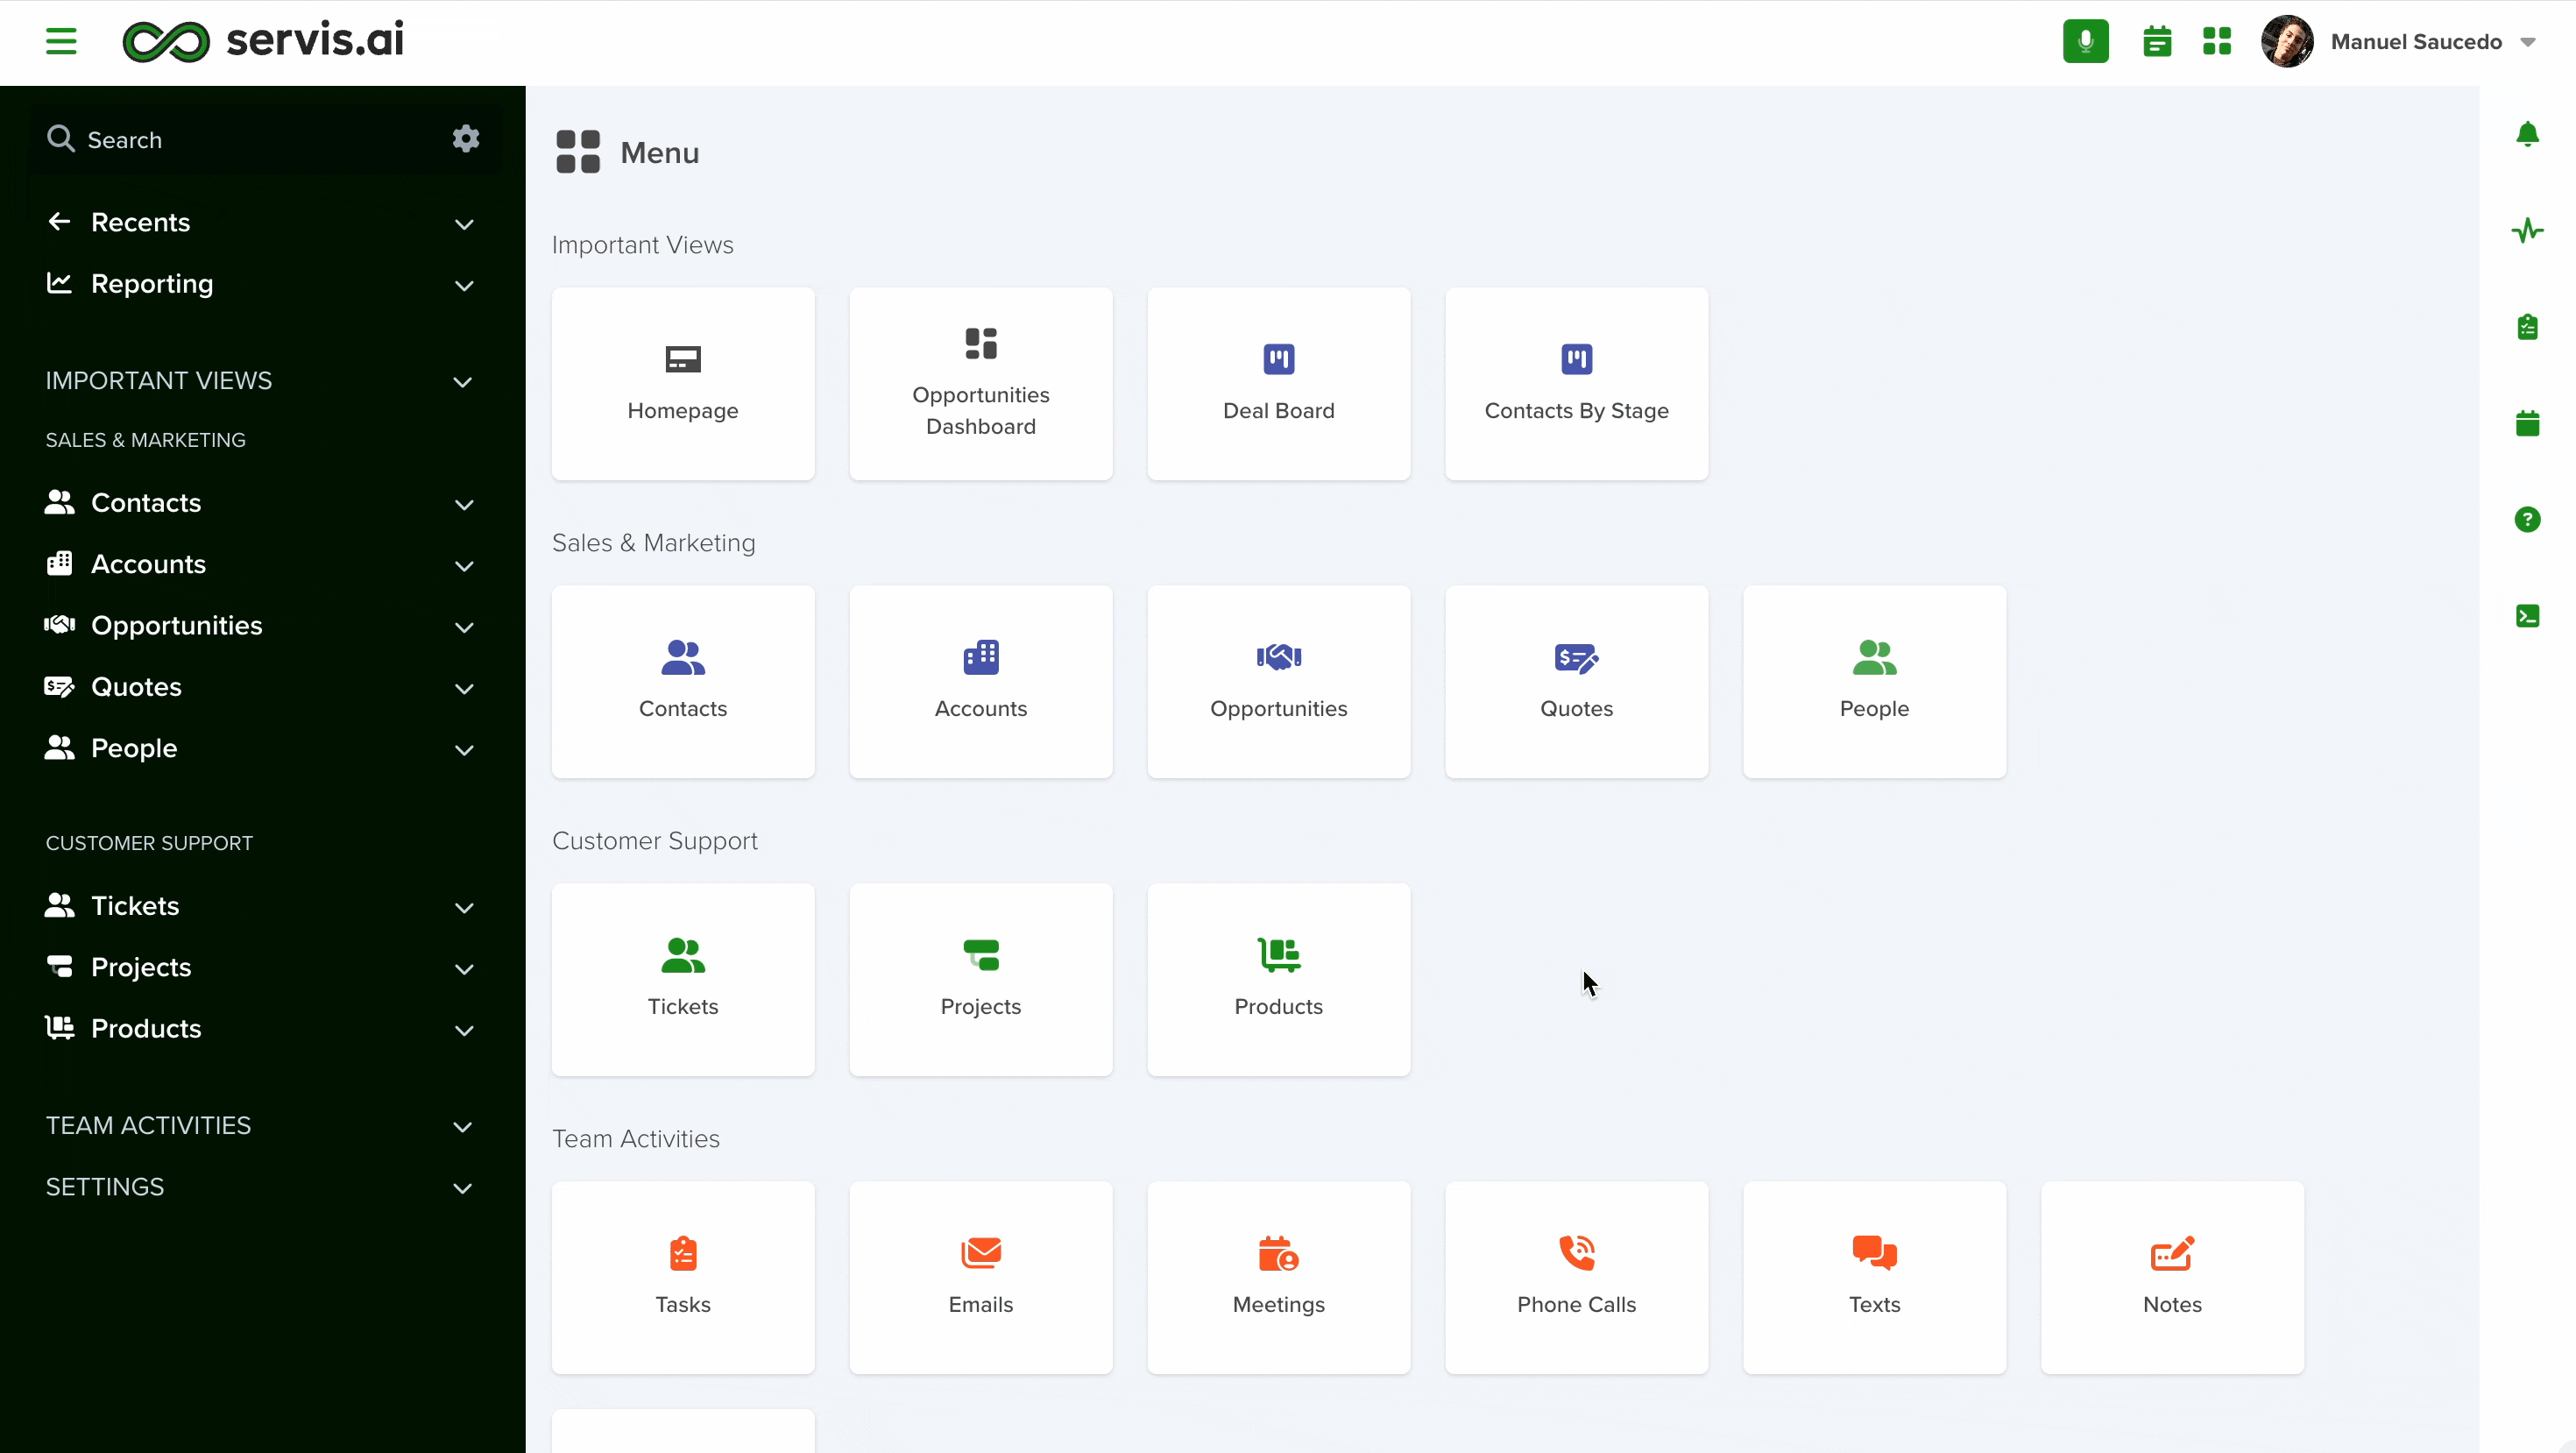
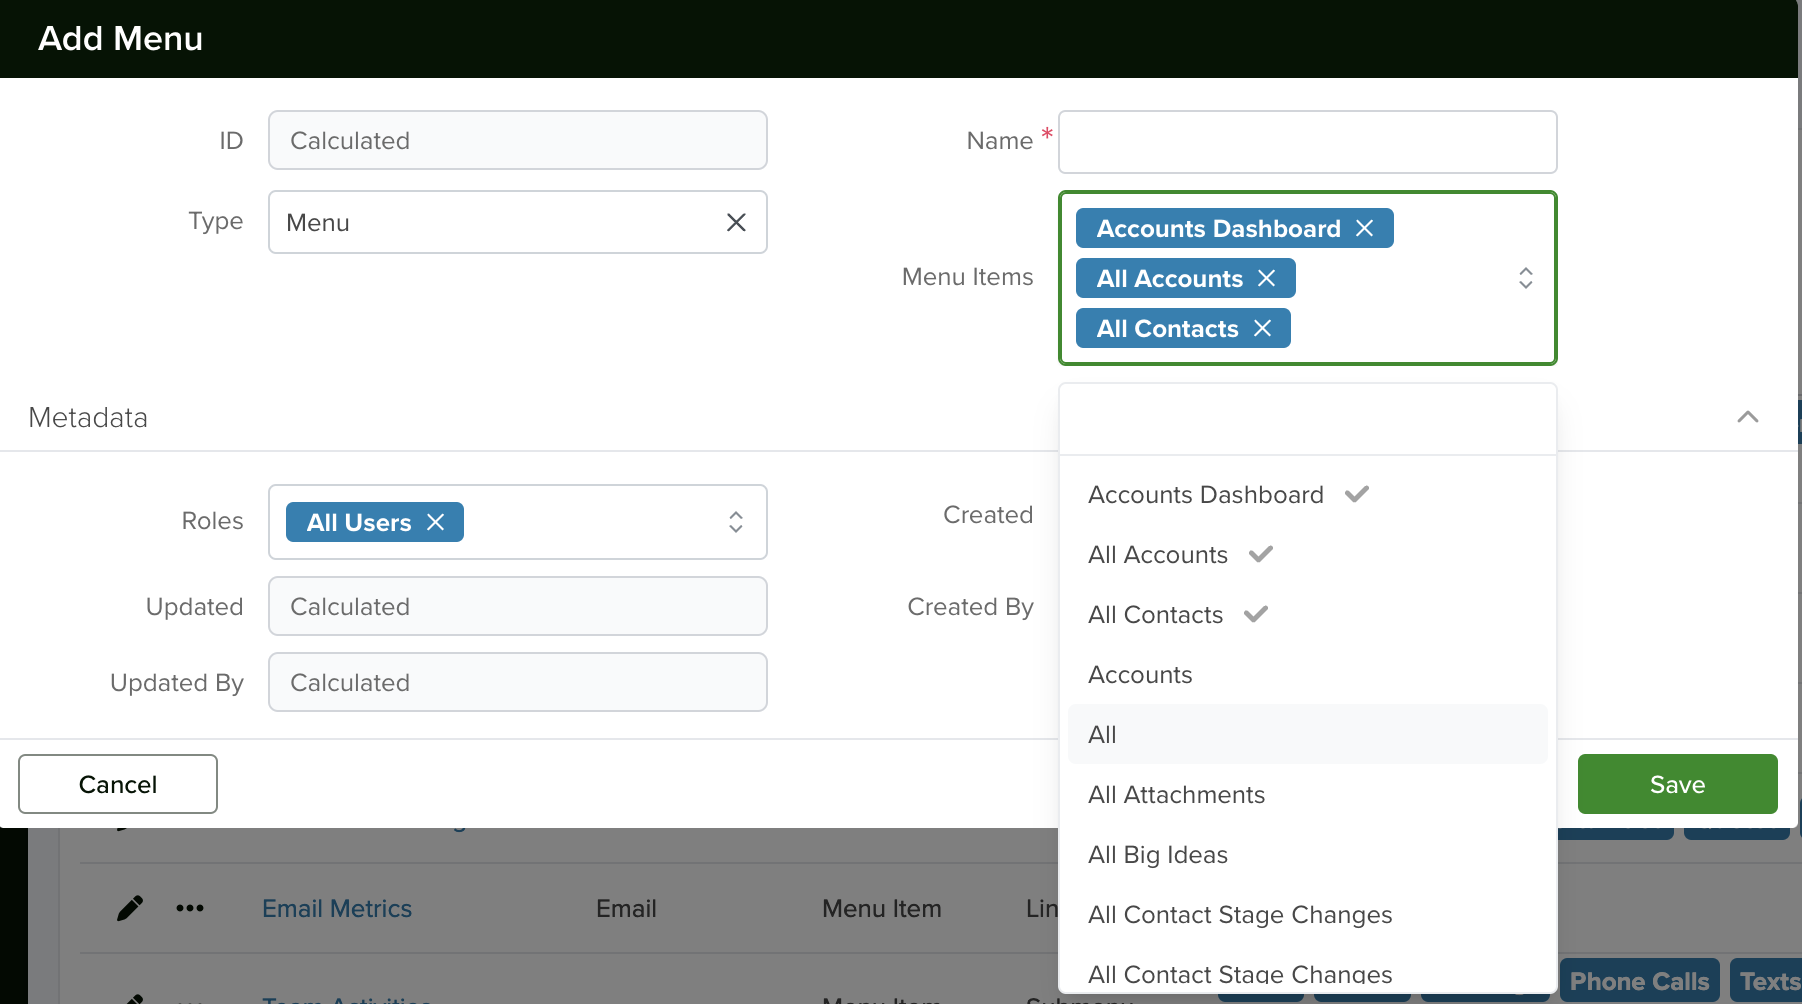
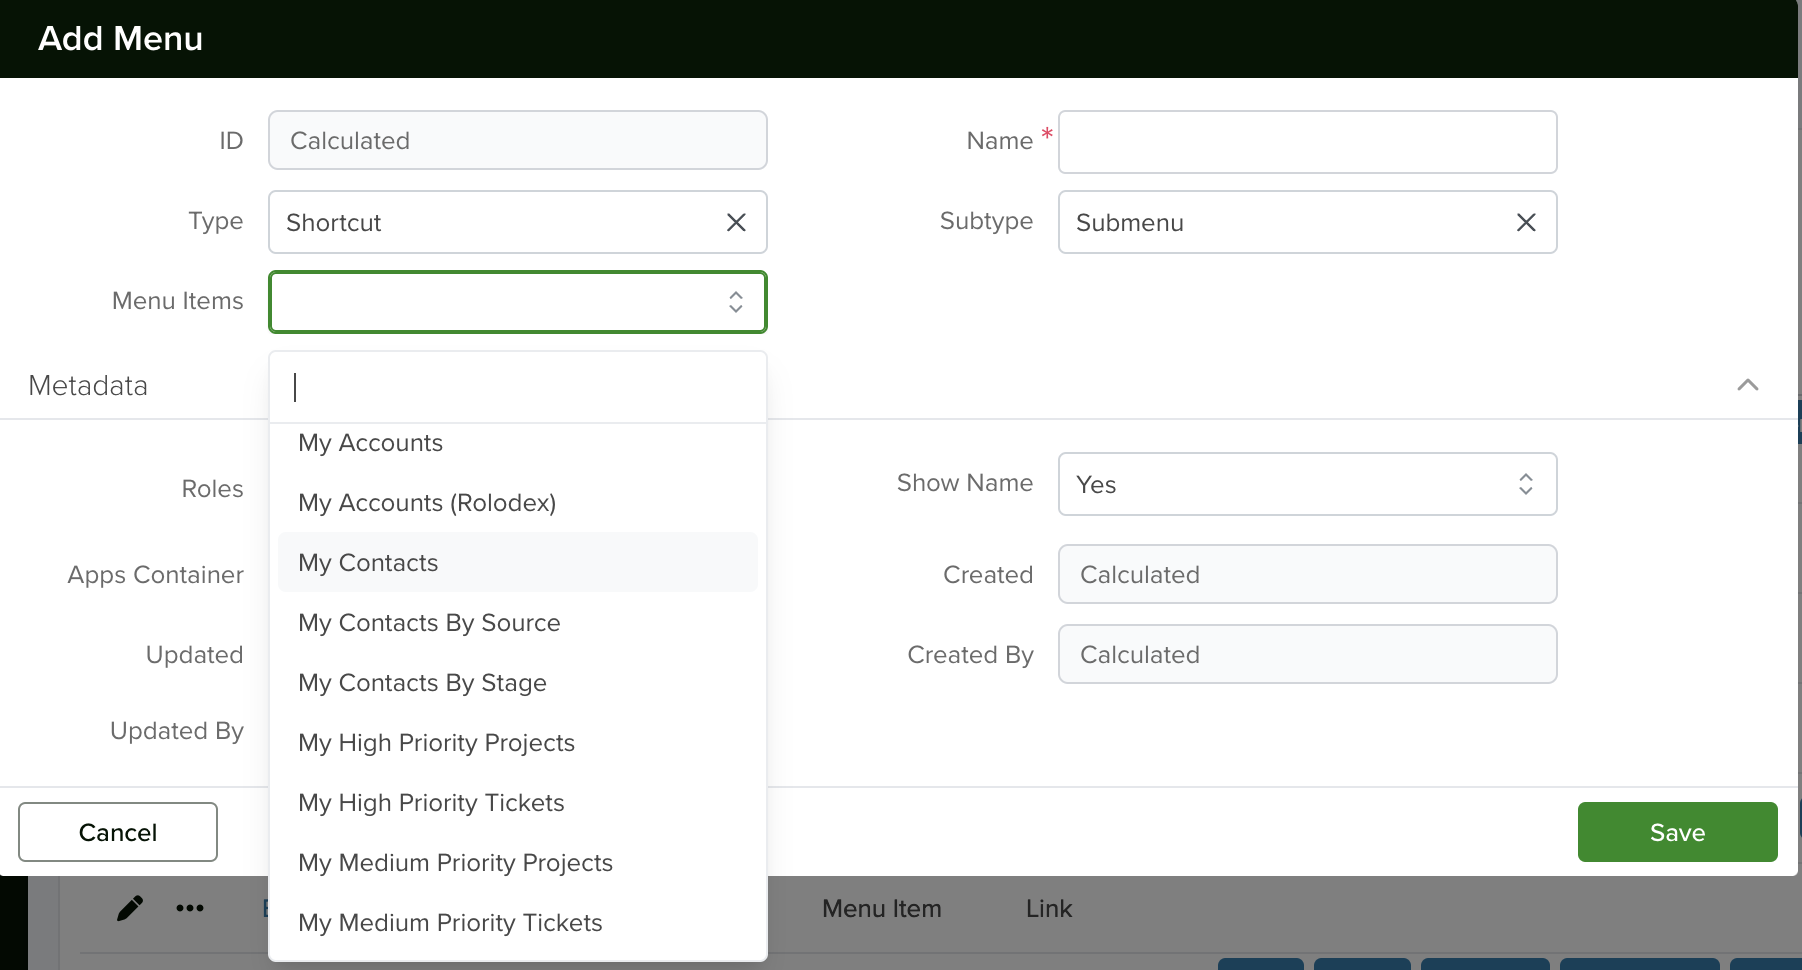
Menu Items
Gain full control over the Items that appear on your Menu with this great feature. Here you will be able to add or remove items, whether they are Saved views or links to other sections in servis.ai.
User Permissions: This feature is available for administrators only.
Navigate to Menu Items
Open the menu and go to Settings > Advanced > Menus.
Add Menu Items
Click the ‘Add New Menu Item’ button to get to the creation form.
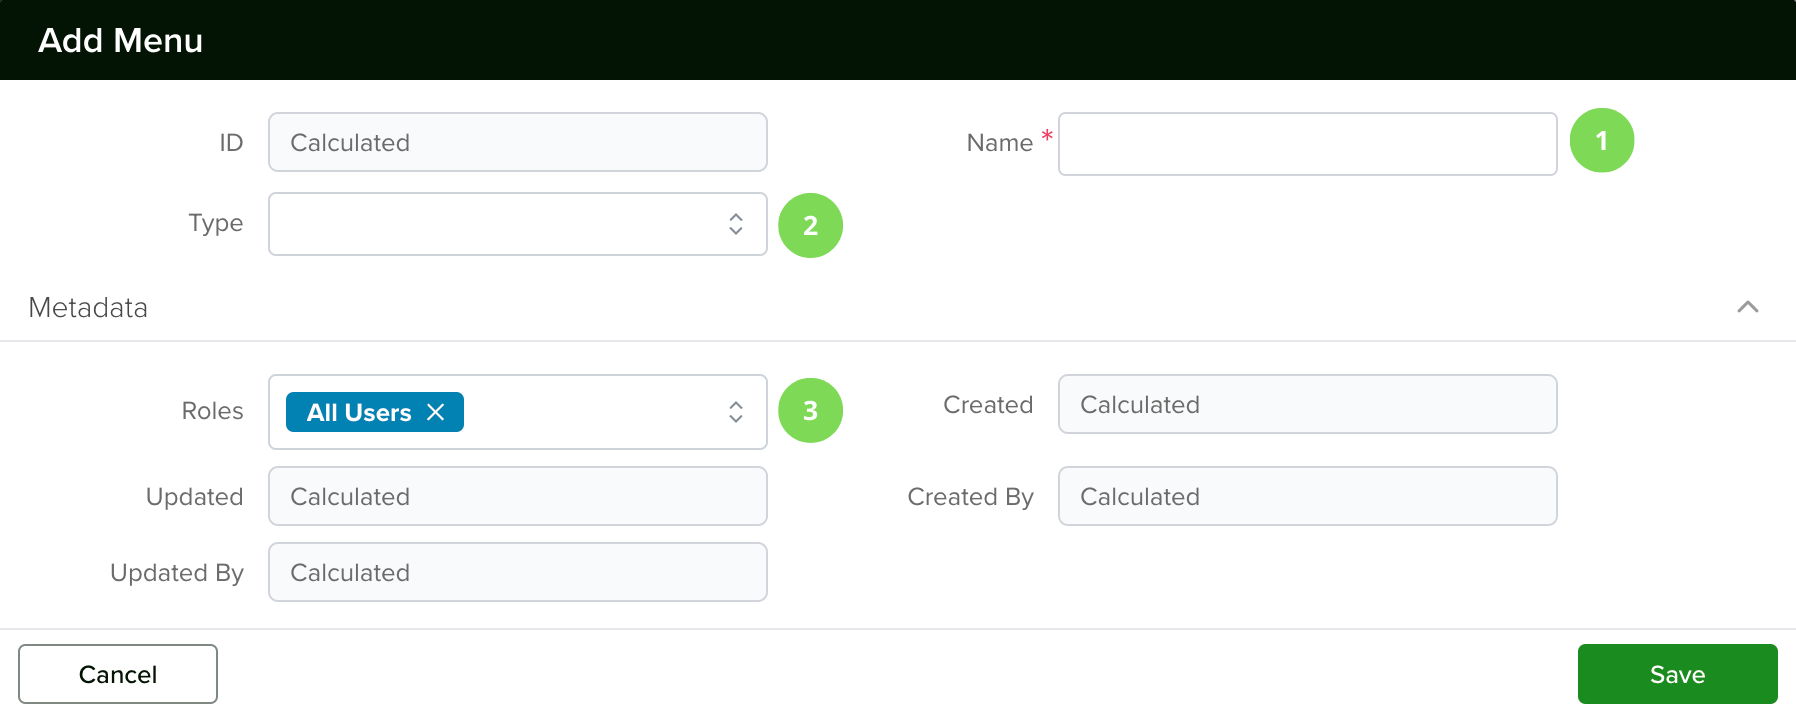
1. Name
Enter a name for your menu item.
2. Type
There are three main types to choose from. Each has sub-types attached to them.
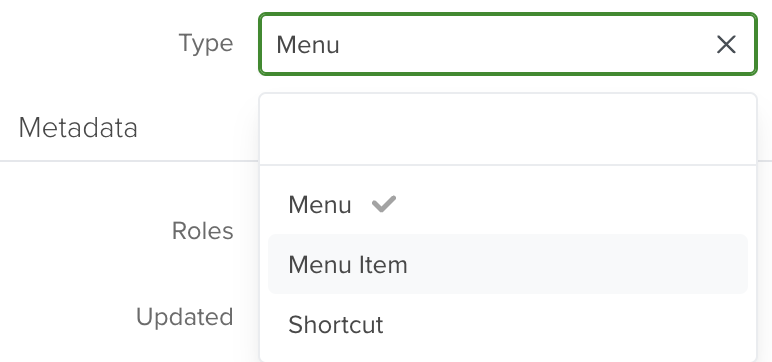
Menu
Link: you can copy & paste the desired link in the space provided. They work great when you want to add quick access to a specific Dashboard or section of the Settings.
Note: The links added here have to be linked to pages inside servis.ai.
View: you will be able to select from your existing Saved Views. This is a great option when you want to share Saved Views with the entire team.
Dashboard: you will be able to choose from your existing Dashboards.
Submenu: You can create a submenu containing different items pertaining to the app.
Edit Menu Items
Select the Menu Item and click the ‘Edit’ button. You will be able to change the menu item completely, and save your changes once you are done.
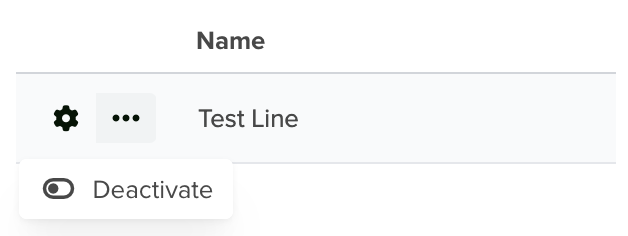
Deactivate / Activate Menu Items
When you don’t want a specific Menu Item to show up in the Menu anymore you can deactivate it by selecting it and then clicking on the ‘Deactivate’ button.
If you wish to bring it back, first enable the ‘show deactivated’ checkbox, select the desired menu item, and click the ‘Activate’ button.
