In this article, we’ll explore the essential aspects of utilizing the GoTo VoIP integration within servis.ai. We’ll guide you through the setup process.
Navigate to GoTo
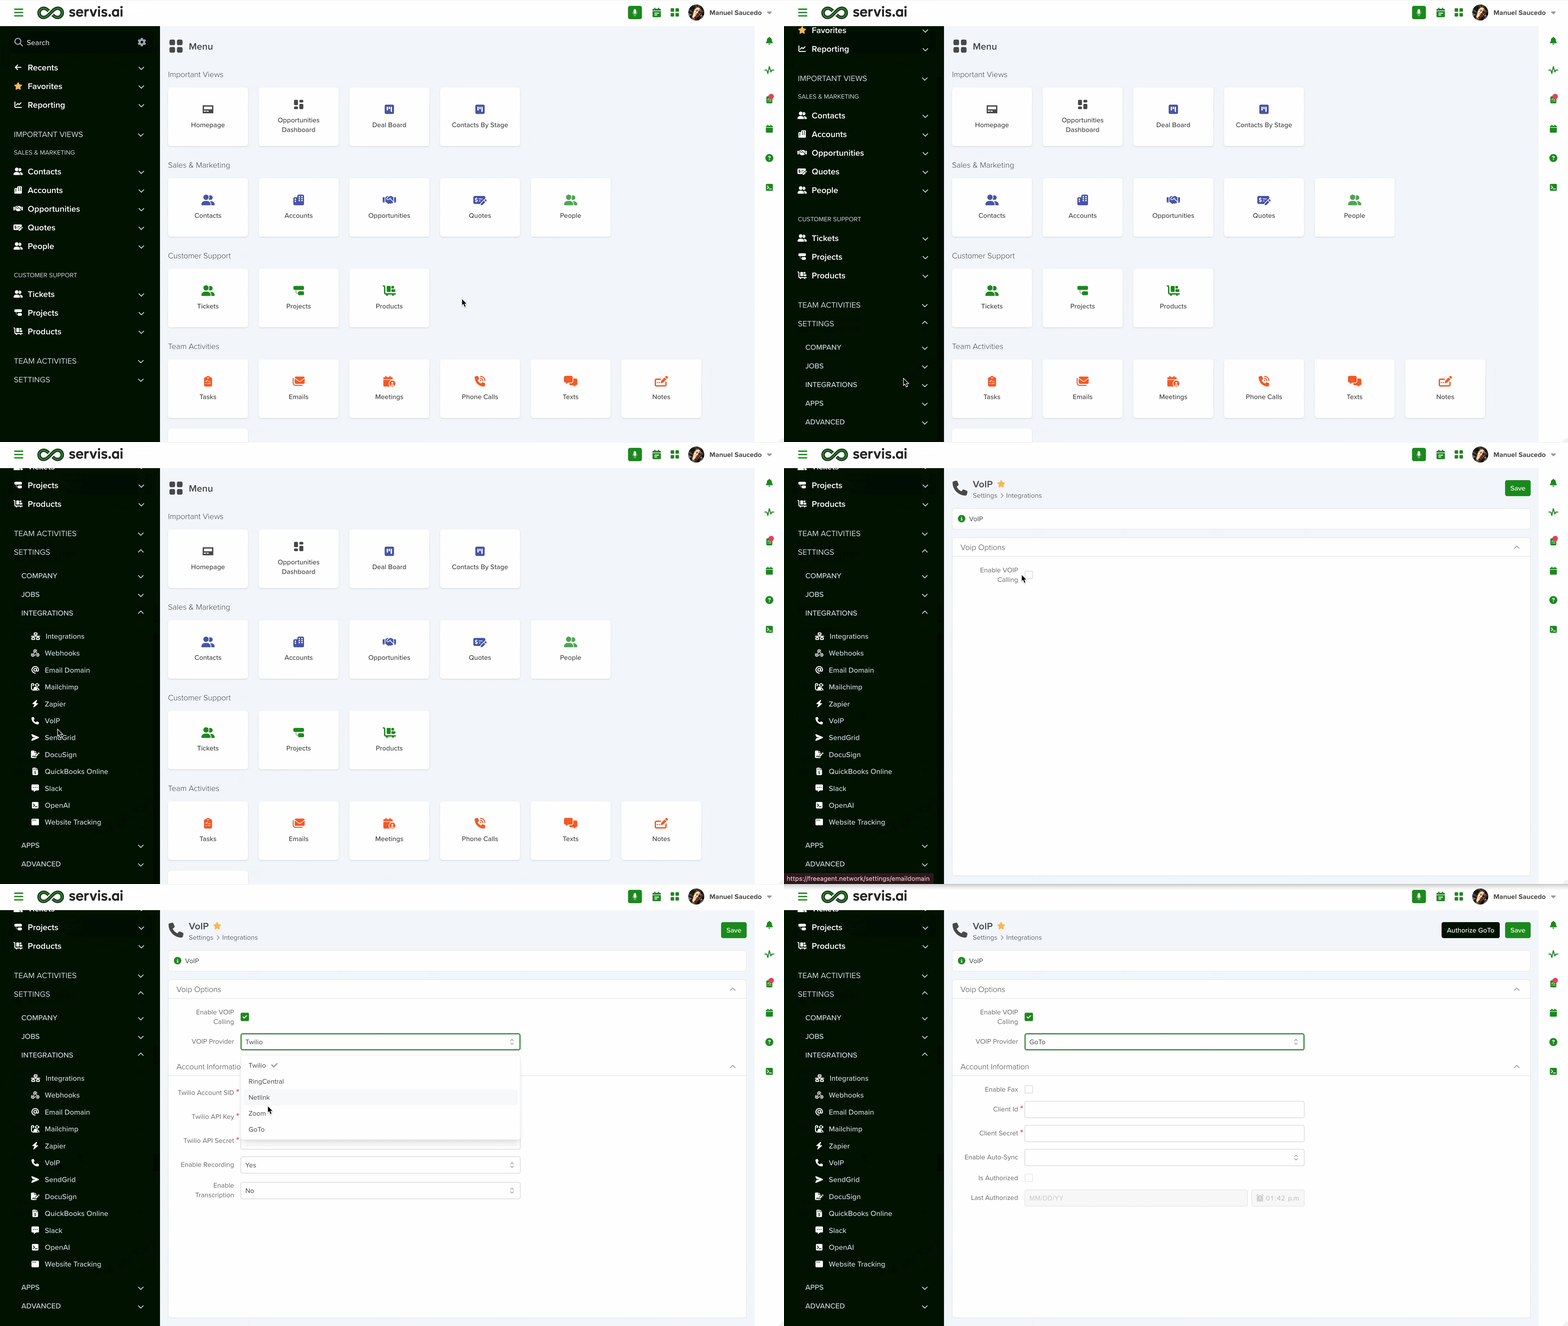
To enable VoIP with GoTo in servis.ai, follow these steps:
- Navigate to Settings – Go to Settings > Integrations > VoIP.
- Enable VoIP Calling – Check the Enable VoIP Calling checkbox.
- Select a Provider – In the VoIP Provider dropdown, choose GoTo.
Create a New OAuth Client
To create a new OAuth Client to obtain both the ID and Secret do this:
- Log in to the GoTo Developer Center.
- Navigate to OAuth Clients and select Create a client.
- Provide a Client Name, Description, and at least one Redirect URI.
- Copy the generated link and paste it into the input box below.
- Select the necessary scopes for your application.

- We recommend selecting the GoToConnect scope.
Don’t forget to save the client to obtain your Client ID and Client Secret.
Account Information
When you select GoTo from the dropdown menu, the Account Information section will automatically update to display the required fields for enabling the integration.
Before we explore the required fields, ensure you have:
- A GoTo account: Sign up at the GoTo Developer Center.
- Access to the GoTo Admin Center: Sign in at GoTo Admin.
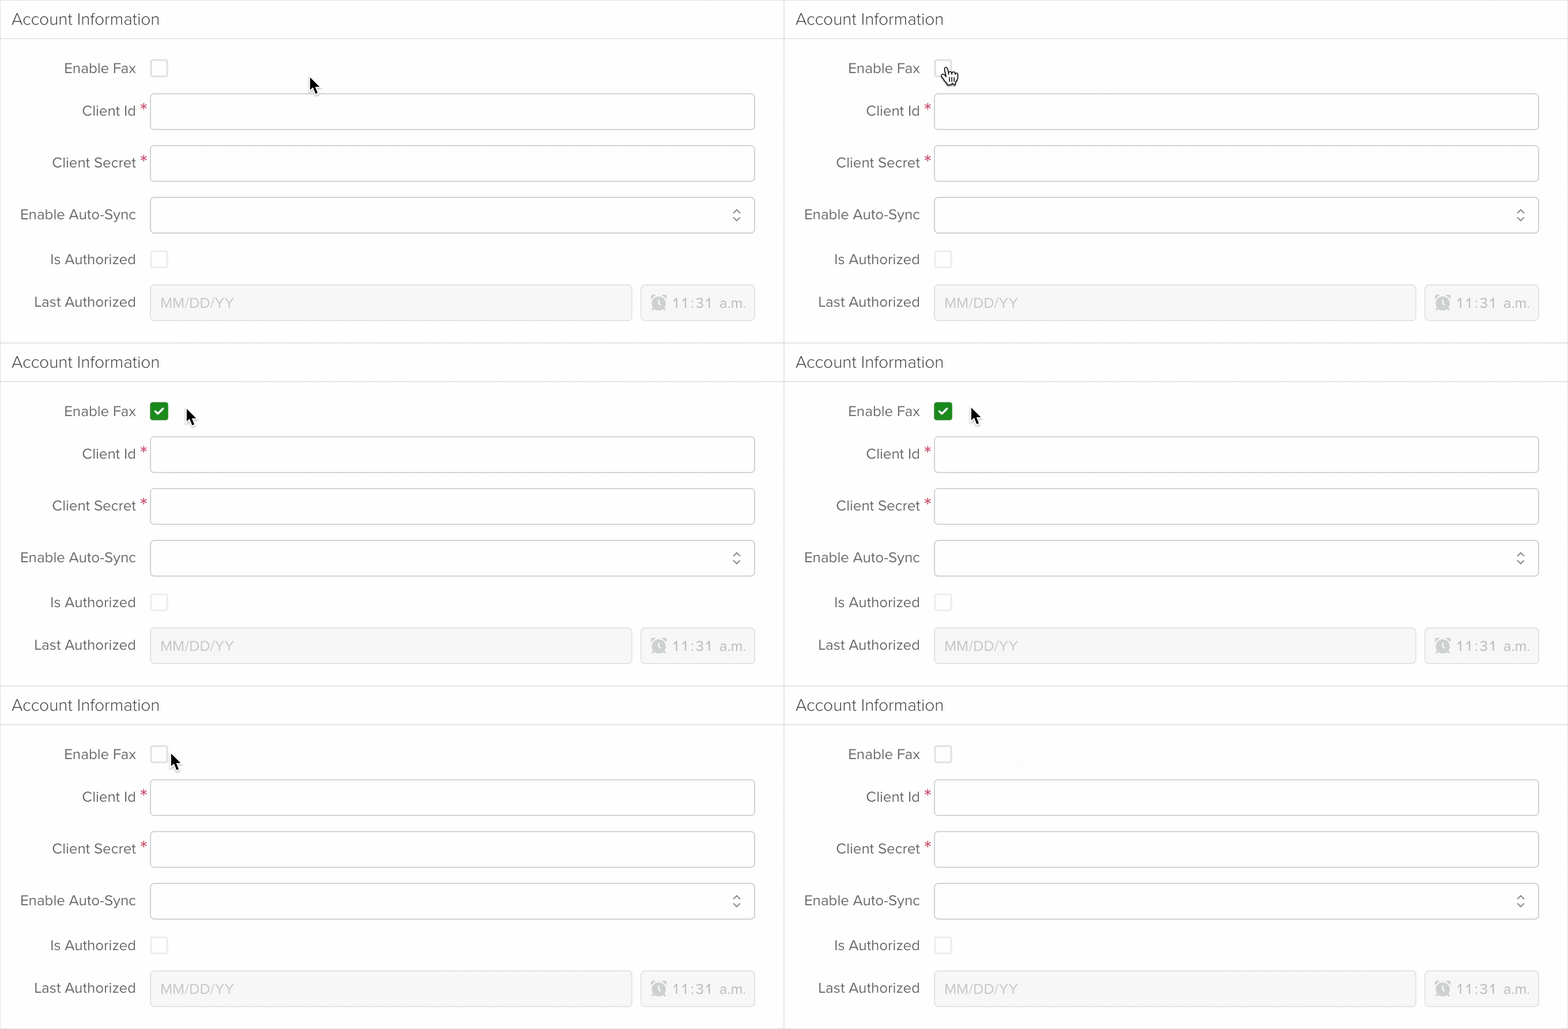
Enable Fax
Enabling the Fax option adds a new Faxes app to your Activities menu. This app allows you to manage all your sent and received faxes. For detailed instructions on using the Faxes app, jump here.
Client ID & Secret
This are the only mandatory fields to enable the integrations and they can be obtained from the GoTo Developer Center.
Access the Developer Center and go to OAuth Clients > Advanced to find your Client ID and Secret to copy and paste it into servis.ai Integration page.
Note: To view your Client ID and Client Secret, ensure you’ve created an OAuth client in the GoTo Developer Center. If you haven’t done so, follow the steps outlined here.
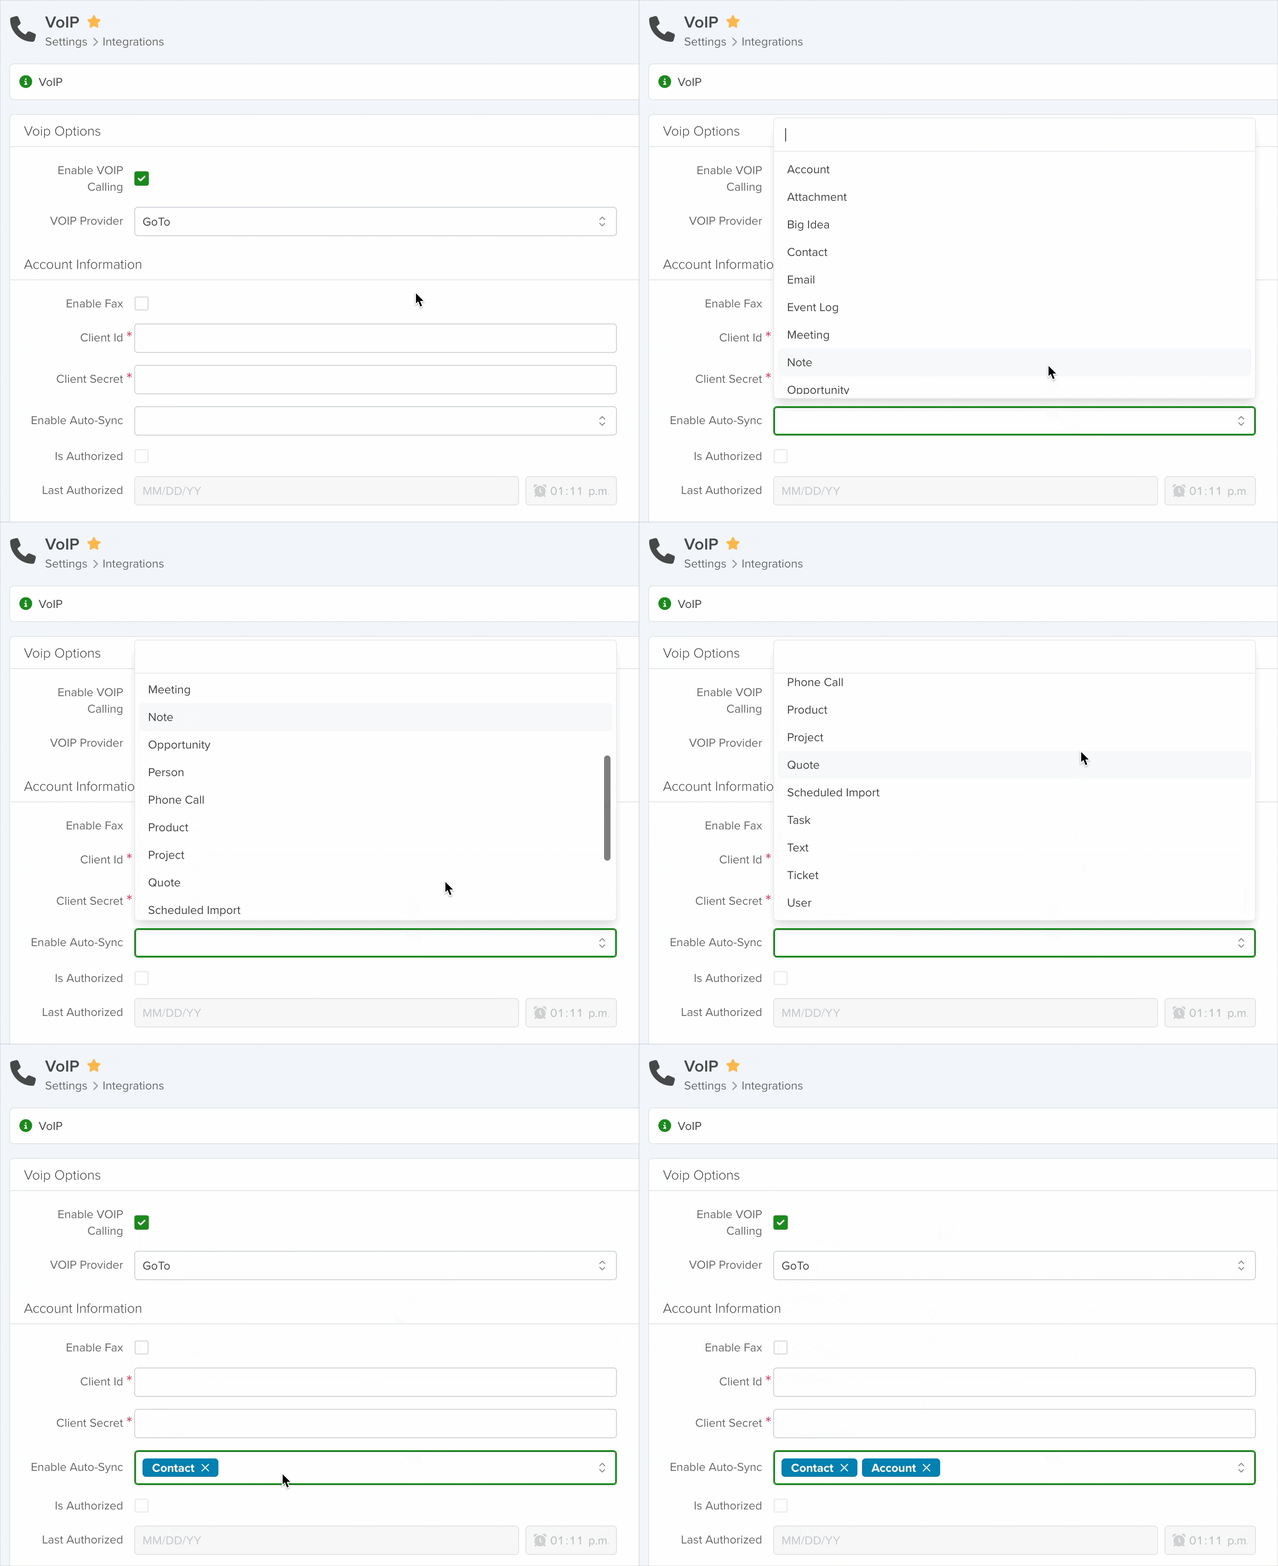
Enable Auto-Sync
You can use the dropdown menu to select the apps from which the Faxes App will retrieve information about each record associated with a generated fax like the Source Record.
Is Authorized & Last Authorized
The “Is Authorized” and “Last Authorized” fields are read-only. They display the date and time when the GoTo Client was authorized on the Developer Center.
Permissions
After entering your Client ID and Client Secret click Save, then authorize GoTo to integrate with servis.ai by clicking the ‘Authorize GoTo’ button.
After clicking ‘Authorize GoTo’, a new window will prompt you to sign in with your GoTo Admin credentials.
Note: Ensure the account used has permissions to read, edit, and send faxes; otherwise, the Faxes App won’t display sent and received faxes.


