There are multiple different ways to create Contacts and Accounts in servis.ai, including automations and imports. In this article we will cover how to create a Contact or Account record manually using the +Add button in the All Contacts or All Accounts view.
Add a Contact or Account
To create a Contact or Account using +Add, go to the Apps section of the Navigation menu and select the All view for the App of your choice. In the example below, we have navigated to the Contacts App and clicked on the “All Contacts” view.
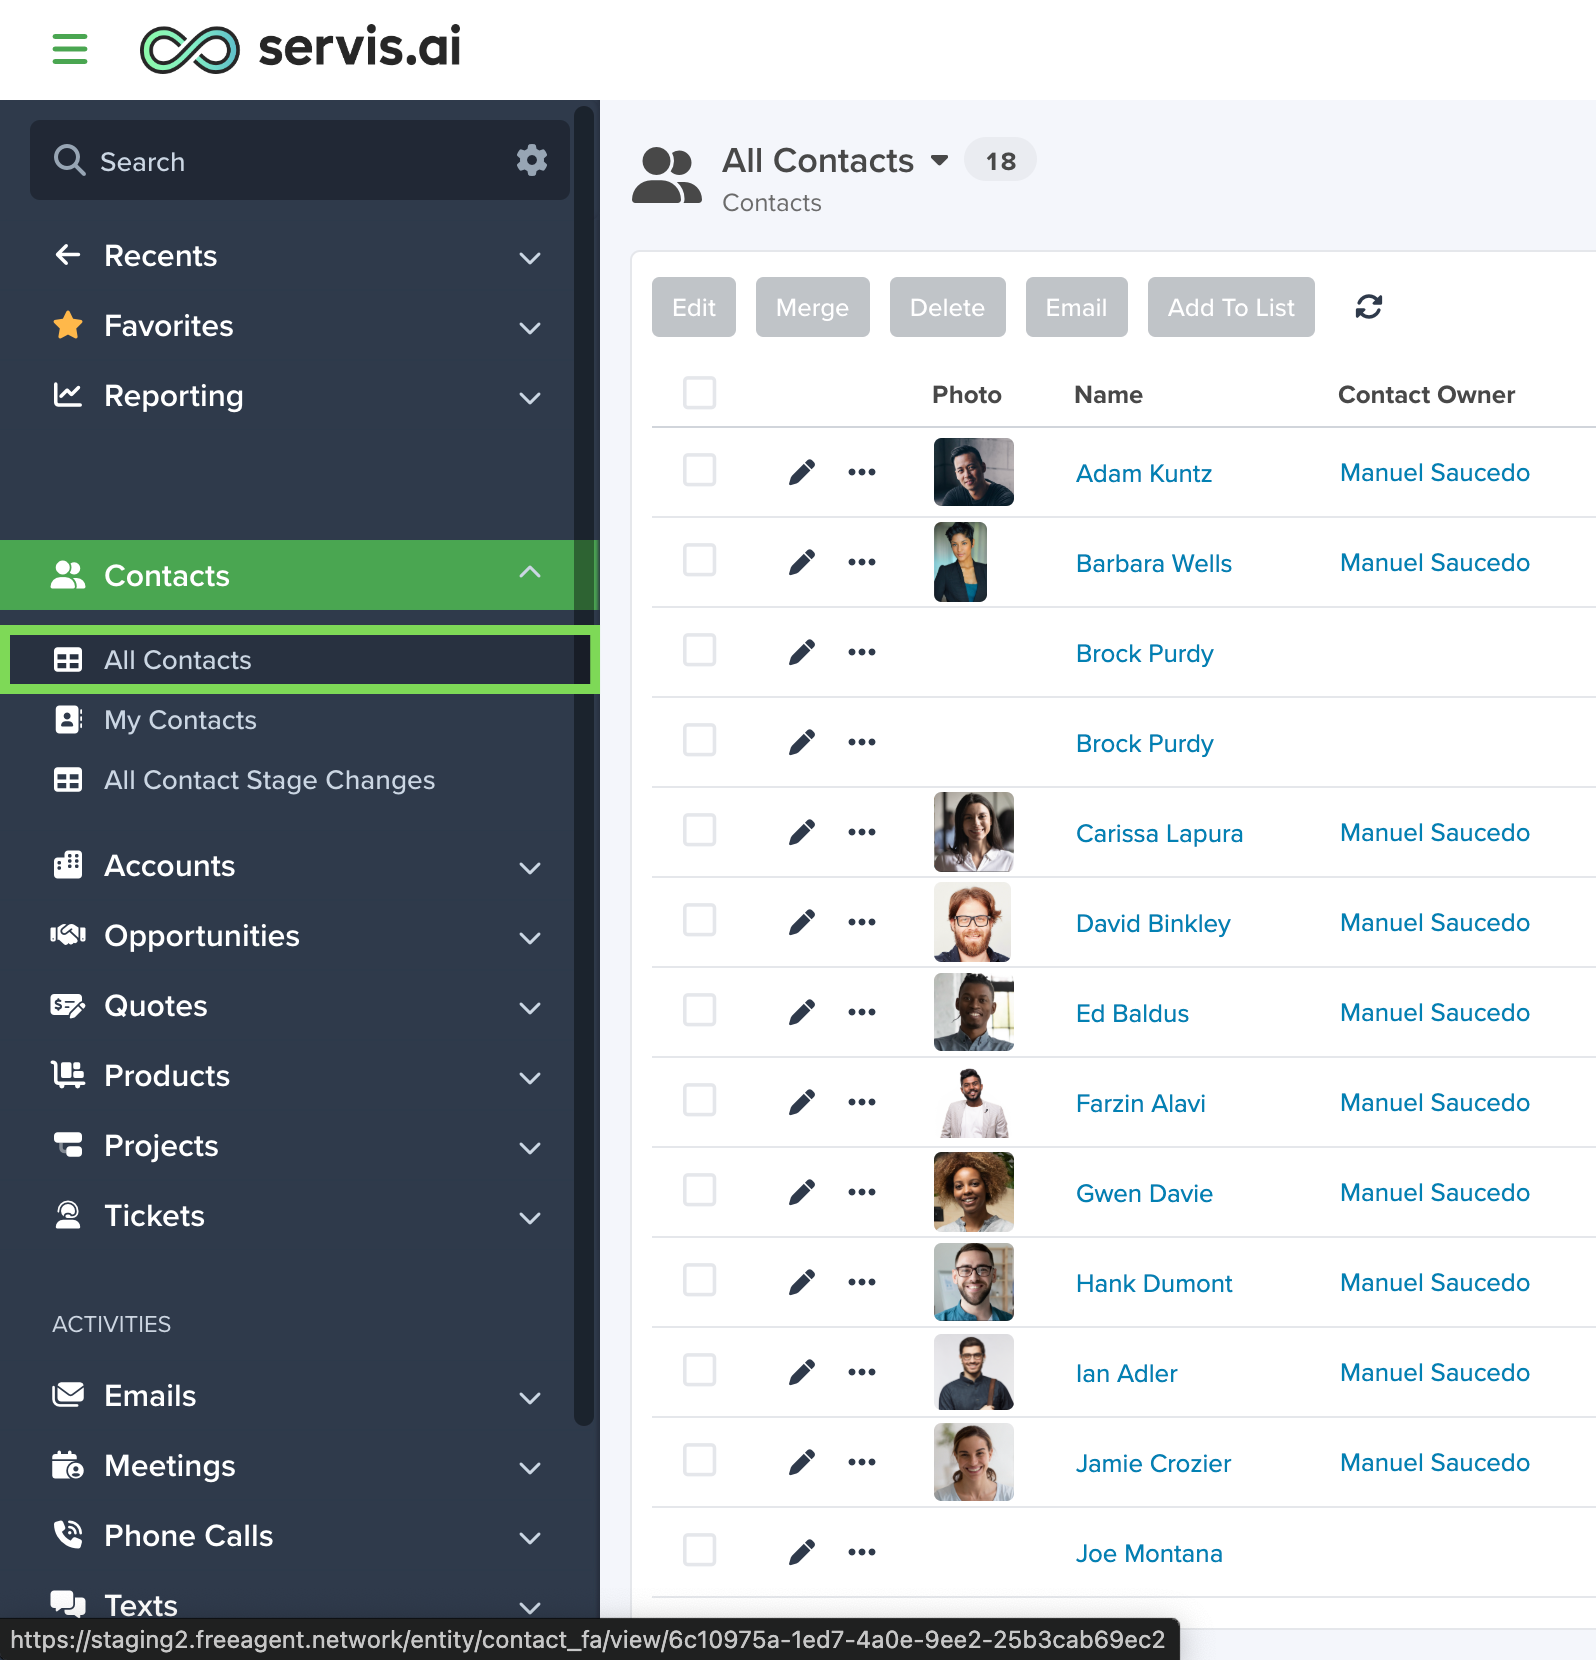
Next, select the +Add button in the top right corner of the All view page to open the App’s form.

Now you can input the specific details for the Contact or Account.
Note: If you want to customize the fields or designate which fields are required, see our Form Fields article for instructions.
App Form Example – Contacts Form
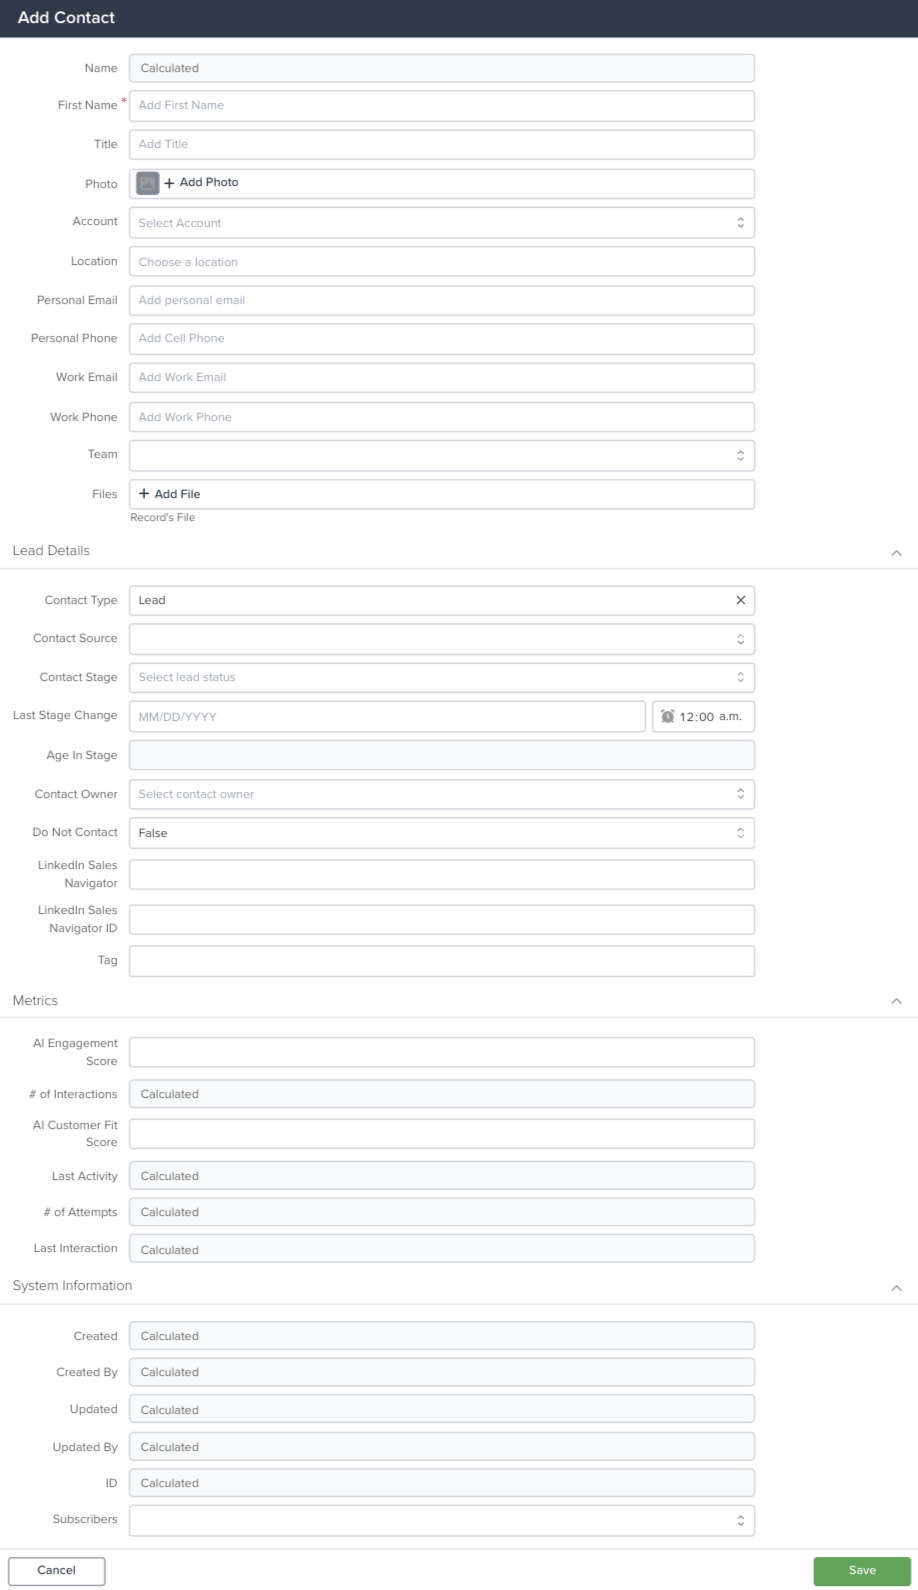
Required Fields
Required Fields are marked with a red asterisk and must contain a value in order to save the record. For example, all Contact records must include a First Name.

Restricted Fields
Restricted Fields will be grayed-out and unselectable.
Note: Fields may be restricted due to form rules or other settings that restrict manually adding data such as Calculated Fields.

In the example above, Name is Calculated Field whose value is determined by combining the First Name and Last Name fields.
Reference Fields
Reference Fields can be used to connect an App record to a different App record. For example, you could have a Reference Field in your Contact records that reference the Account record the Contact belongs to.
To learn more about References Fields, check out our References(Field) or References(Join Field) articles.
Form Sections
Each app form is organized into sections that group related information. For instance, the Contacts App includes:
- General Information – Name, Title, and Contact Type
- Contact Details – Email, Phone Number, and Timezone
- Contact Preferences – Options to opt out of email, text, or phone communications
Save
Once you are done entering all the information you want included in the record, click the Save button to create the record. The record will be accessible from the All view of the App the record was created in.
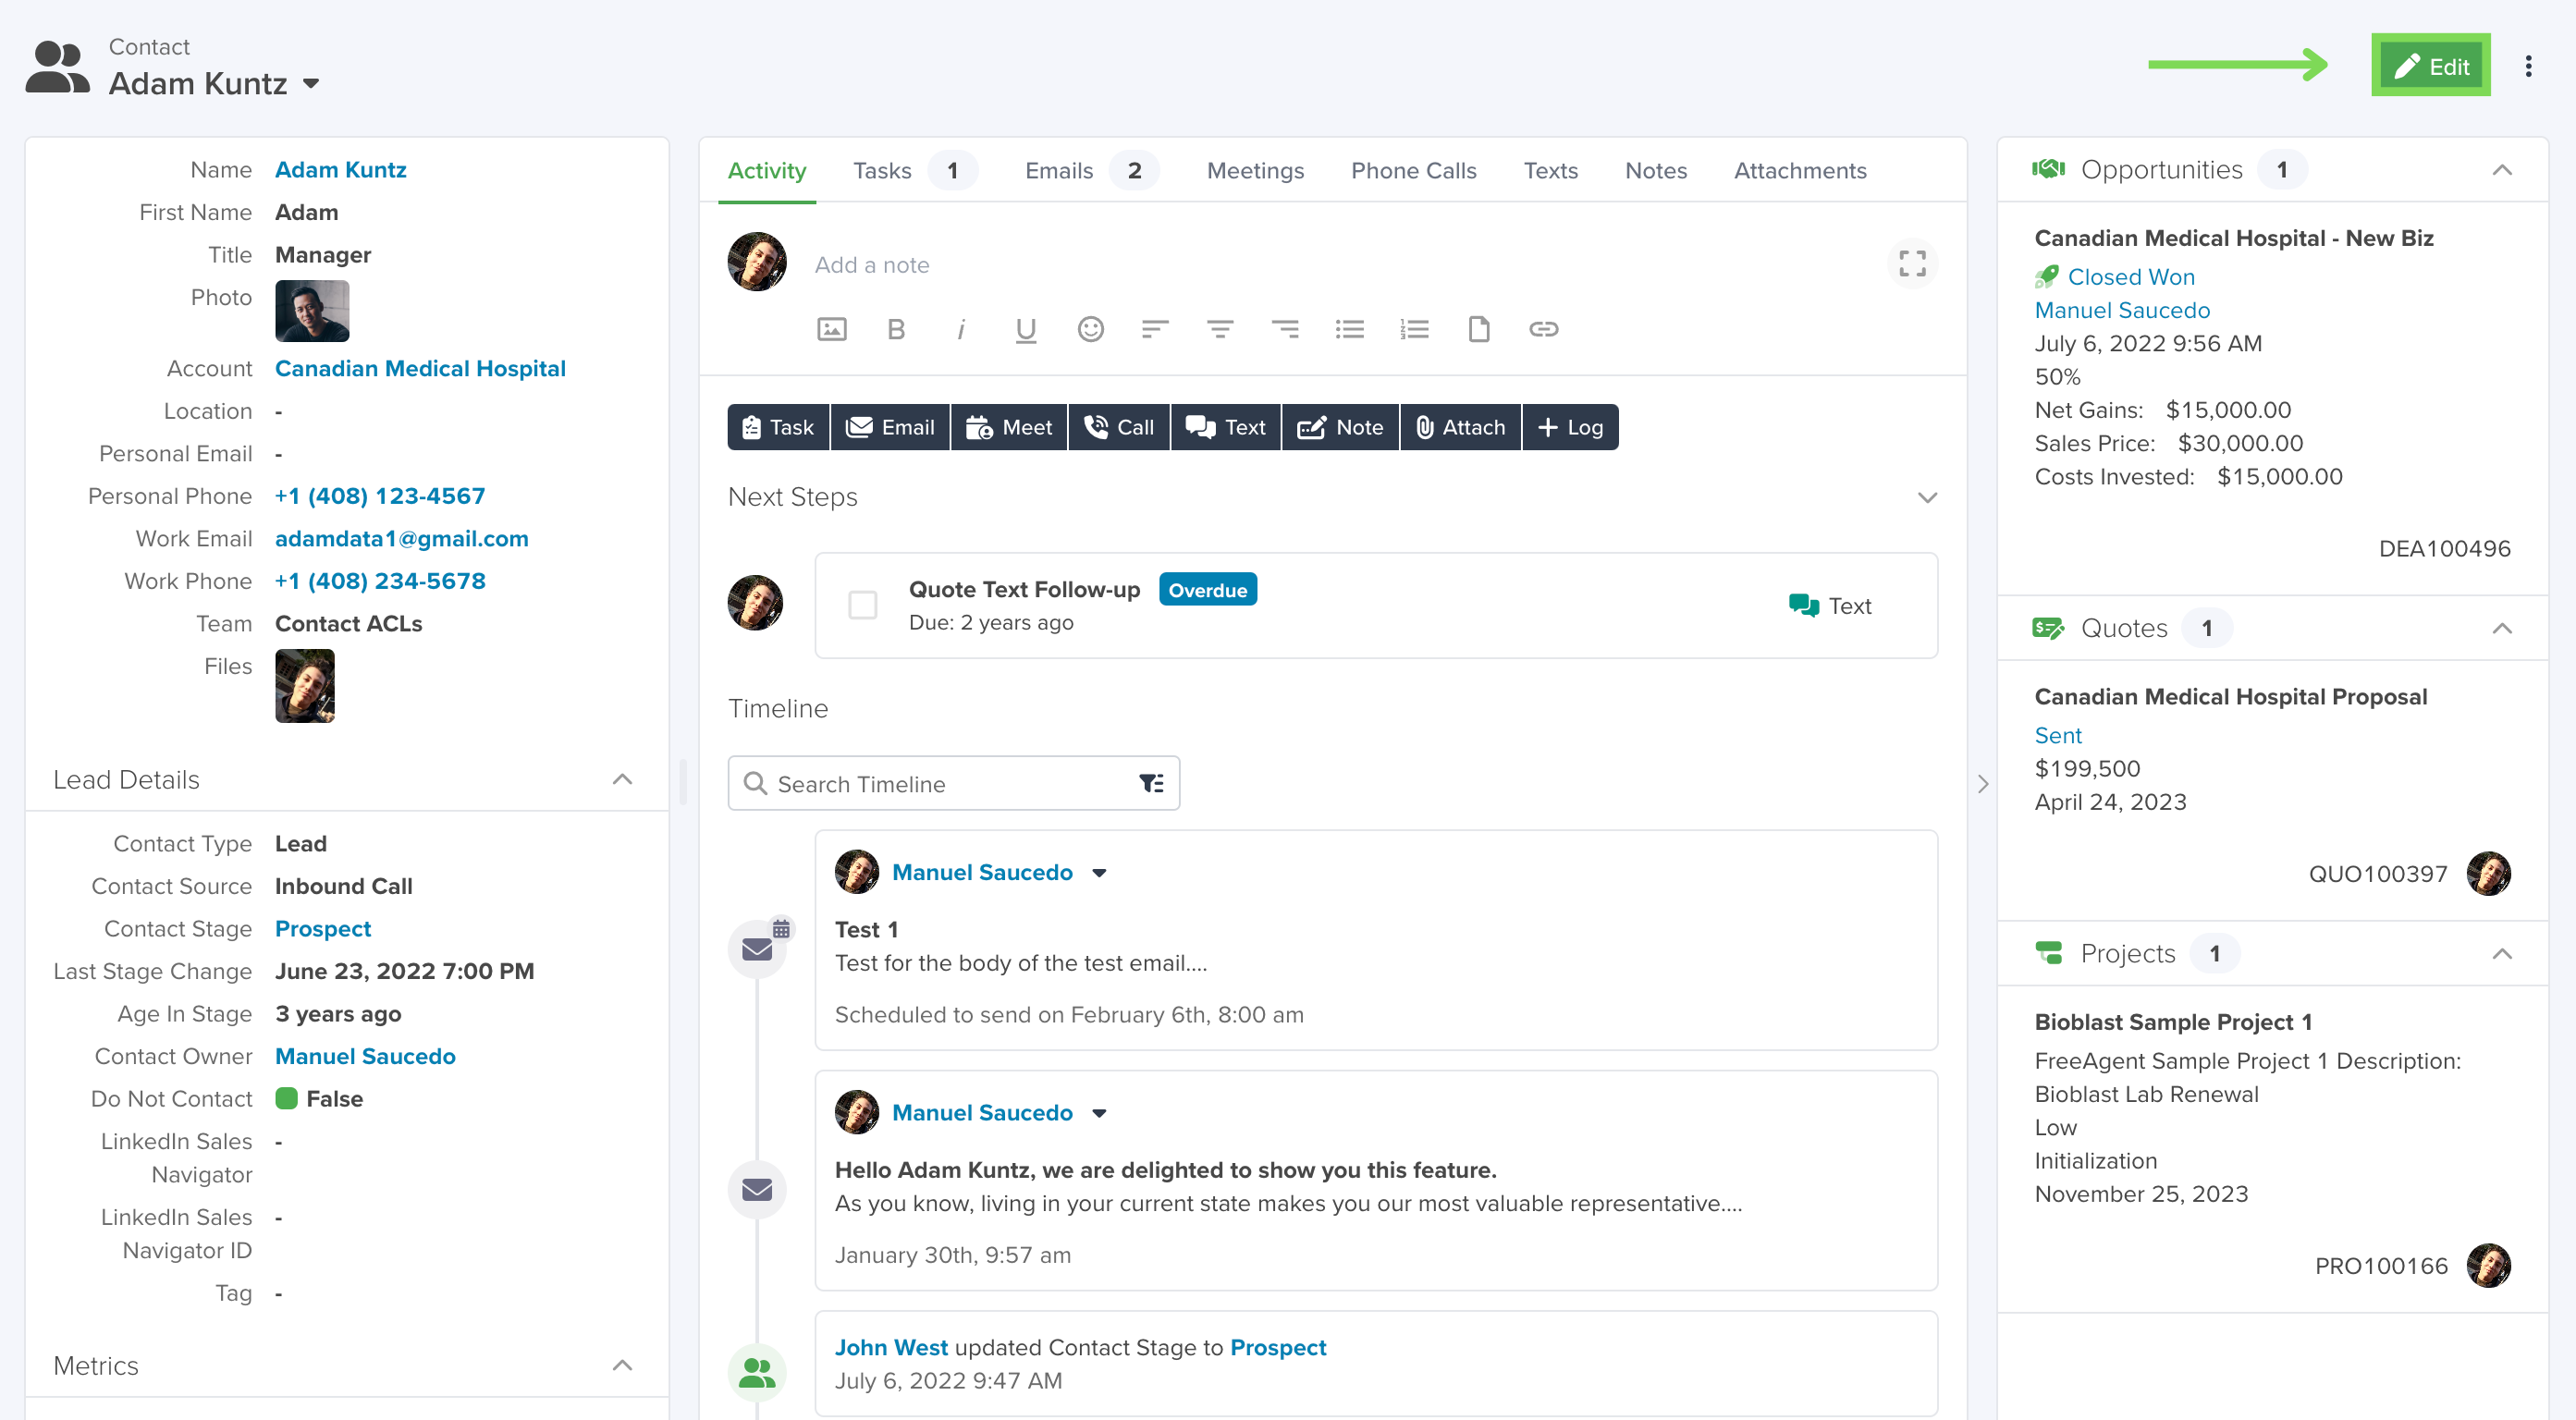
Updating Records
To update an App record, select the Edit button in the top right of the record’s detail page.