Automations can help you and your organization do more, automatically. You can use them to:
- Assign Work
- Do Work Automatically
- Integrate servis.ai to other systems or processes.
User Permissions: Only Administrators can create automations.
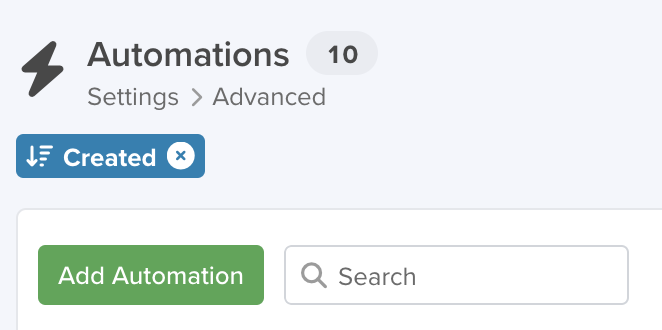
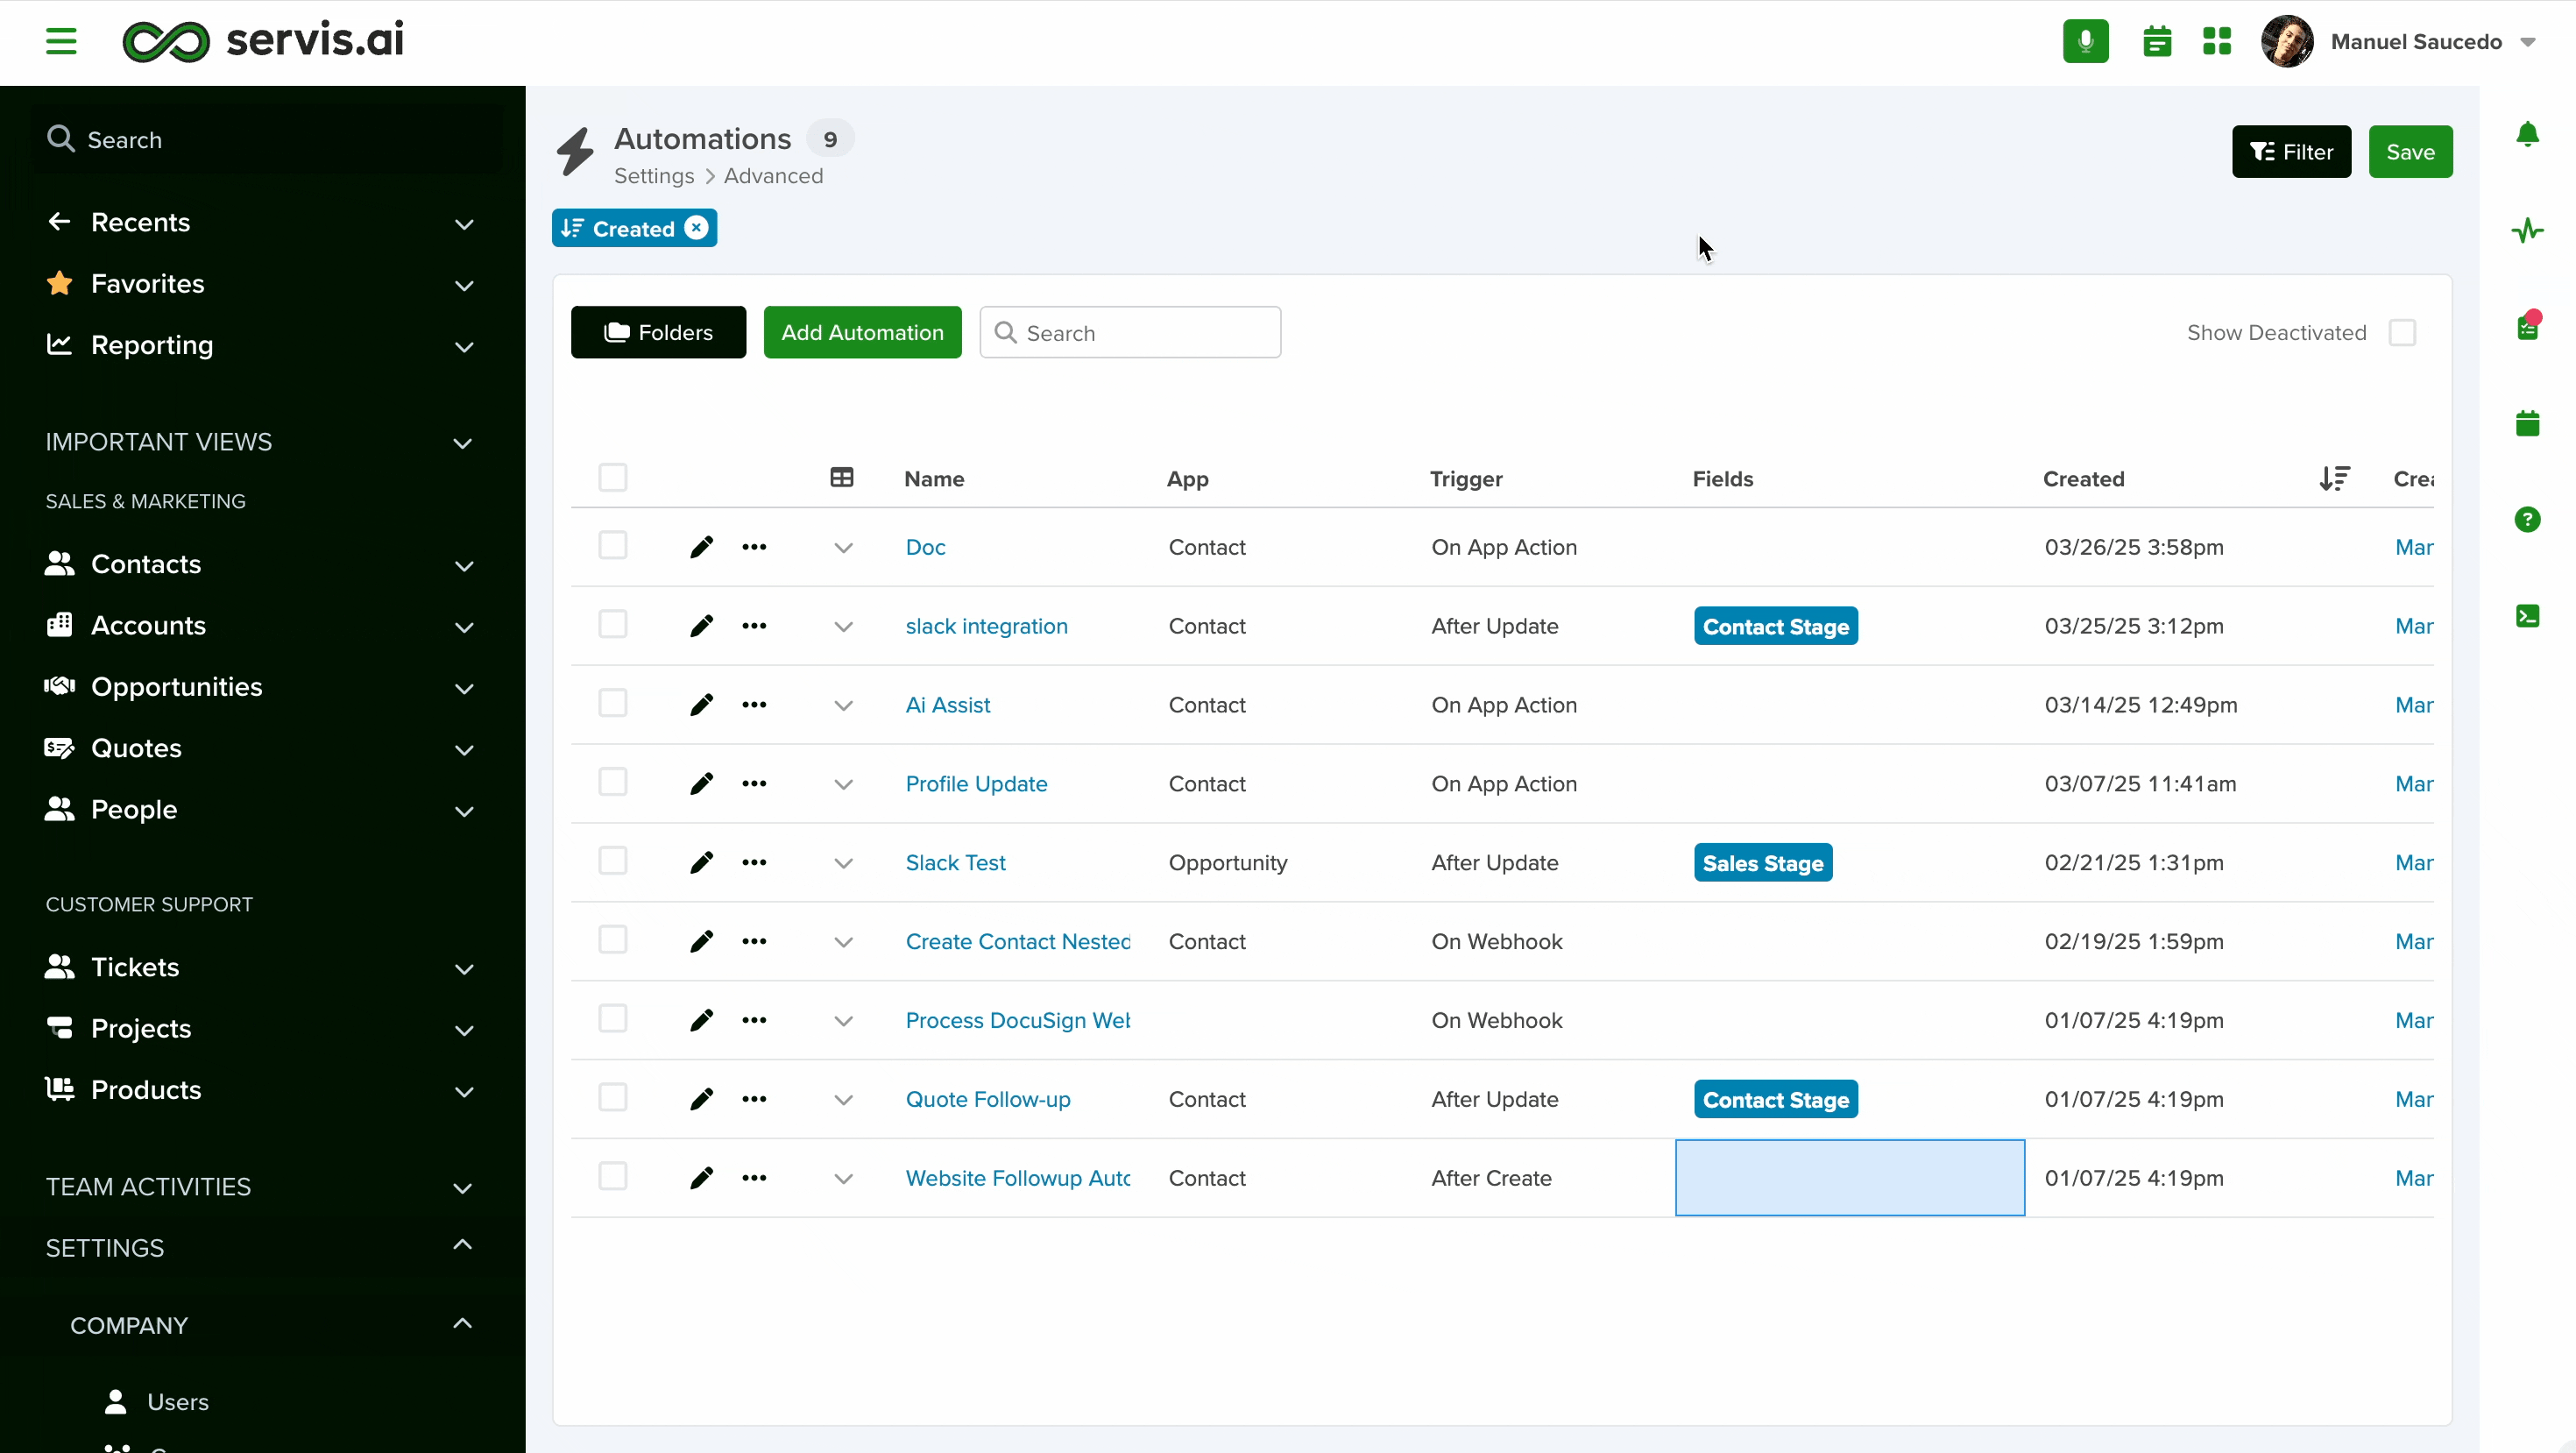
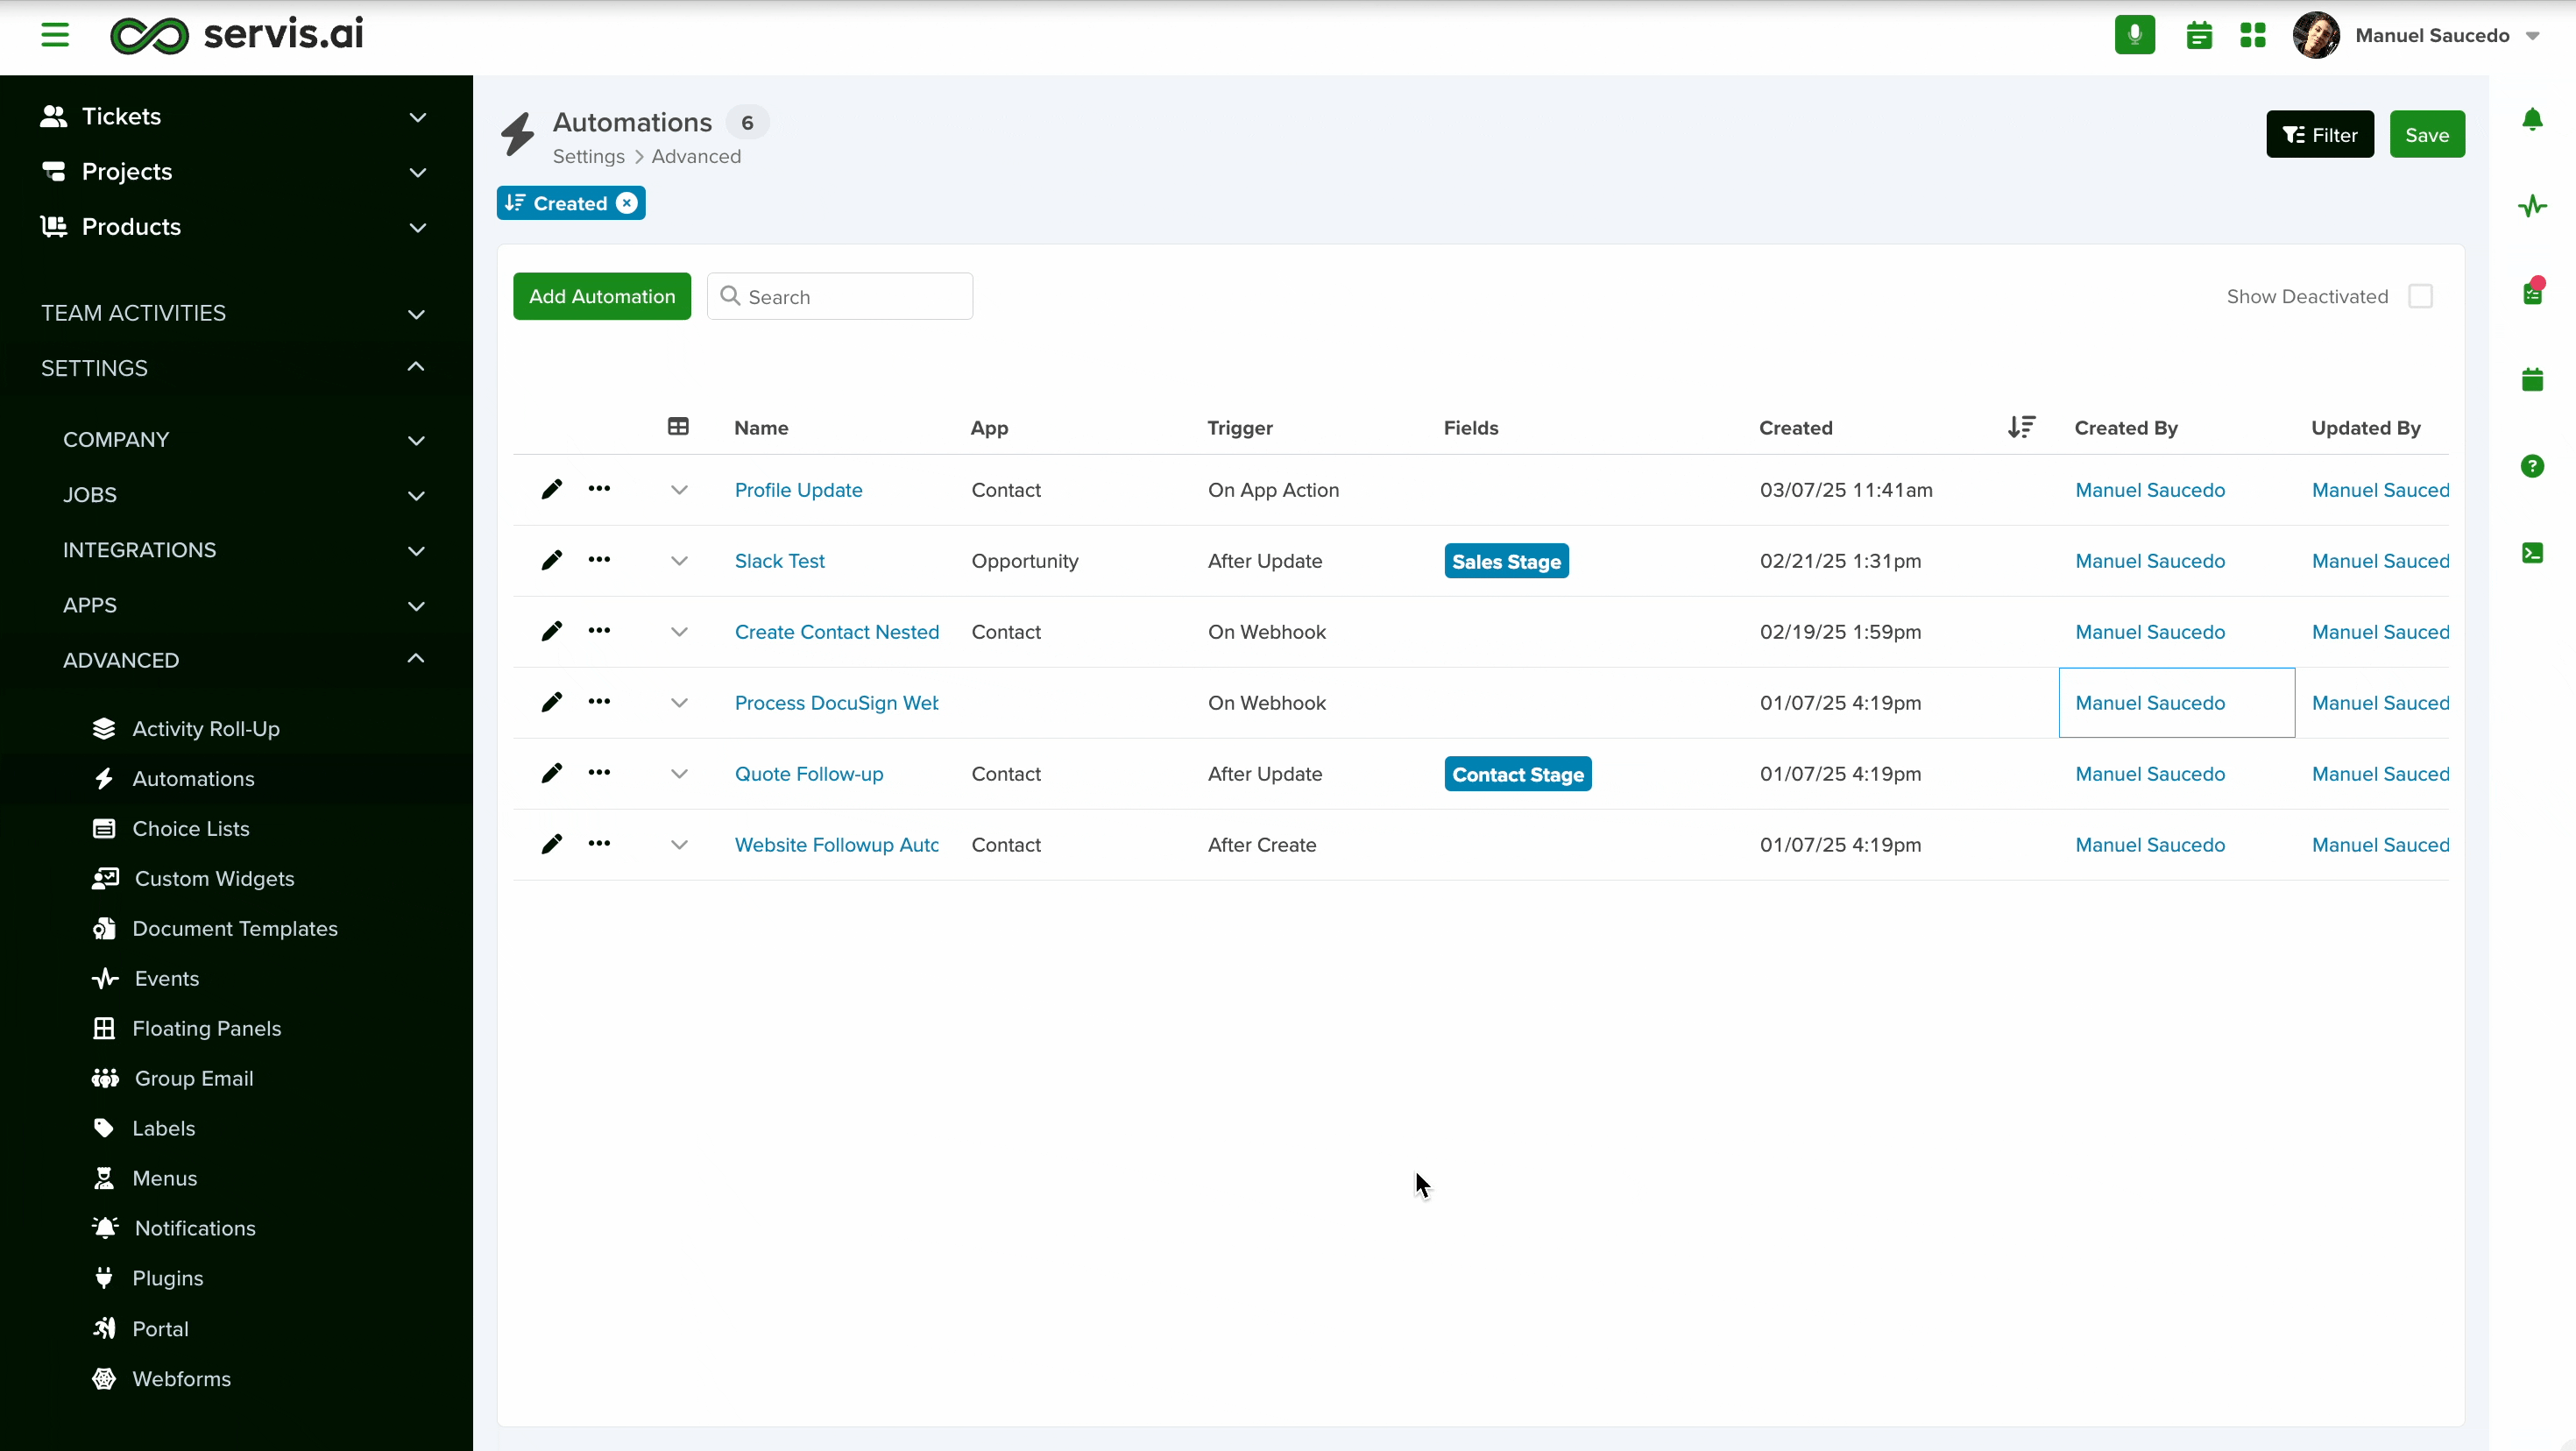
Navigate to Automations
Go to Settings > Advanced > Automations.

Create a New Automation
To get started, click the ‘Add Automation’ button.
Let’s go through all of the fields in the Automation creation panel.
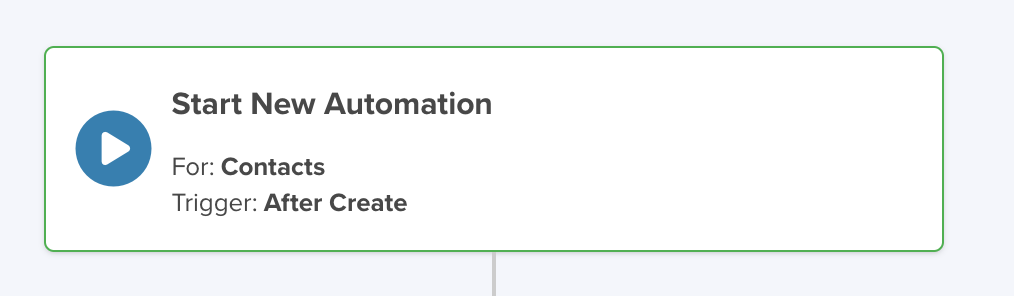
Start
When you create a new automation it starts with the settings for the “Start” panel.
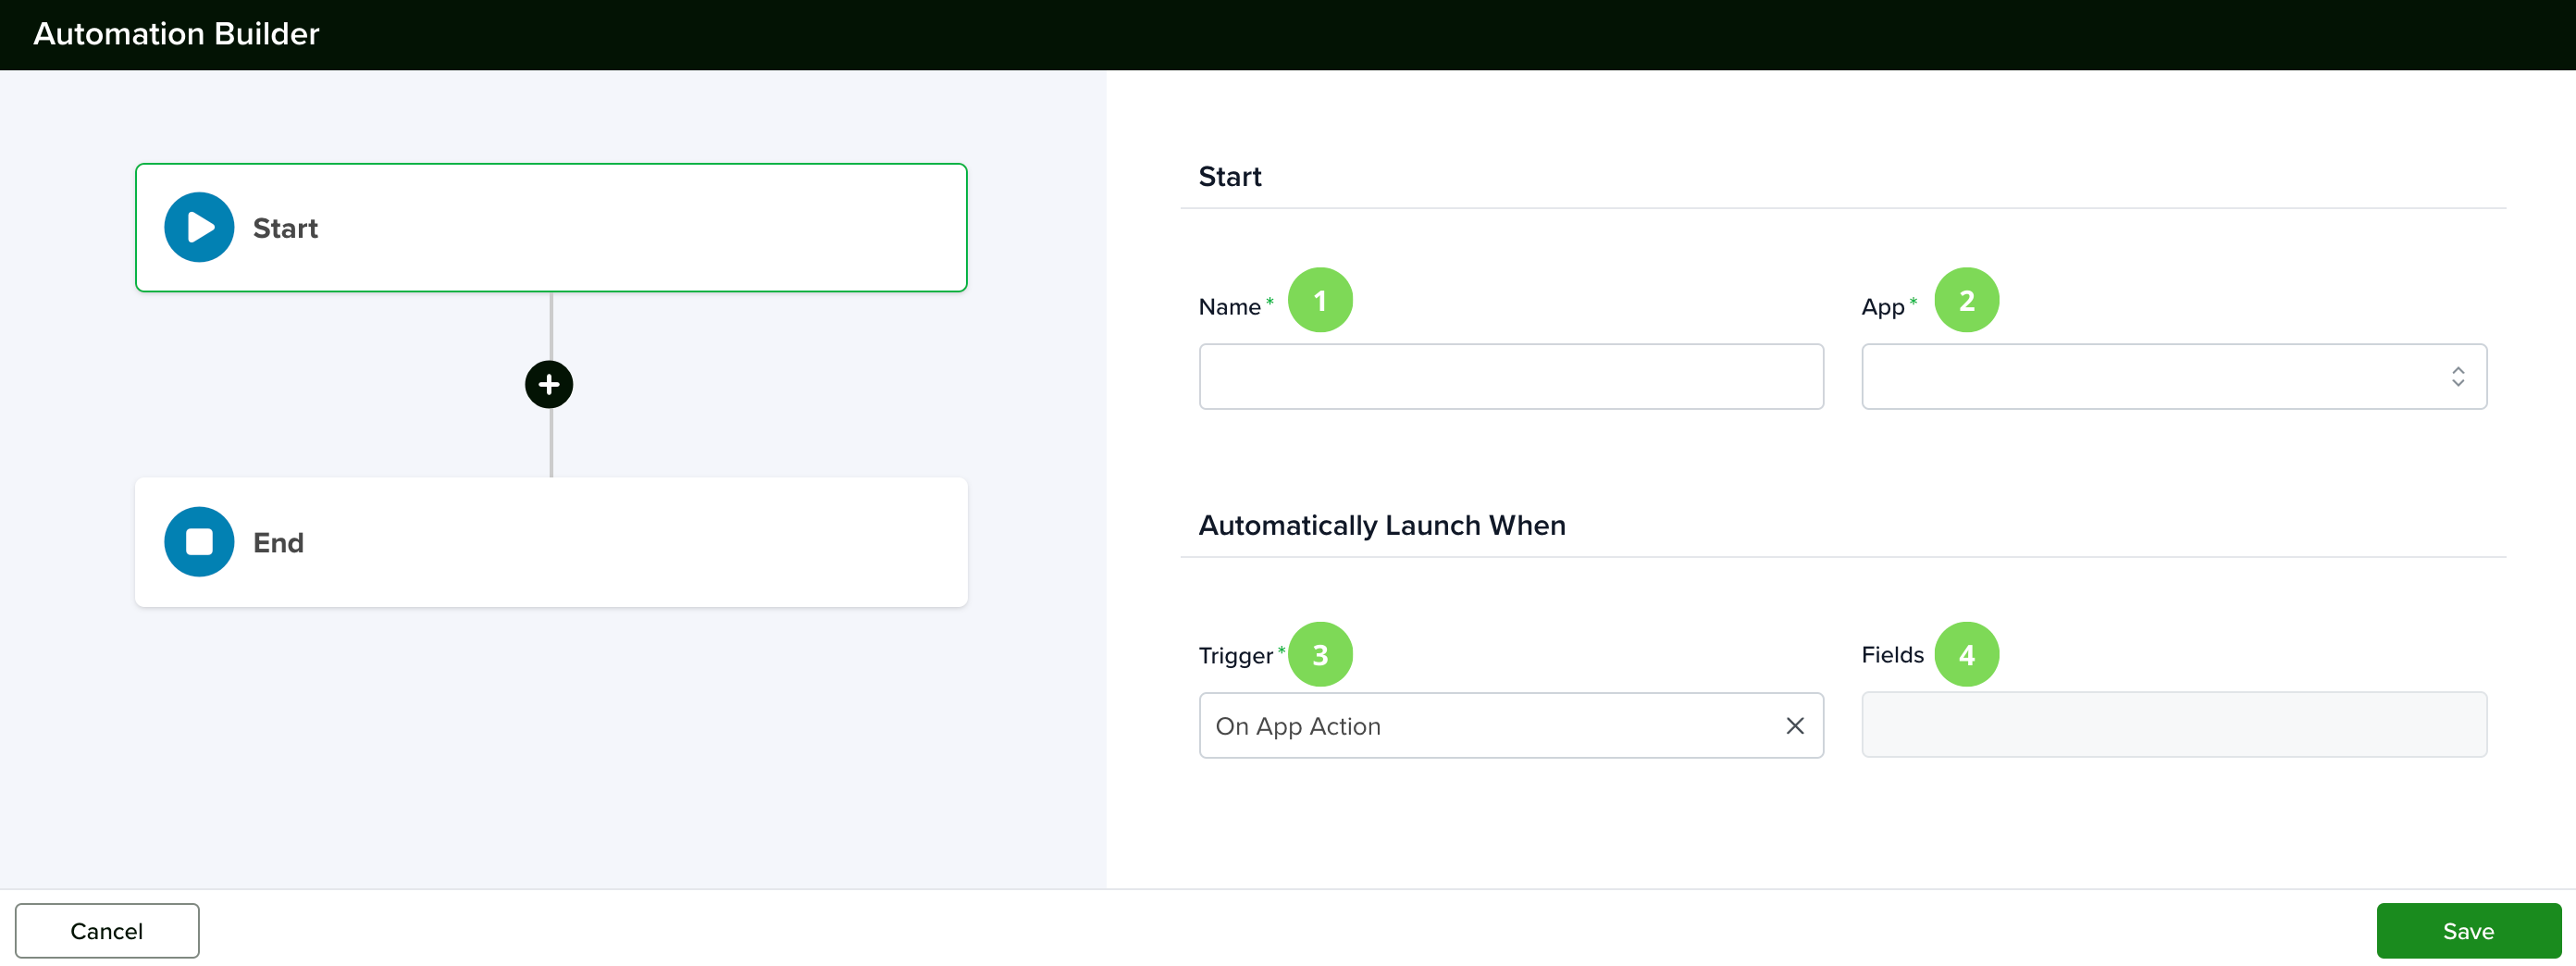
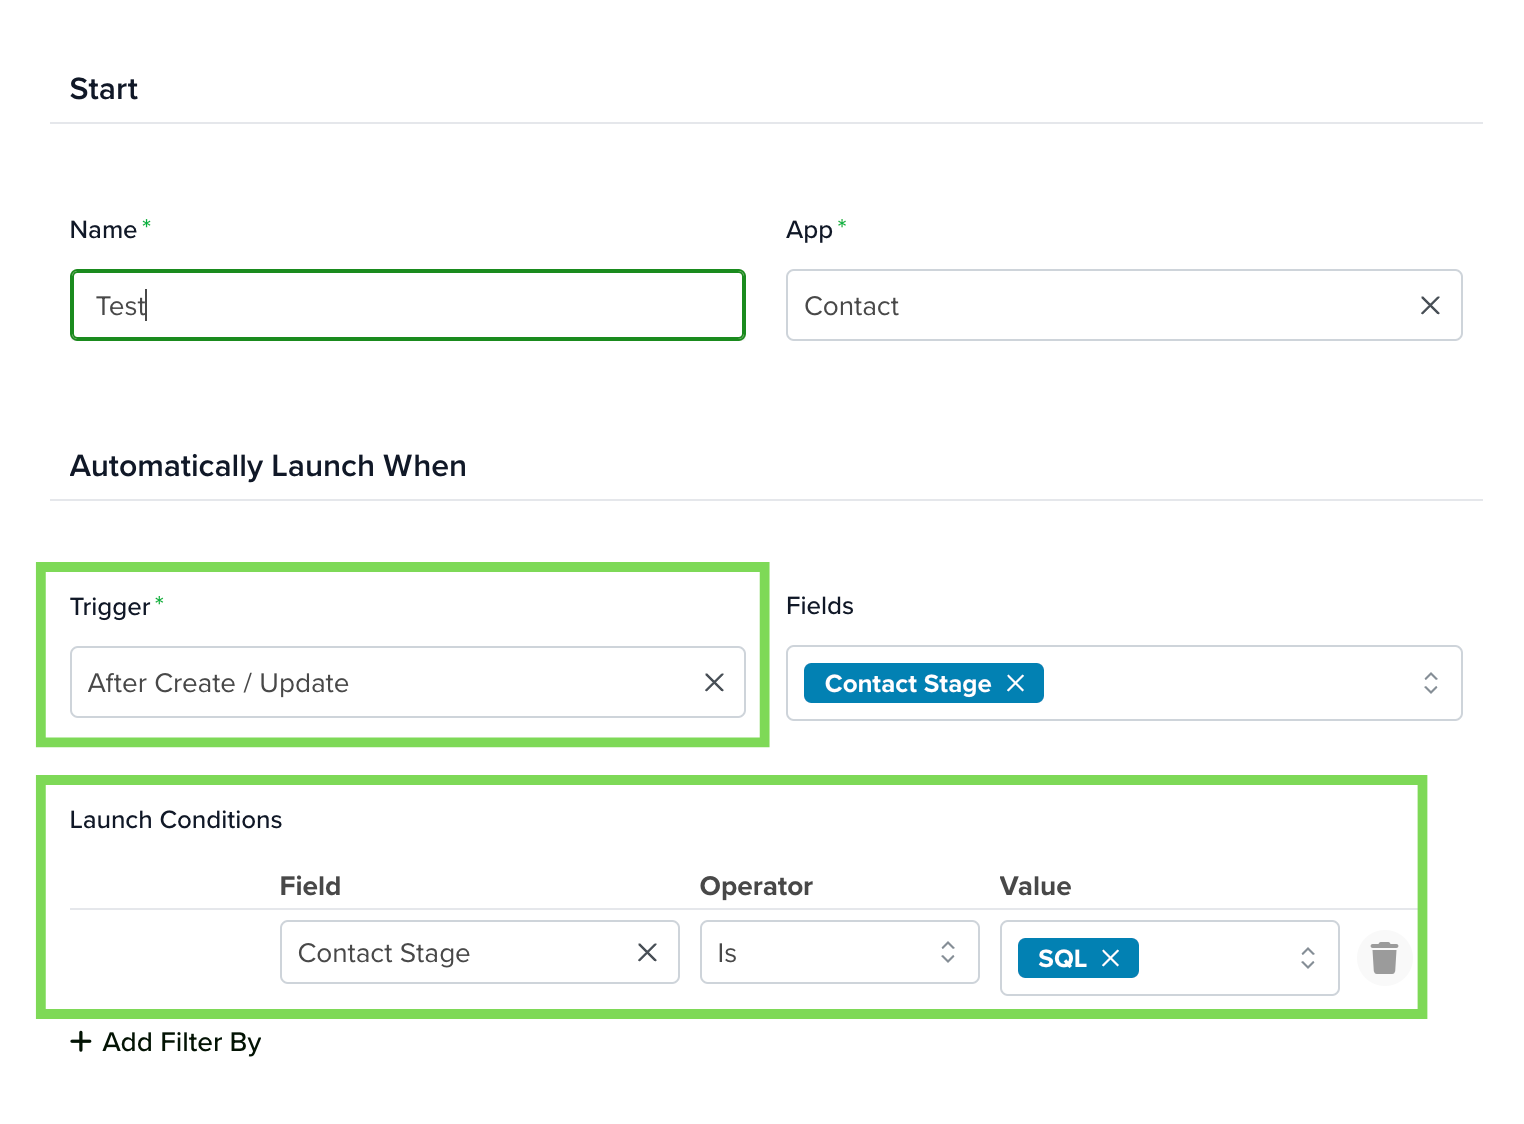
1. Name
Give your automation a name.
2. App
Choose the application you’d like to apply the automation to from the dropdown.
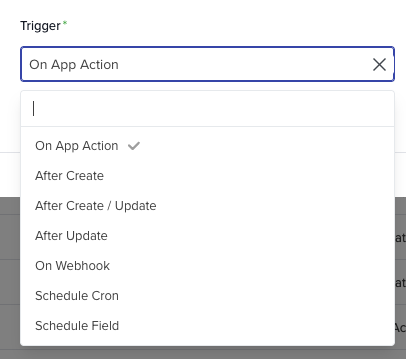
3. Trigger
Now you will specify when this automation should be triggered. The following table describes each trigger option available in this step.
| TRIGGER | DESCRIPTION |
| On App Action | As soon as you click the App Action Button, the automation will be triggered. |
| After Create | As soon as you create a new record on the specified App, the automation will occur. |
| After Create / Update | Combines the ‘After Create’ and ‘After Update’ triggers into a single one. Recommended when a single automation needs to consider both scenarios. |
| After Update | When a change in the selected field is detected, the automation will take place. |
| On Webhook | Requires Webhook. The automation will occur as soon as the Webhook gets triggered. |
| Schedule Field | It is used for scheduling periodic automation runs based on system fields with date and time stamps. Fields like “Created”, “Updated”, or “Due Date” |
| Schedule Cron | Type a Cron Expression to make the automation under specific time intervals |
To learn more about App Actions, please visit the following tutorial:
App Actions
4. Fields
For triggers that involve an ‘Update’, you must select one or more fields that will activate the automation when they are updated and meet the specified conditions (if applicable). The available fields will correspond to the App selected earlier.
Conditions
Depending on the chosen trigger, you can add conditions to control when the automation runs. For this example, with the “After Create/Update” trigger, you can set specific conditions that must be met before the automation executes.
You can also create conditions that will stop the automation from running. Click on the “End” action in the left pane to create the conditions.
Triggers and their Available Conditions
| Trigger | Available Conditions |
| On App Action |
|
| After Create |
|
| After Create/Update |
|
| After Update |
|
| On Webhook |
|
| Schedule Field |
|
The specified rules operate inclusively, meaning all defined conditions must be met for the automation to trigger or conclude. To customize your automation, simply click ‘Add Conditions’ and configure your set of rules accordingly.
The operators will vary according to the type of field selected. Here is the list of those available:
| Operator | Description | Availability (field type) |
| Is, Is Not, Exists, Does not Exist |
The selected value is included (IS) or excluded (IS NOT) from the filter results. The value (Exists) or (Does not Exist).
|
|
| <=, >= |
Less Than or Equal To; Greater Than or Equal To, will return records that fall above or below the selected value. |
|
| Between |
This will return all the records that fall between a given range of numbers or a range of dates. |
|
| Period |
Returns the records for a specified period, such as Last Week or This Month. |
|
| Relative |
From X to X days, months, or years. |
|
| After / Before |
All the records fall before or after the specified date. |
|
Add Actions
To incorporate actions into your automation:
- Click the plus sign (+) in the right-hand pane to access the Actions menu.
- Define the specific actions that should occur when your previously set conditions are met.
- Choose from a variety of action types to suit your automation needs.
- Combine multiple actions or use a single action, depending on your requirements.
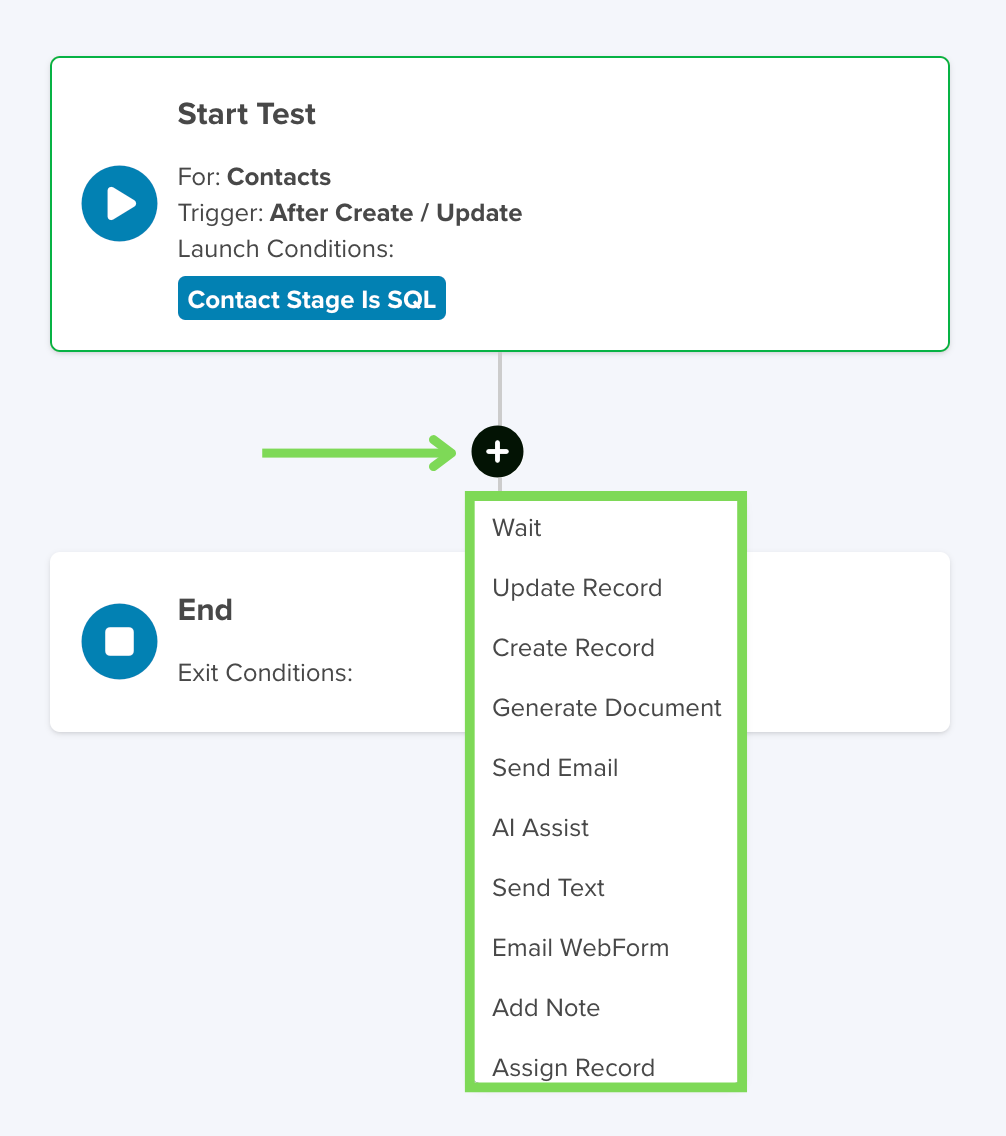
Note: The actions will always run in order from top to bottom.
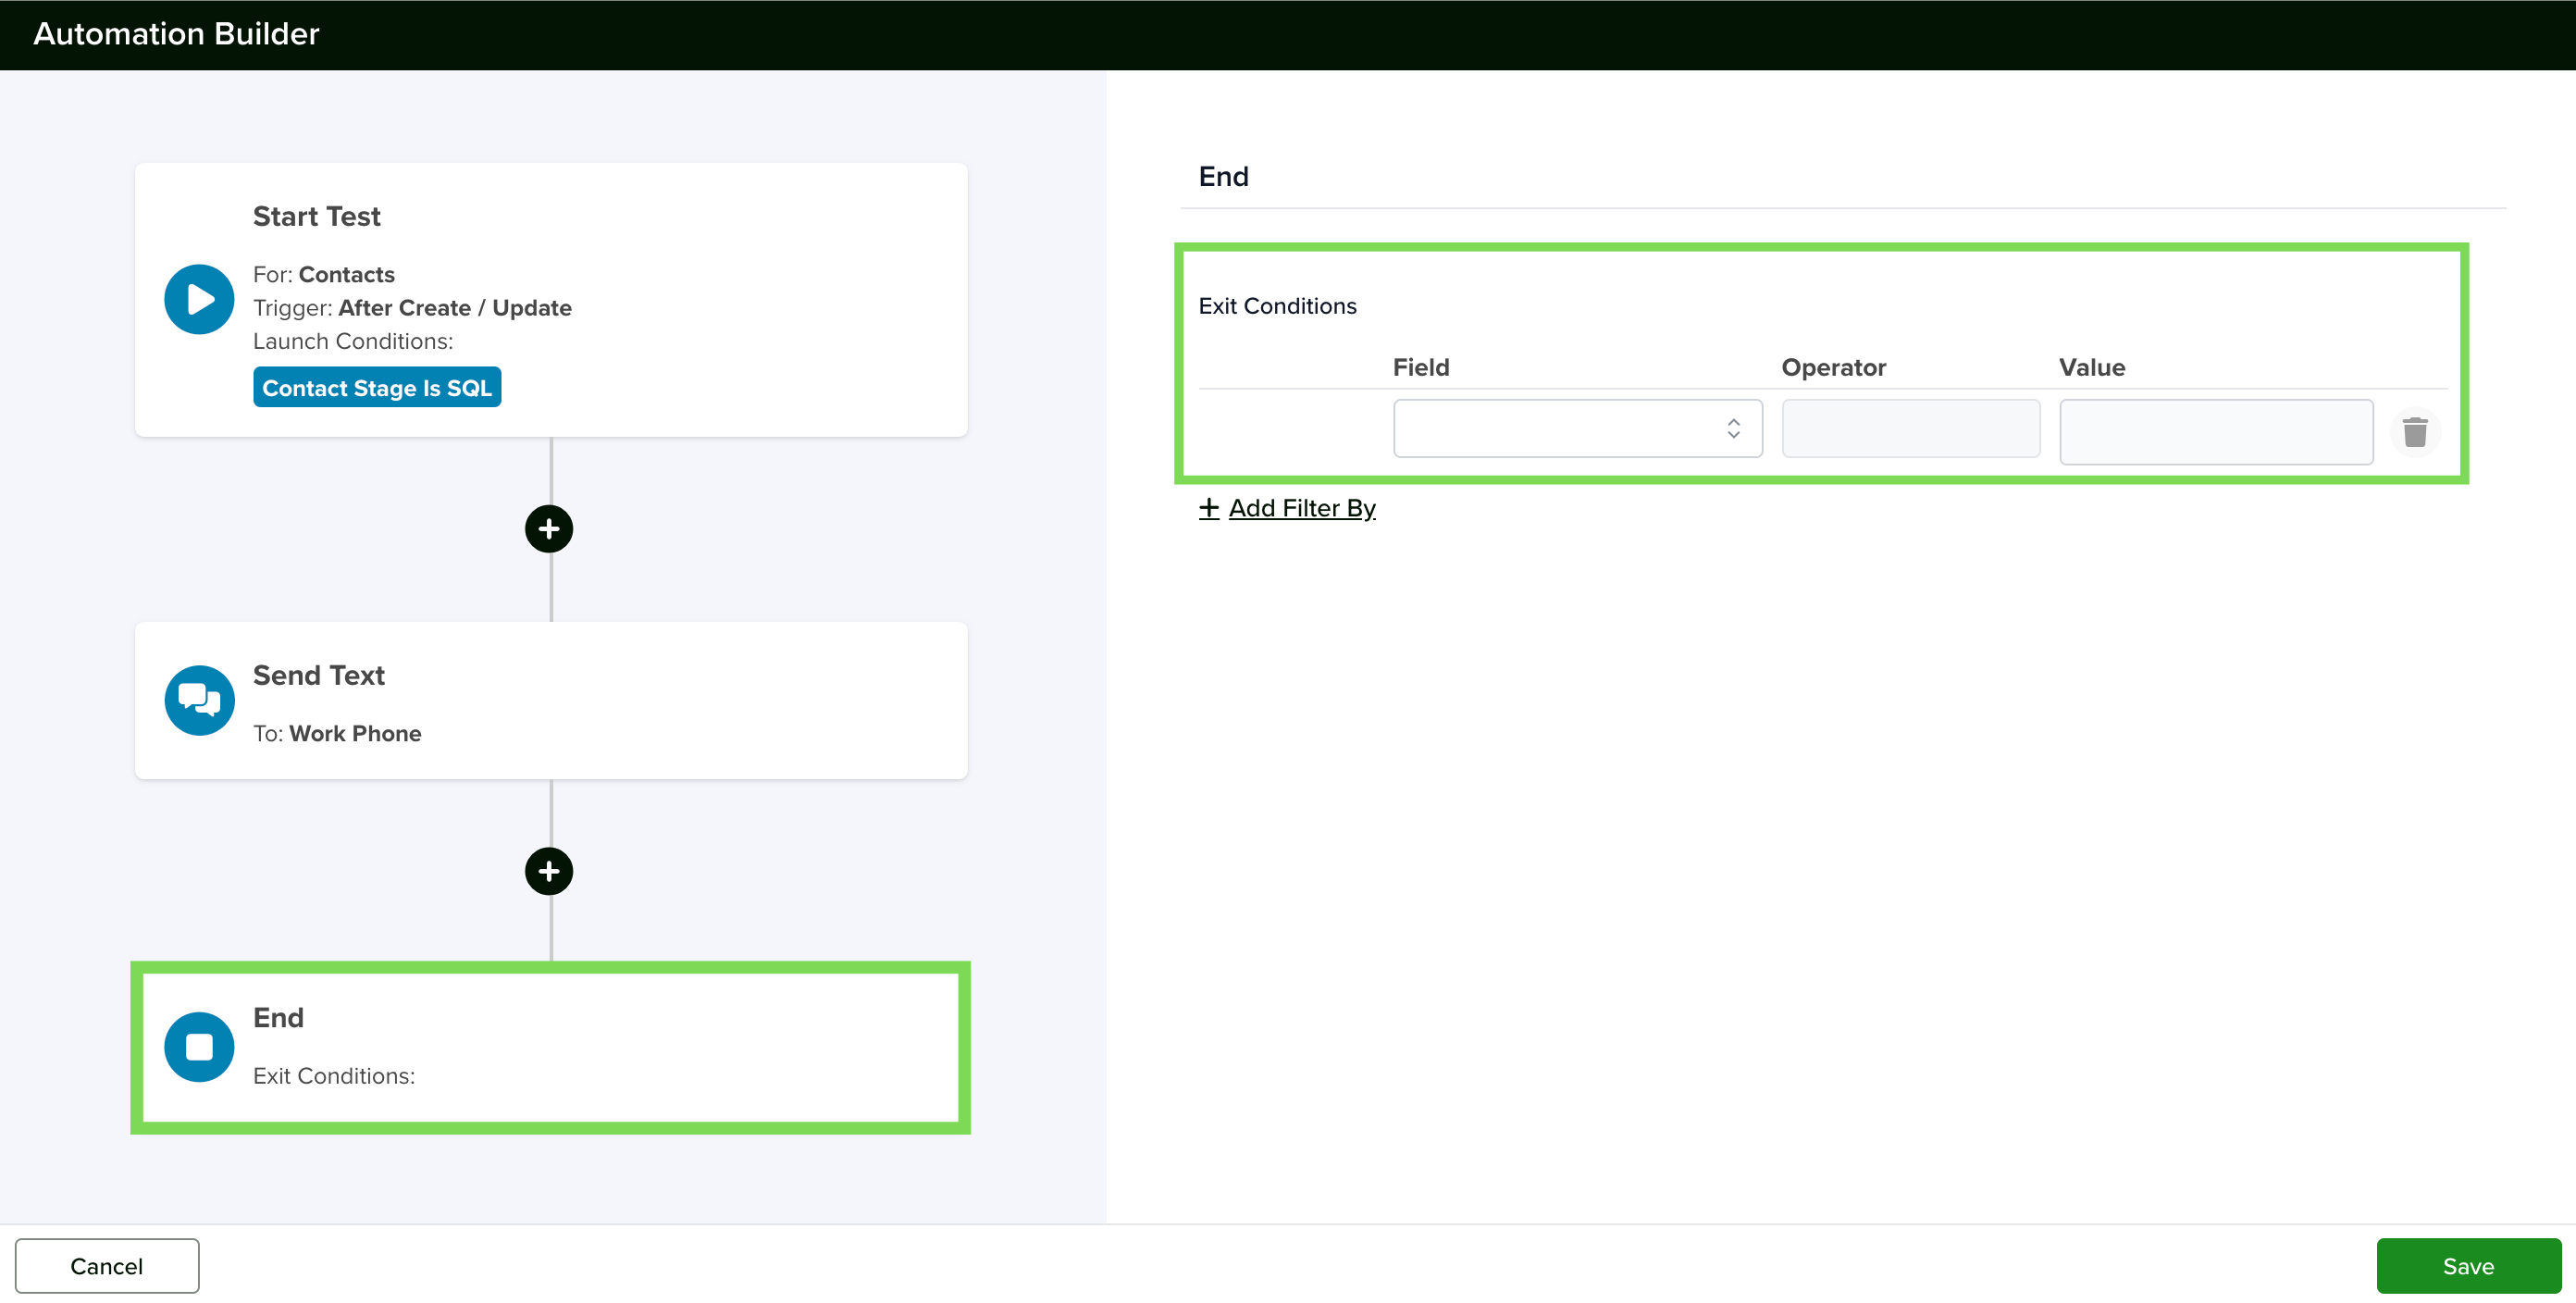
End

The End action is the final step an automation performs before it completes. It is different from the Stop If action in the following way:
Stop If Action:
- Checks conditions for a single previous action rather than all prior actions.
- Can be triggered by a record different from the one that initiated the automation (the triggering record).
How to Set Up the End Action
This action lets you set conditions using the fields from the record selected in the Start action. Alternatively, you can leave it without any conditions and use it solely to close the automation.
End Action:
- The End action strictly operates in relation to the triggering record—the record that initiates the automation process.
For example, in this case, the triggering record is the one created using the specified fields defined in its configuration.
- Automatically included as the final step in every automation.
- Can be configured without conditions, simply waiting for all preceding actions to complete before closing the automation.
- If conditions are set, it checks every prior action to determine if the conditions are met, but only concerning the original triggering record.

This means that if the Contact Status of the triggering record changes to “Customer” at any point during the process, the automation will immediately stop.
Edit an Automation
You can update an existing automation at any time to better suit your needs. To edit an automation:
- Go to Settings > Advanced > Automations.
- Click the pencil icon next to the automation you want to modify.
- The Edit Automation window will open, allowing you to review and adjust each Action in the automation.
- Within each Action, you can update the fields as needed.
- Once you’re done, click Save to apply your changes.
Automation Actions – Index
This is your go-to guide for understanding what’s possible within servis.ai automations. This index offers a clear overview of each available action, helping you design smarter, more efficient automations.
Whether you’re automating tasks, updating records, sending emails or Slack alerts, or integrating external tools via webhooks, each action serves a specific purpose.
Click here to go to the Automation Actions Index.
Action Settings
When you select an action in the left pane the settings for that action will appear in the right.
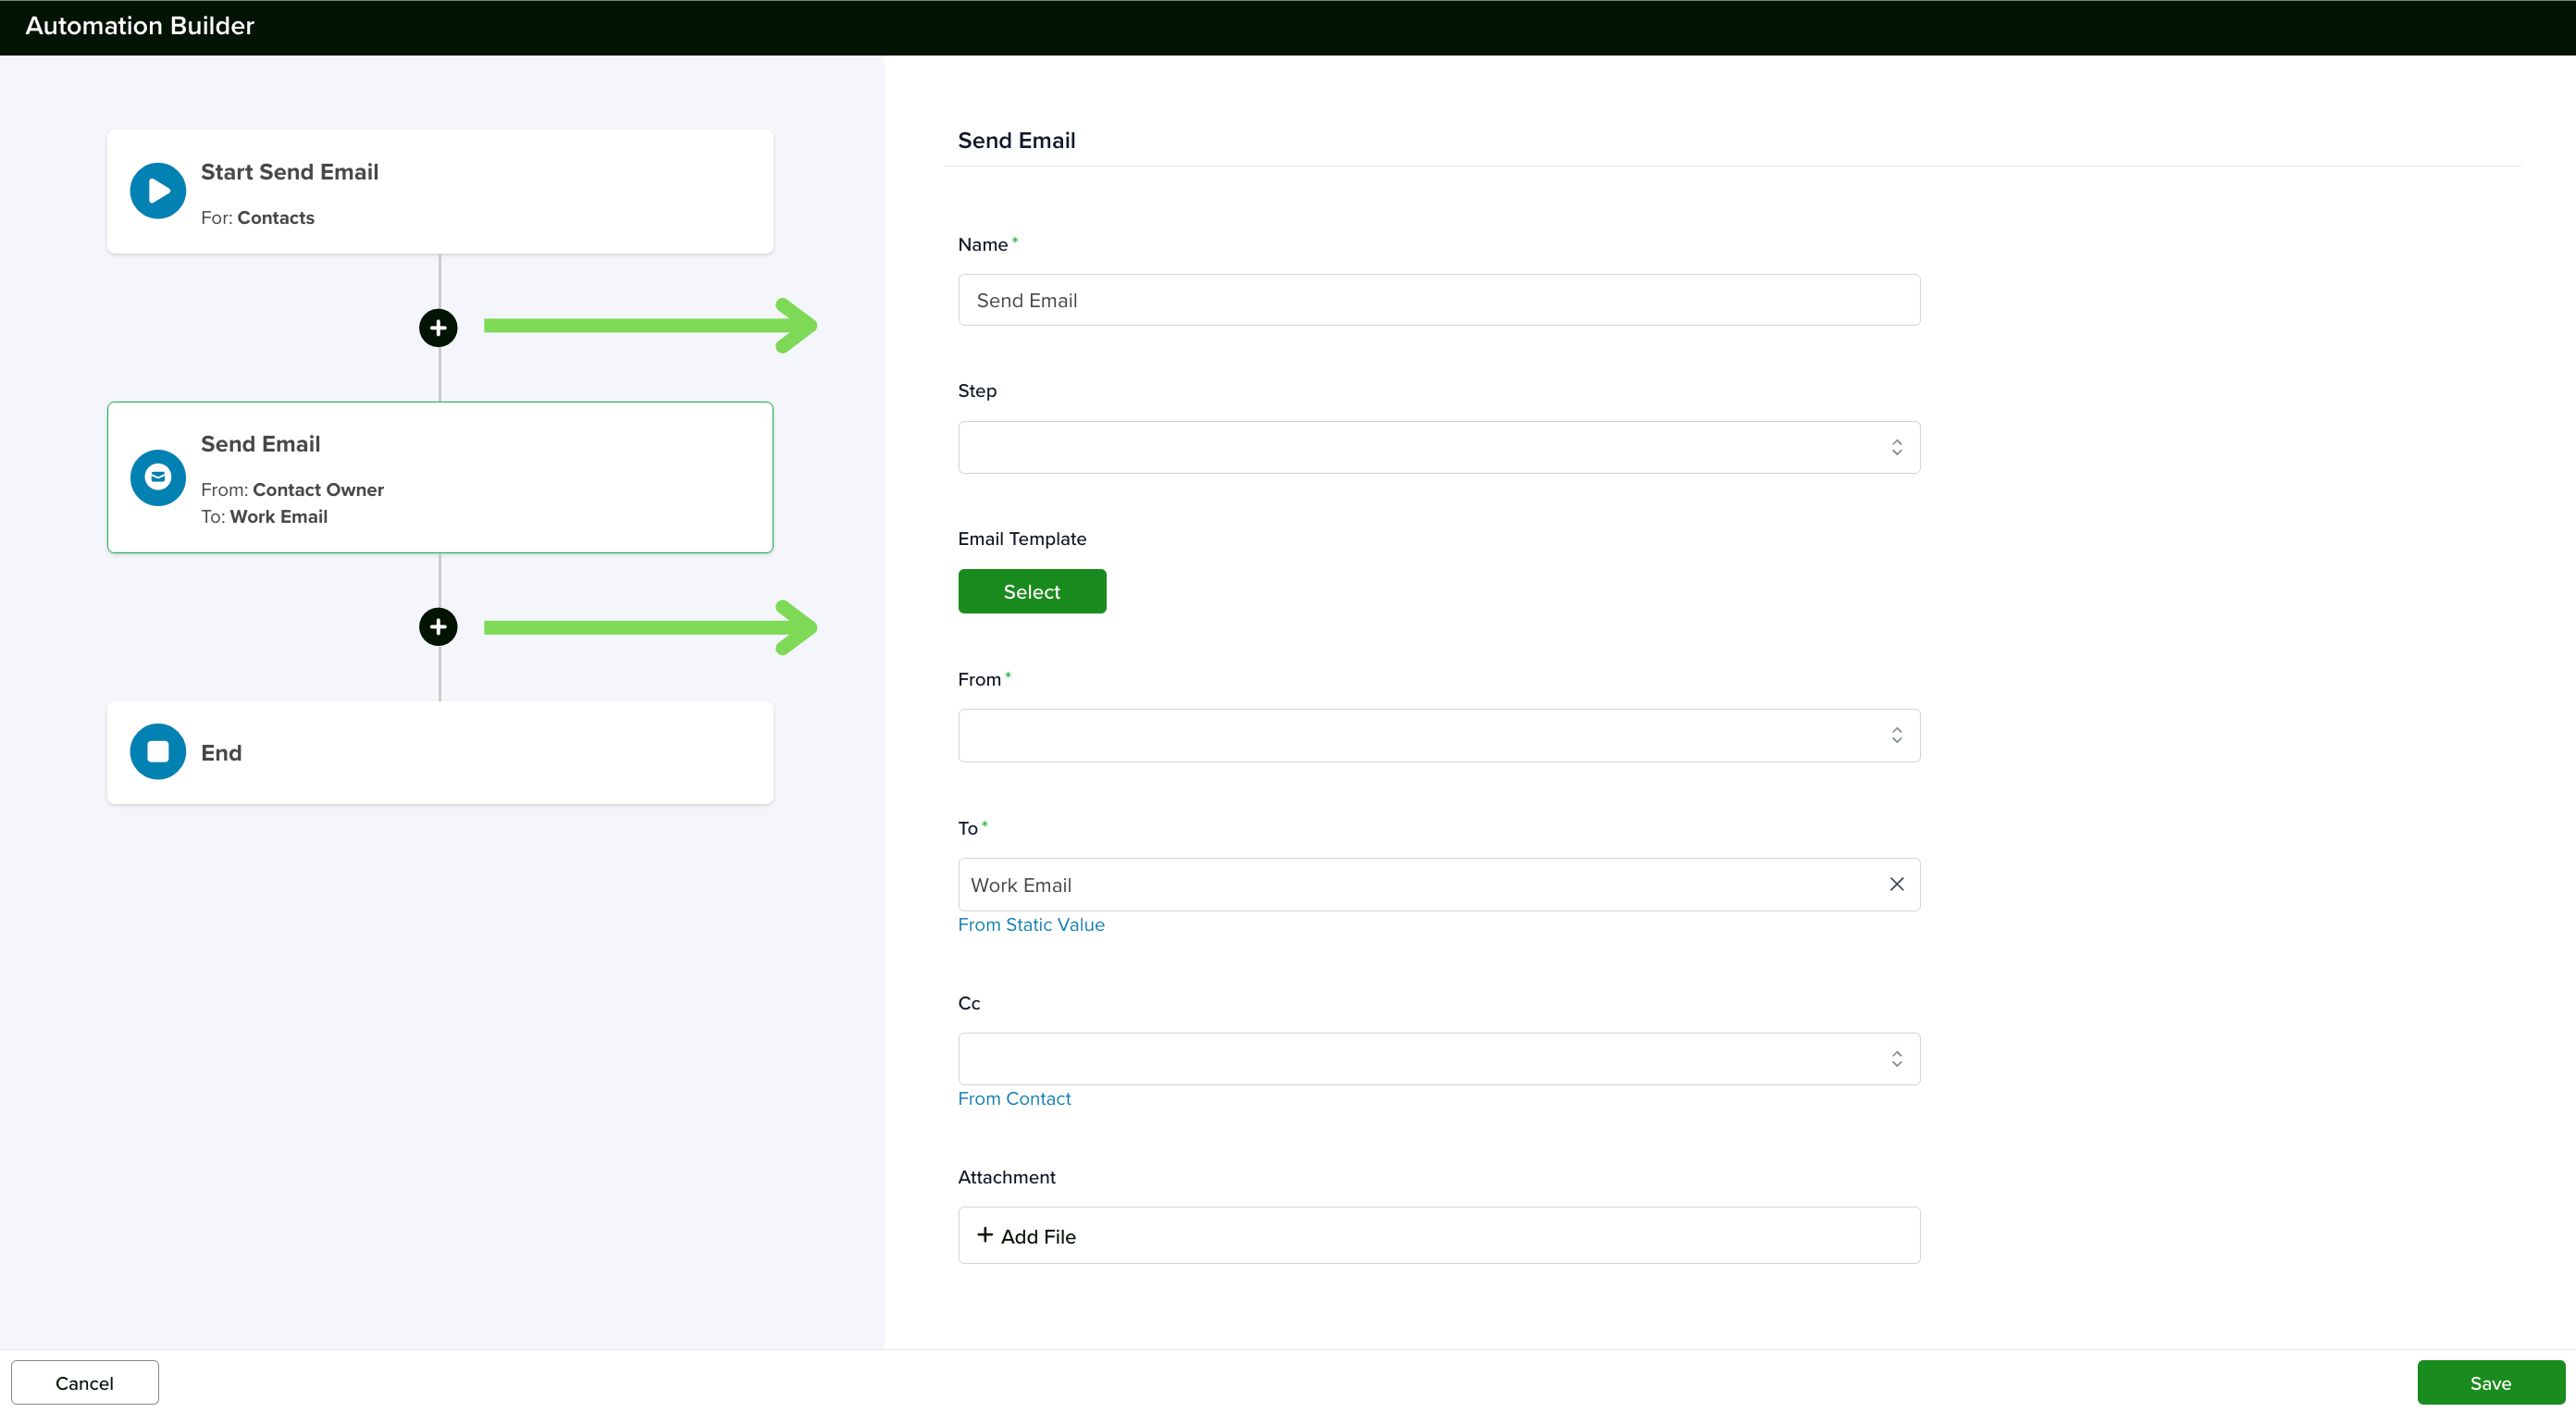
The settings will be different depending on the type of actions you’ve selected. In the example above, the “Send Email” action is chosen. In the settings, the following options are available:
- Name: Define the name of this step in the automation.
- Step: Specify the step number or sequence within the automation.
- Email Template: Select a pre-defined email template.
- From: Choose who the email will be sent from.
- To: Define the recipient, which is set to “Work Email” by default.
- Cc: Optionally add recipients to be copied, with an option to pull from a contact field.
- Attachment: Attach a file to the email.
Automation History


Known Limitations
Automations Not Triggered by Imports on Schedule Fields
Automations that rely on a Schedule Field trigger will not be scheduled or activated when the data is populated via the Import Wizard or a Scheduled Import.
Even if the schedule field is filled in during the import, the automation will not be scheduled and will not run when the scheduled date time is reached.
