The Tasks Activity Type App is a unique tool that stands out with its extensive range of powerful settings and customization options. These features are designed to enhance both your experience and your team’s efficiency when working within the App.
Use Tasks to stay organized and on top of your activities or to assign work to others in your organization.
Where to Access Tasks
There are a few different places you can access Tasks in servis.ai.
1. Right-Hand Menu
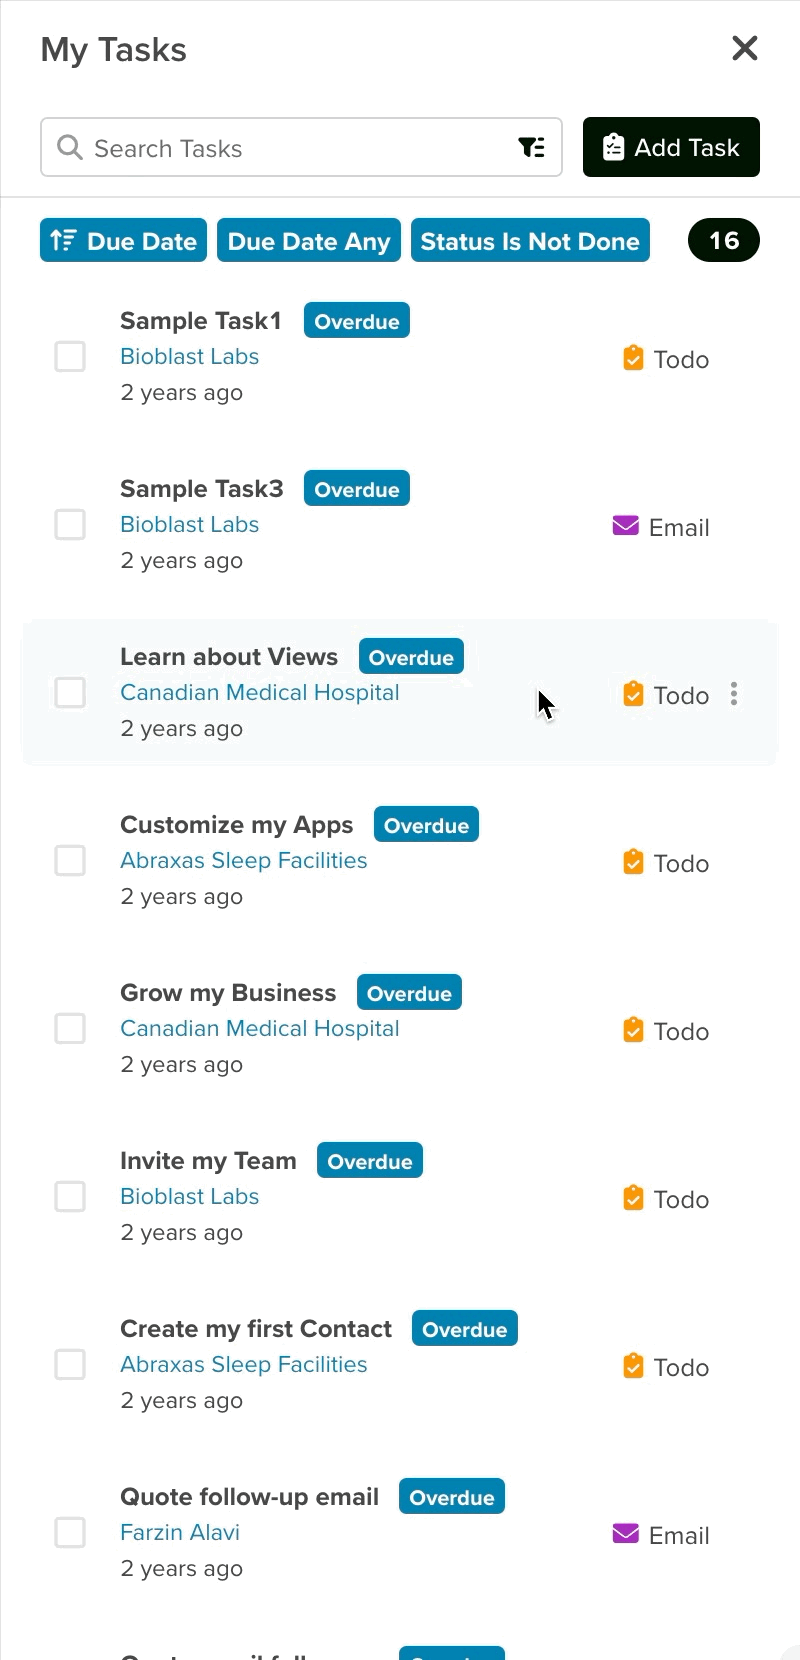
Click on the “My Tasks” icon in the right menu to reveal all of your assigned tasks, as well as all the tasks assigned to your group.
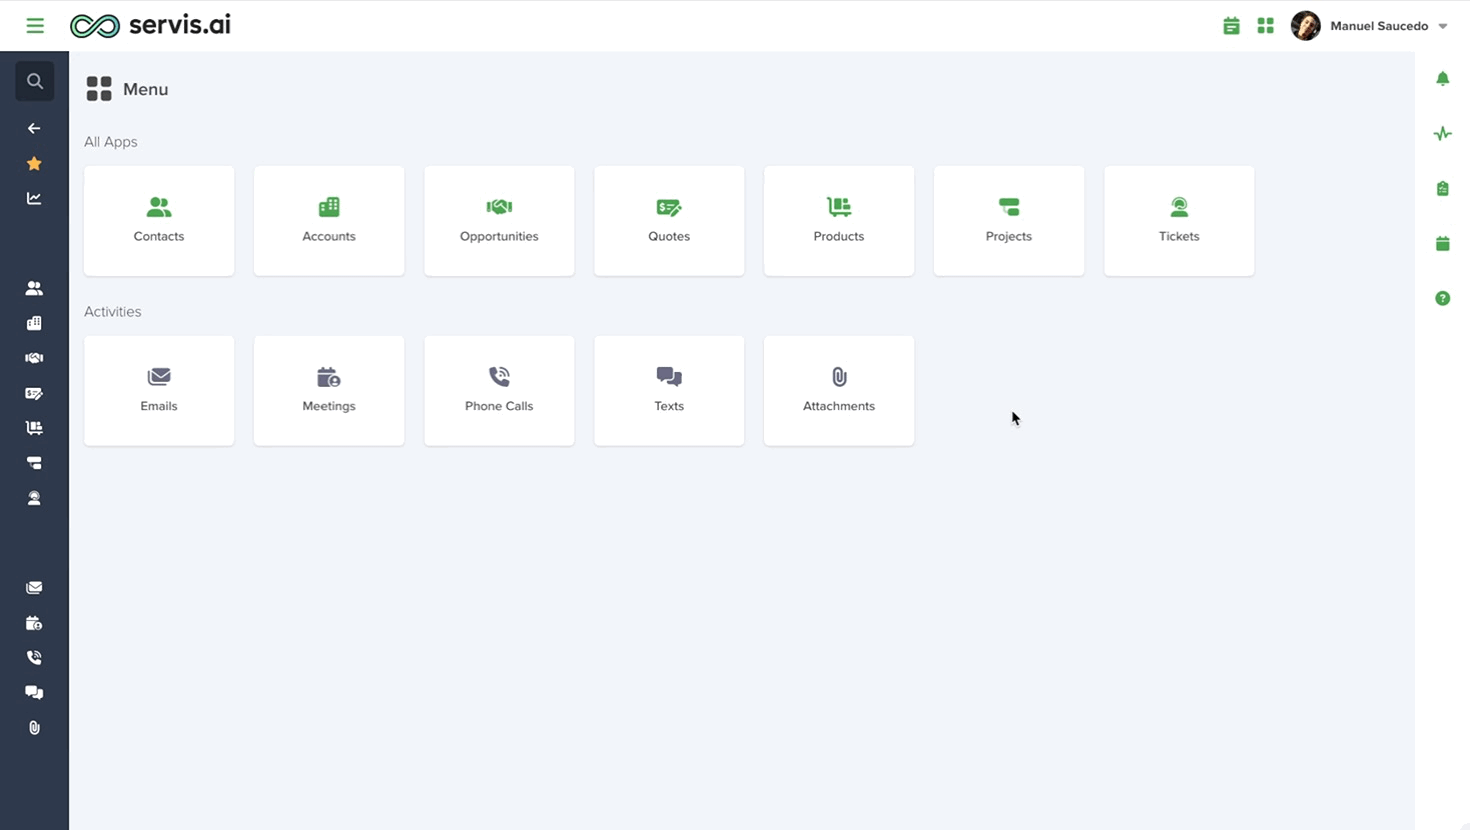
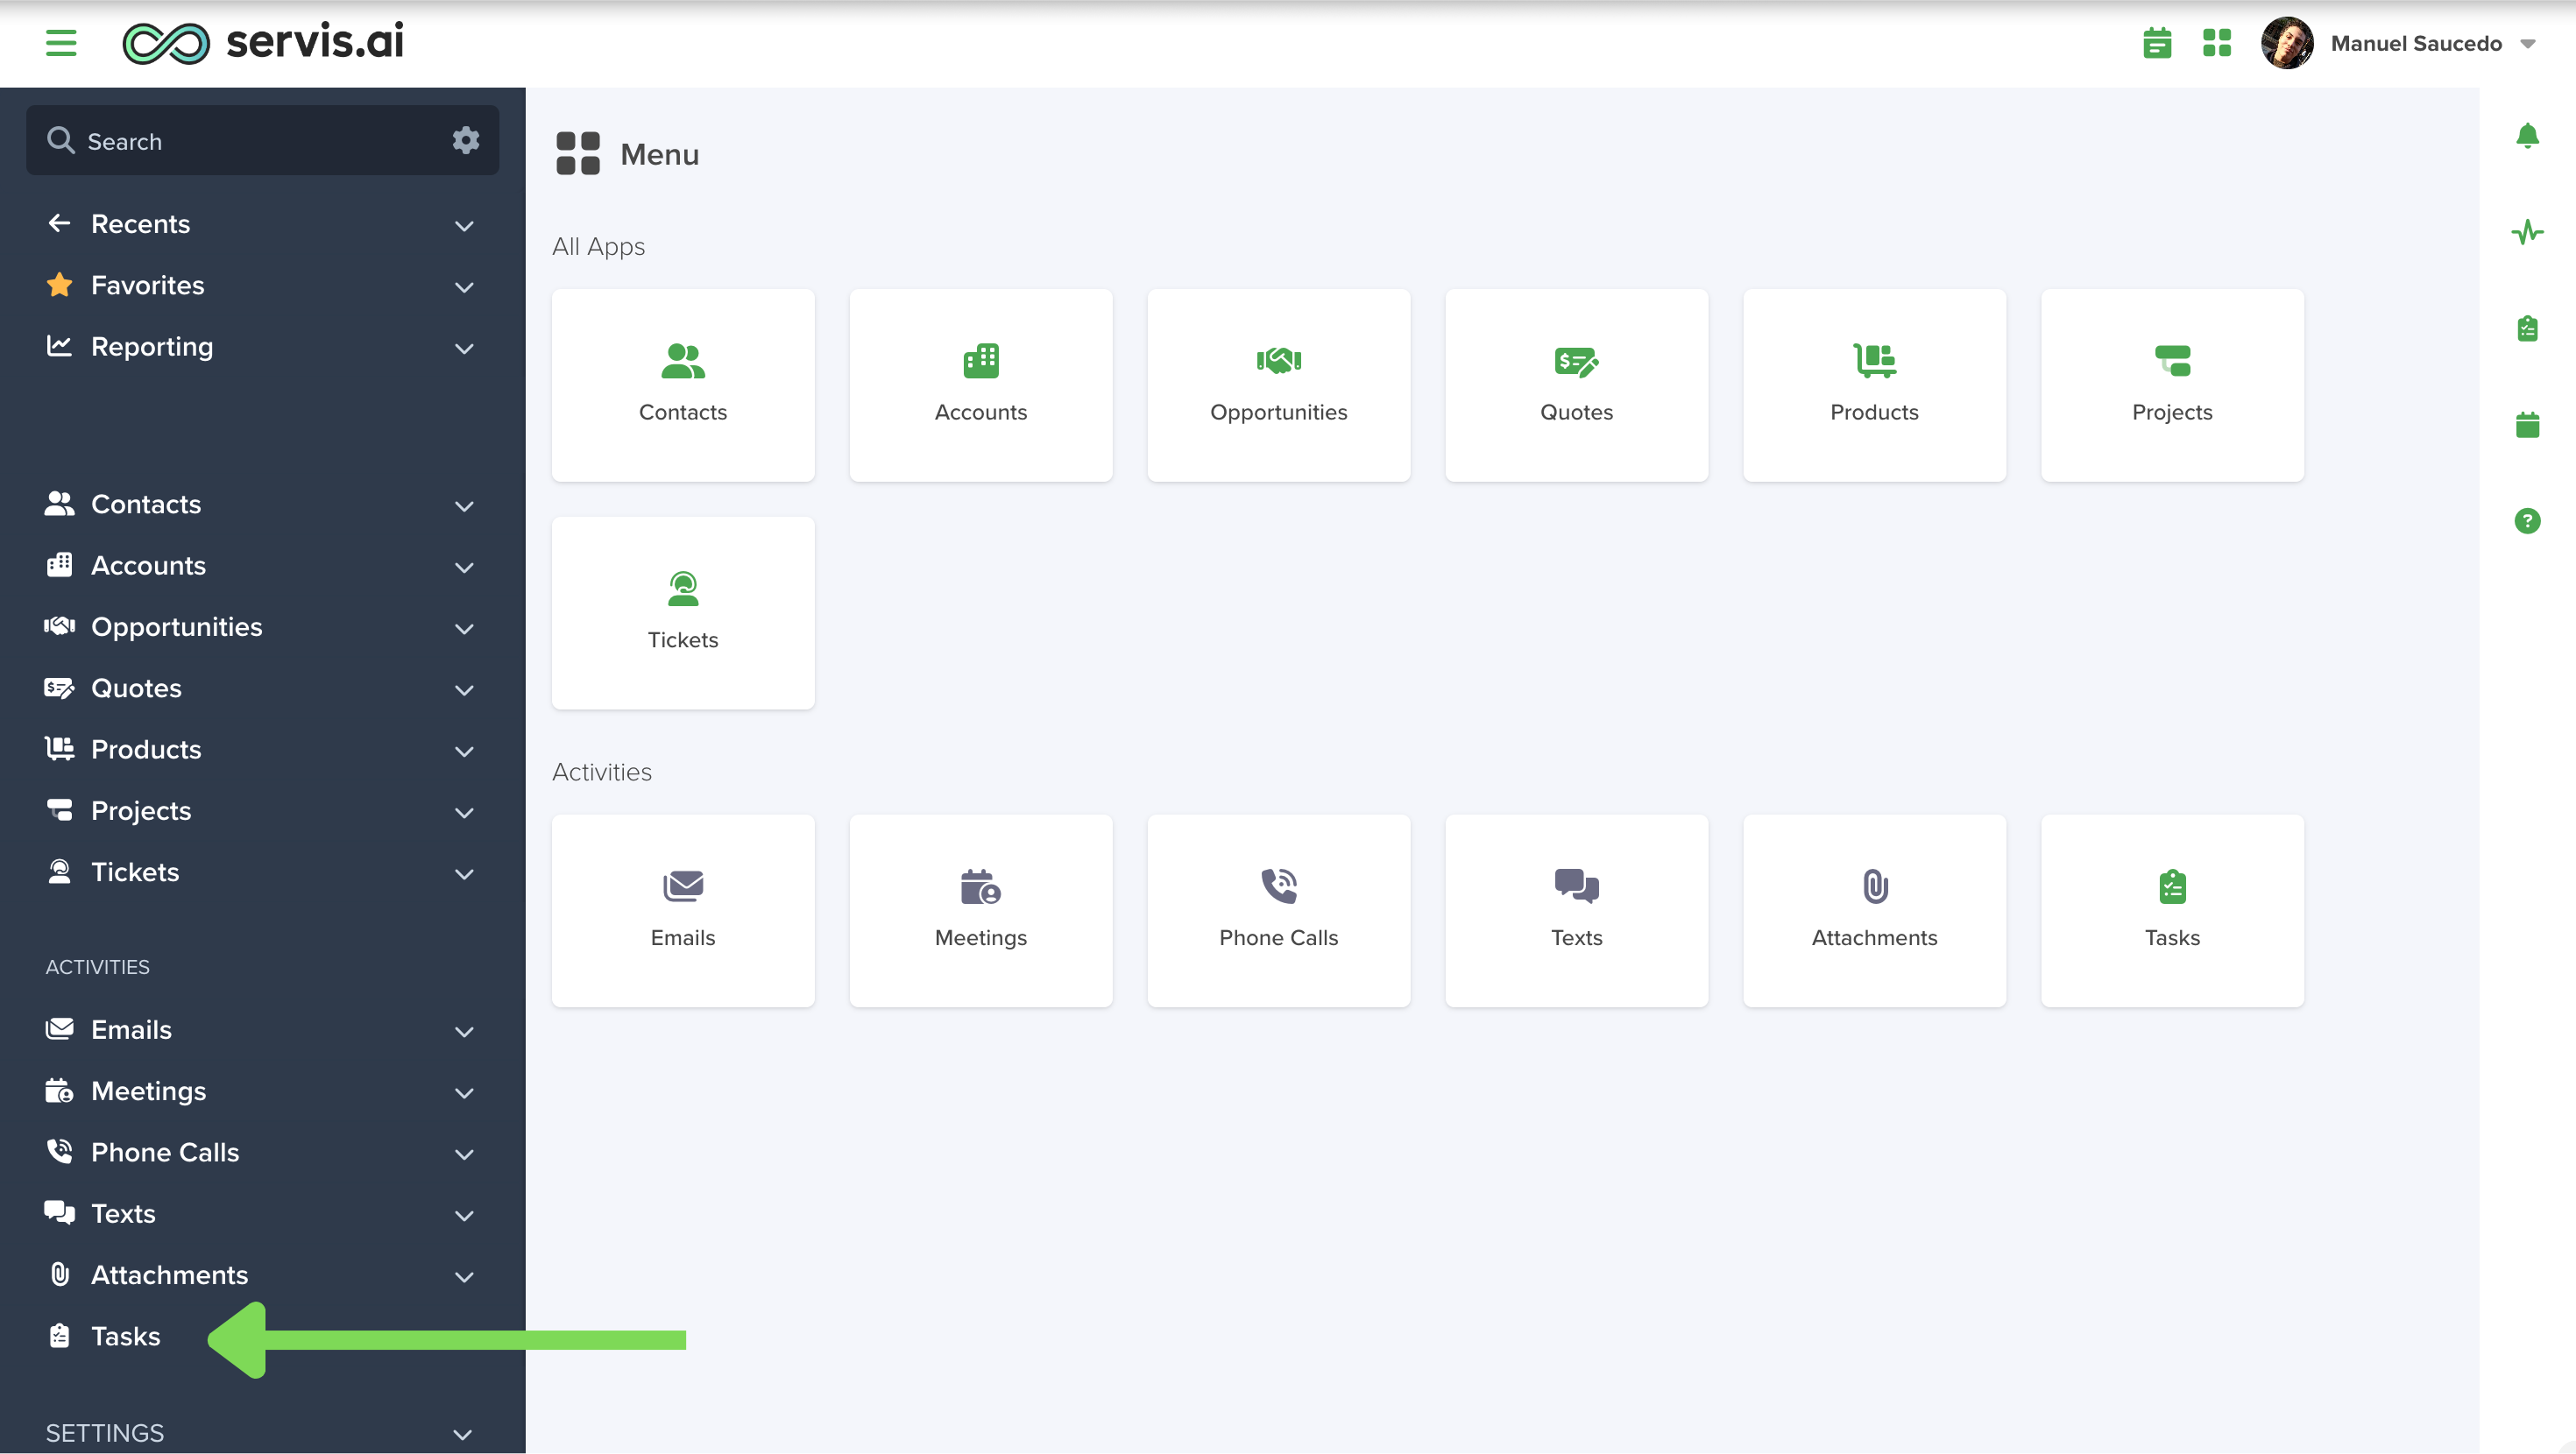
2. Main Menu
The second is available in the main menu, right under the Activities section. You can also start typing ‘Tasks’ in the global search to get there faster.
3. Activity Feed
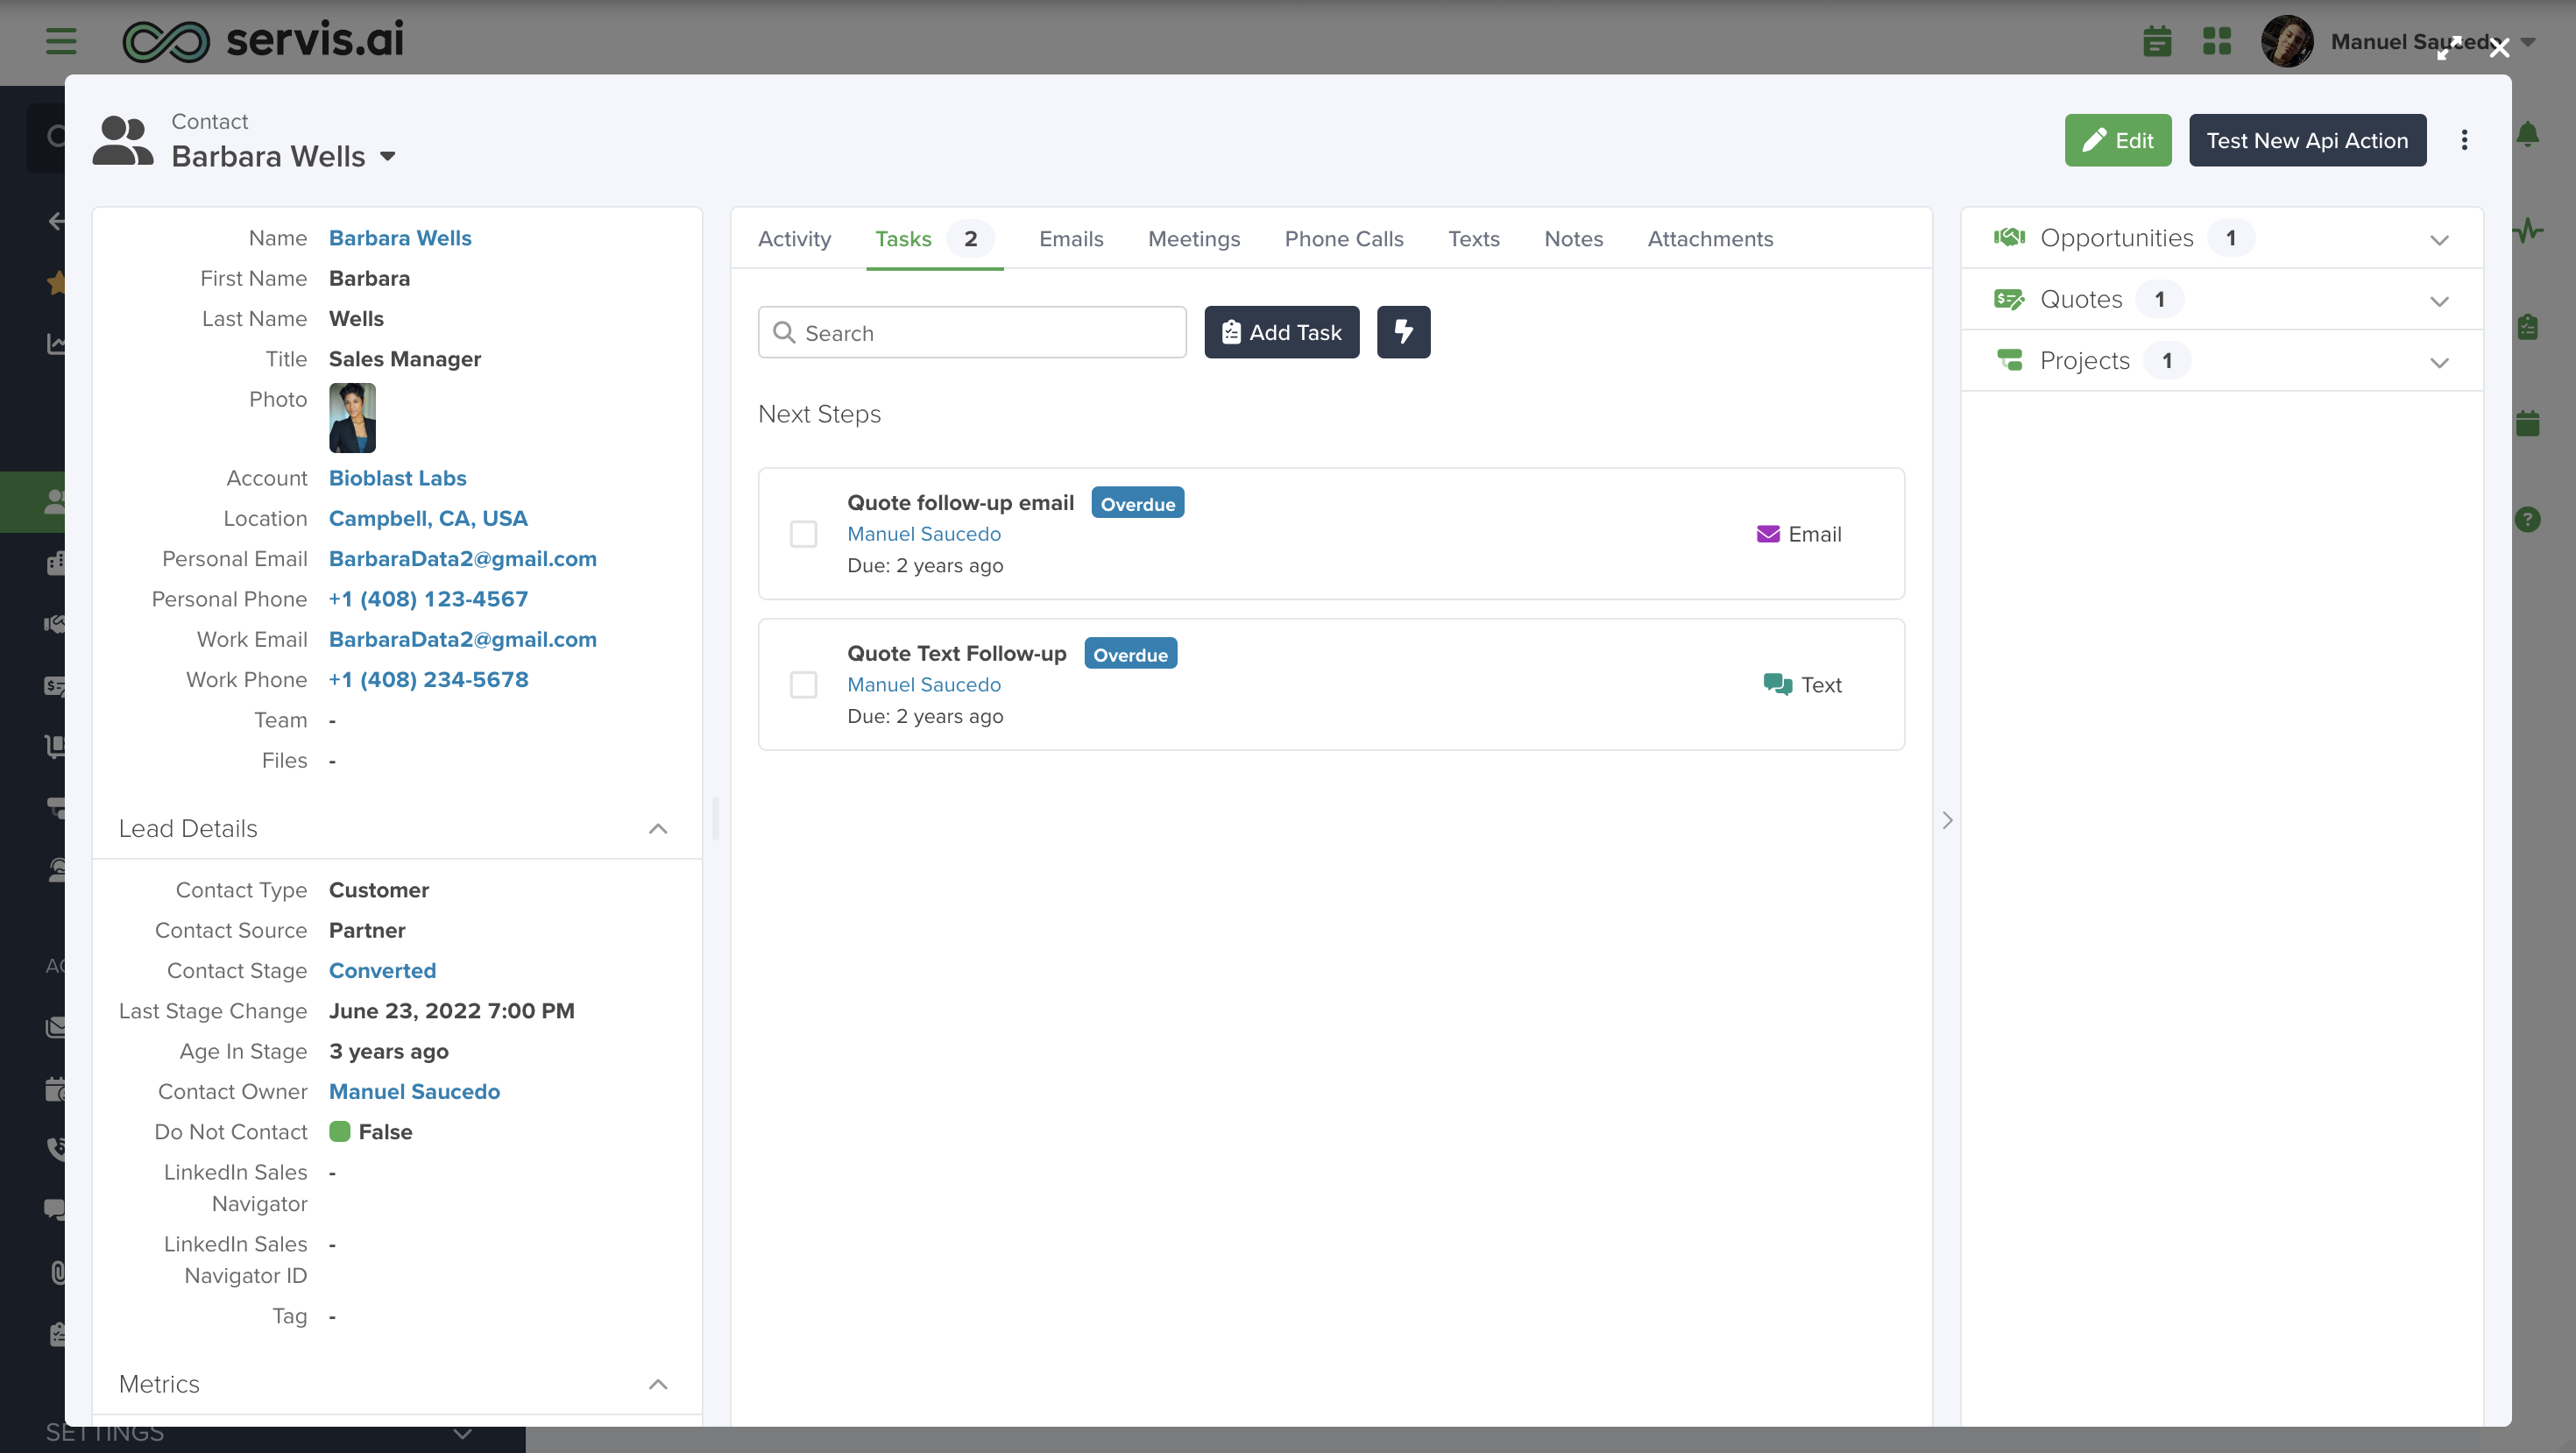
Go to the detailed view of any record and then click on the “Tasks” tab in the Activity feed.
Creating Tasks
You can create tasks from any of the three locations we listed above.
From the Right-Hand Menu:

From the Main Menu Task App:

From the Activity Feed:

The task creation modal will open for you to create your task.

1. Description
Here is where you explain what the goal of the task is. (Required)
2. Source
You can select any Record from any App to embed the task. (Optional)
3. Due Date
Date by which the Task should be completed.
Task Due Notifications
If a Task includes Due Date, you will have the option of selecting a notification alert from a drop-down menu.

When the time comes to complete your task, servis.ai will send you a notification. You will receive the notification in the web app, mobile app, and across all other delivery channels set via your personal preferences.
4. Type
Choose the type of task you would like to create. (You must select a Source beforehand). These types act as categories for you to manage your tasks.

Phone
- Select a Phone Script to use.

- Pick a phone number to attach it to the task.

- Once you create the task you’ll be able to make the phone call using all the resources you provided. Go to the Details Page of your task or look for it inside the Right-Hand Menu.

- Select a Template (optional) or compose your email.

- If you want the email sent right after the task is created, check the Auto-send checkbox. This will display the From and the To email selectors.

- If you didn’t check the Auto-send checkbox, once you create the task you’ll be able to send the email using all the resources you provided. Go to the Details Page of your task or look for it inside the Right-Hand Menu.

Text
- Select a Template (optional) or compose your text.

- If you want the text sent right after the task is created, check the Auto-send checkbox. This will display the Text Send From Agent user selector and the Text To phone number selector.

- If you didn’t check the Auto-send checkbox, once you create the task you’ll be able to send the text using all the resources you provided. Go to the Details Page of your task or look for it inside the Right-Hand Menu.
How to Create Custom Task Types
1. Navigate to Task Settings:
•Go to Settings > Apps > Tasks.
•Under the General tab, locate the Task Type section and click Manage.

2.Open the Task Type Manager:
•The All Choices window will open. If this is your first time, the list will be empty.
•To add a new Task Type, click the + Add button in the top-right corner.

3.Fill Out the Task Type Form:
When you click + Add, a new window with forms will appear. Complete the following fields:

•Value: Enter the name for your new Task Type.
•Unique Value: This is automatically generated by the system based on the name in the Value field.
•Icon: Select an icon from the dropdown menu. Use the search bar to find specific icons by keyword.
•Color: Choose a color for the icon from the provided palette.
•Active: Decide whether to activate the Task Type immediately or keep it inactive for now.
For more information visit the Manage Choice List article.
4.Save Your New Task Type:
•Once all fields are filled, click Ok to save.
5.Verify Your New Task Type:
•Your new Task Type will now appear in the All Choices window with the details you provided.

Note: Only Custom Types will appear in the All Choices view. Standard types such as Phone and Email are hardcoded into the system and cannot be modified, so they are excluded by default.
•Close the window, and you’ll see your new Task Type listed under the Task Type section in the App’s Settings.

5. Assigned To
Select the team member who will complete the Task. You can create Tasks for yourself and other Team or Group members
You can choose to assign a task to an individual user or an entire group, the current group member to view the task in the Right-Hand menu.
To do this, ensure that groups are already created. Then, create or edit the task and assign it to the desired group.

Additionally, you can create a new View in the ‘All Tasks’ section to display tasks assigned to you and your group members. This view can be added to the Right-Hand menu for easy access.

6. Fields
Fields store specific information for each task and display it on the task record.
How to Add Fields to a Task Type
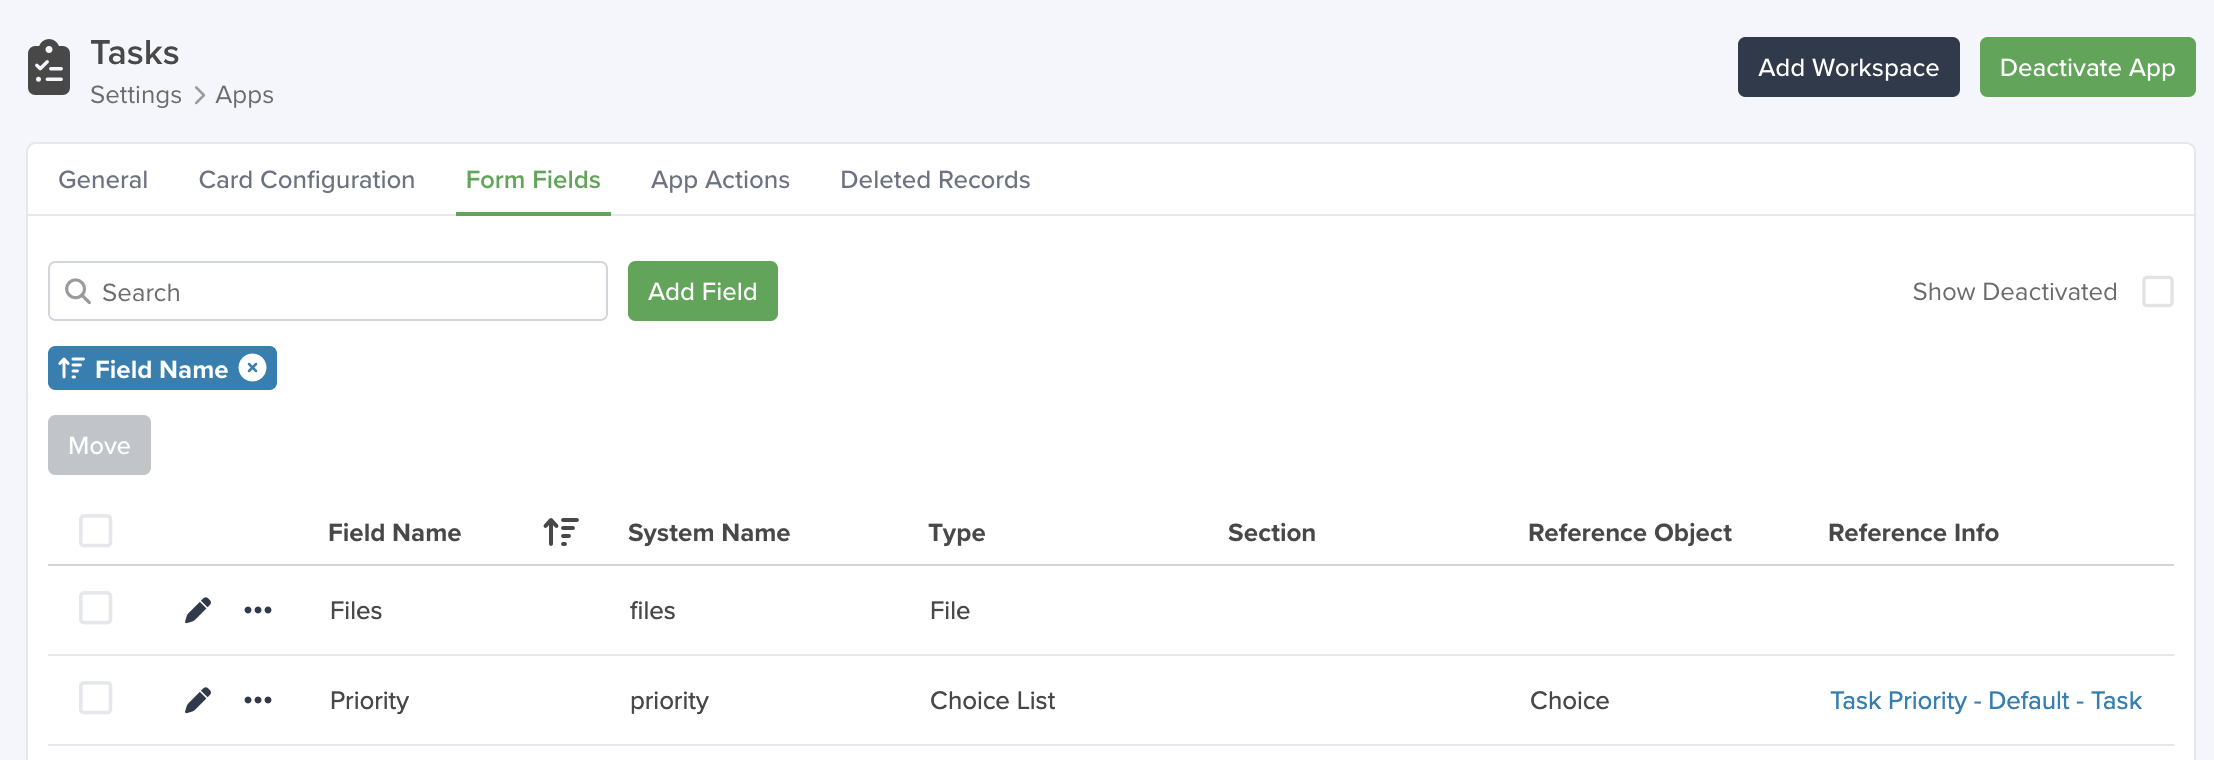
1.Navigate to Form Fields:
•Go to Settings > Apps > Tasks.
•Click on the Form Fields tab to see the list of existing Fields. For this example, we’ll create a Field called Files to attach files to the Task.
If you want to learn more about Form Fields please dive into this article

2.Create a New Field:
•Click the Add Field button at the top of the page, next to the search bar.

- Out-of-the box, the Field on this tab is always ‘Priority’.
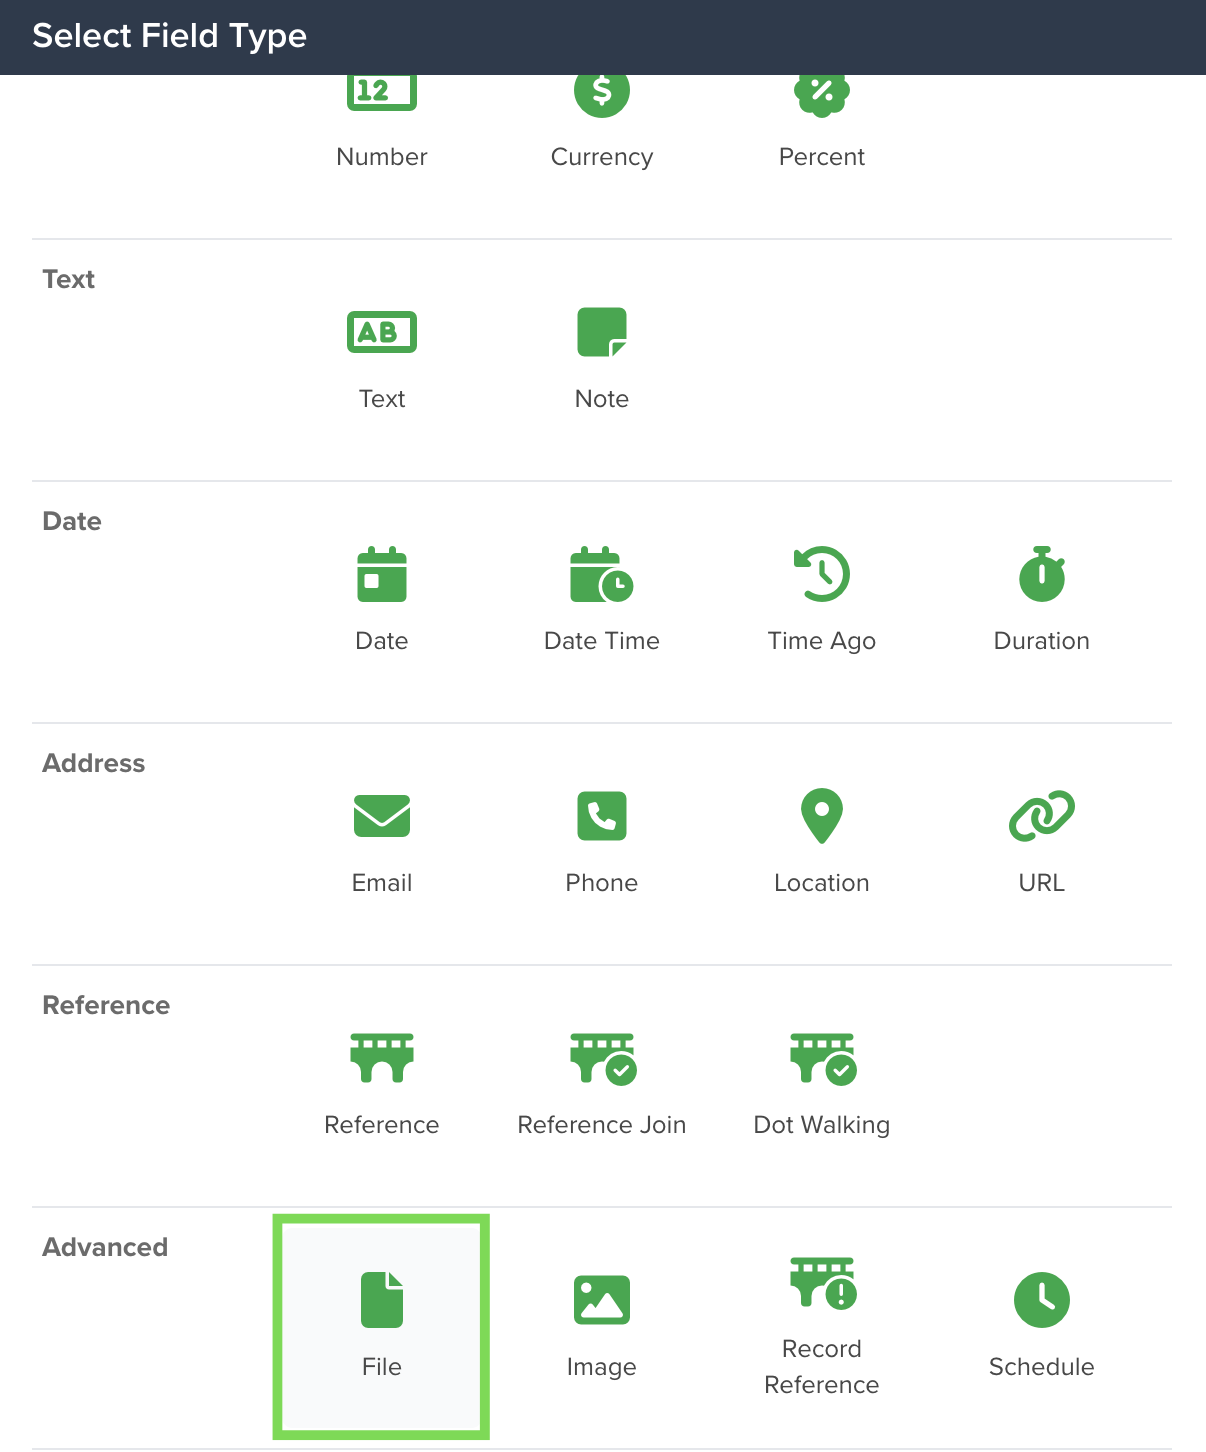
•Select the Field type. For Files, choose the File Type on the Advanced tab.
3.Configure the Field:
Complete the following fields in the Field Builder:

•Field Name: Enter a descriptive name (e.g., “Files”).
•Field Description: Provide a brief explanation of the Field (optional).
•Section: Specify where the Field will be stored (recommended: Default or None).
•Type: Ensure it is set to File Type (for the ‘File’ Field in this example).
4.Save the Field:
•Click Save.
•A pop-up will confirm that the Field has been created.
•The new Field will appear under the Form Fields tab.
5.Apply the Field to a Task Type:
•Go to the General tab under the Task Settings and locate the Form Builder section.
•Click + Add to create a new row.
•Select the Task Type (e.g., “Onboarding”) and the Field (e.g., “File”) from the dropdown menus.
•Optionally, reorder multiple fields by clicking and dragging using the Re-Order button (if applicable).

Note: When you open the dropdown menu, you’ll see the ‘Common’ Task Type. This is a default, out-of-the-box Task Type that comes preloaded with default settings, including the ‘Priority’ Field and the standard App Actions.

6.Save Changes:
•Scroll to the bottom of the page and click Save.
•A pop-up will confirm the Task Type has been updated.
App Actions
The Tasks app includes a powerful feature in its settings called ‘App Actions’. This tab allows you to configure custom instant actions. By default, it comes with the ‘Complete Task’ action as a built-in, out-of-the-box option.

You can learn everything about ‘App Actions’ from this exhaustive article.
7. Note
Additional information about the Task and its result.
Once you are done filling out the information for the Task, click the ‘Save’ button.
Editing Tasks
If you want to edit an existing Task, click the three vertical dots icon right next to the task’s icon and then, click ‘Edit’.

Delete Tasks
You can delete existing Tasks at any time in different places:
From the Tasks icon, just click the three vertical dots right next to the task’s icon and then, click ‘Delete’.
From the All Tasks list view, just click the three horizontal dots and click the ‘Delete’ button.
Confirm that you want to proceed, and the task will be deleted.
Note: If you’ve deleted a Task and need to restore it, your admin can assist by accessing the App Settings and navigating to the Deleted Records section.
Complete Tasks
To mark a task as completed from the Tasks icon, you can simply click the checkbox to the left of the task’s description, or you can click the three vertical dots right next to the task’s icon and then click ‘Complete Task’, for either case, the system will automatically update its status to Done and add the Completed Date and Completed by information.
Completed Tasks will be displayed in a different section labelled as ‘Completed’.

From the Task’s detailed page, you can click the ‘Complete Task’ button. It’s located right next to ‘Edit’. Once you do, the system will automatically update its status to Done and add the Completed Date and Completed by information.
One fun little touch is you’ll get a stream of confetti every time you complete a task!