- Businesses often use multiple email addresses—like one for Marketing, another for Support, and one for Sales—to help route customer messages to the right team.
- These group emails streamline communication and make it easier to respond quickly and efficiently.
With servis.ai, you can:
- Set up several group email accounts.
- Choose which one to use when replying or reaching out to customers.
This keeps your communication organized and professional.
This article will just cover how to add multiple group emails. We have other articles on pairing individual email accounts as well as sending emails within servis.ai.
Navigate to Group Email
Go to Settings > Advanced > Group Email.
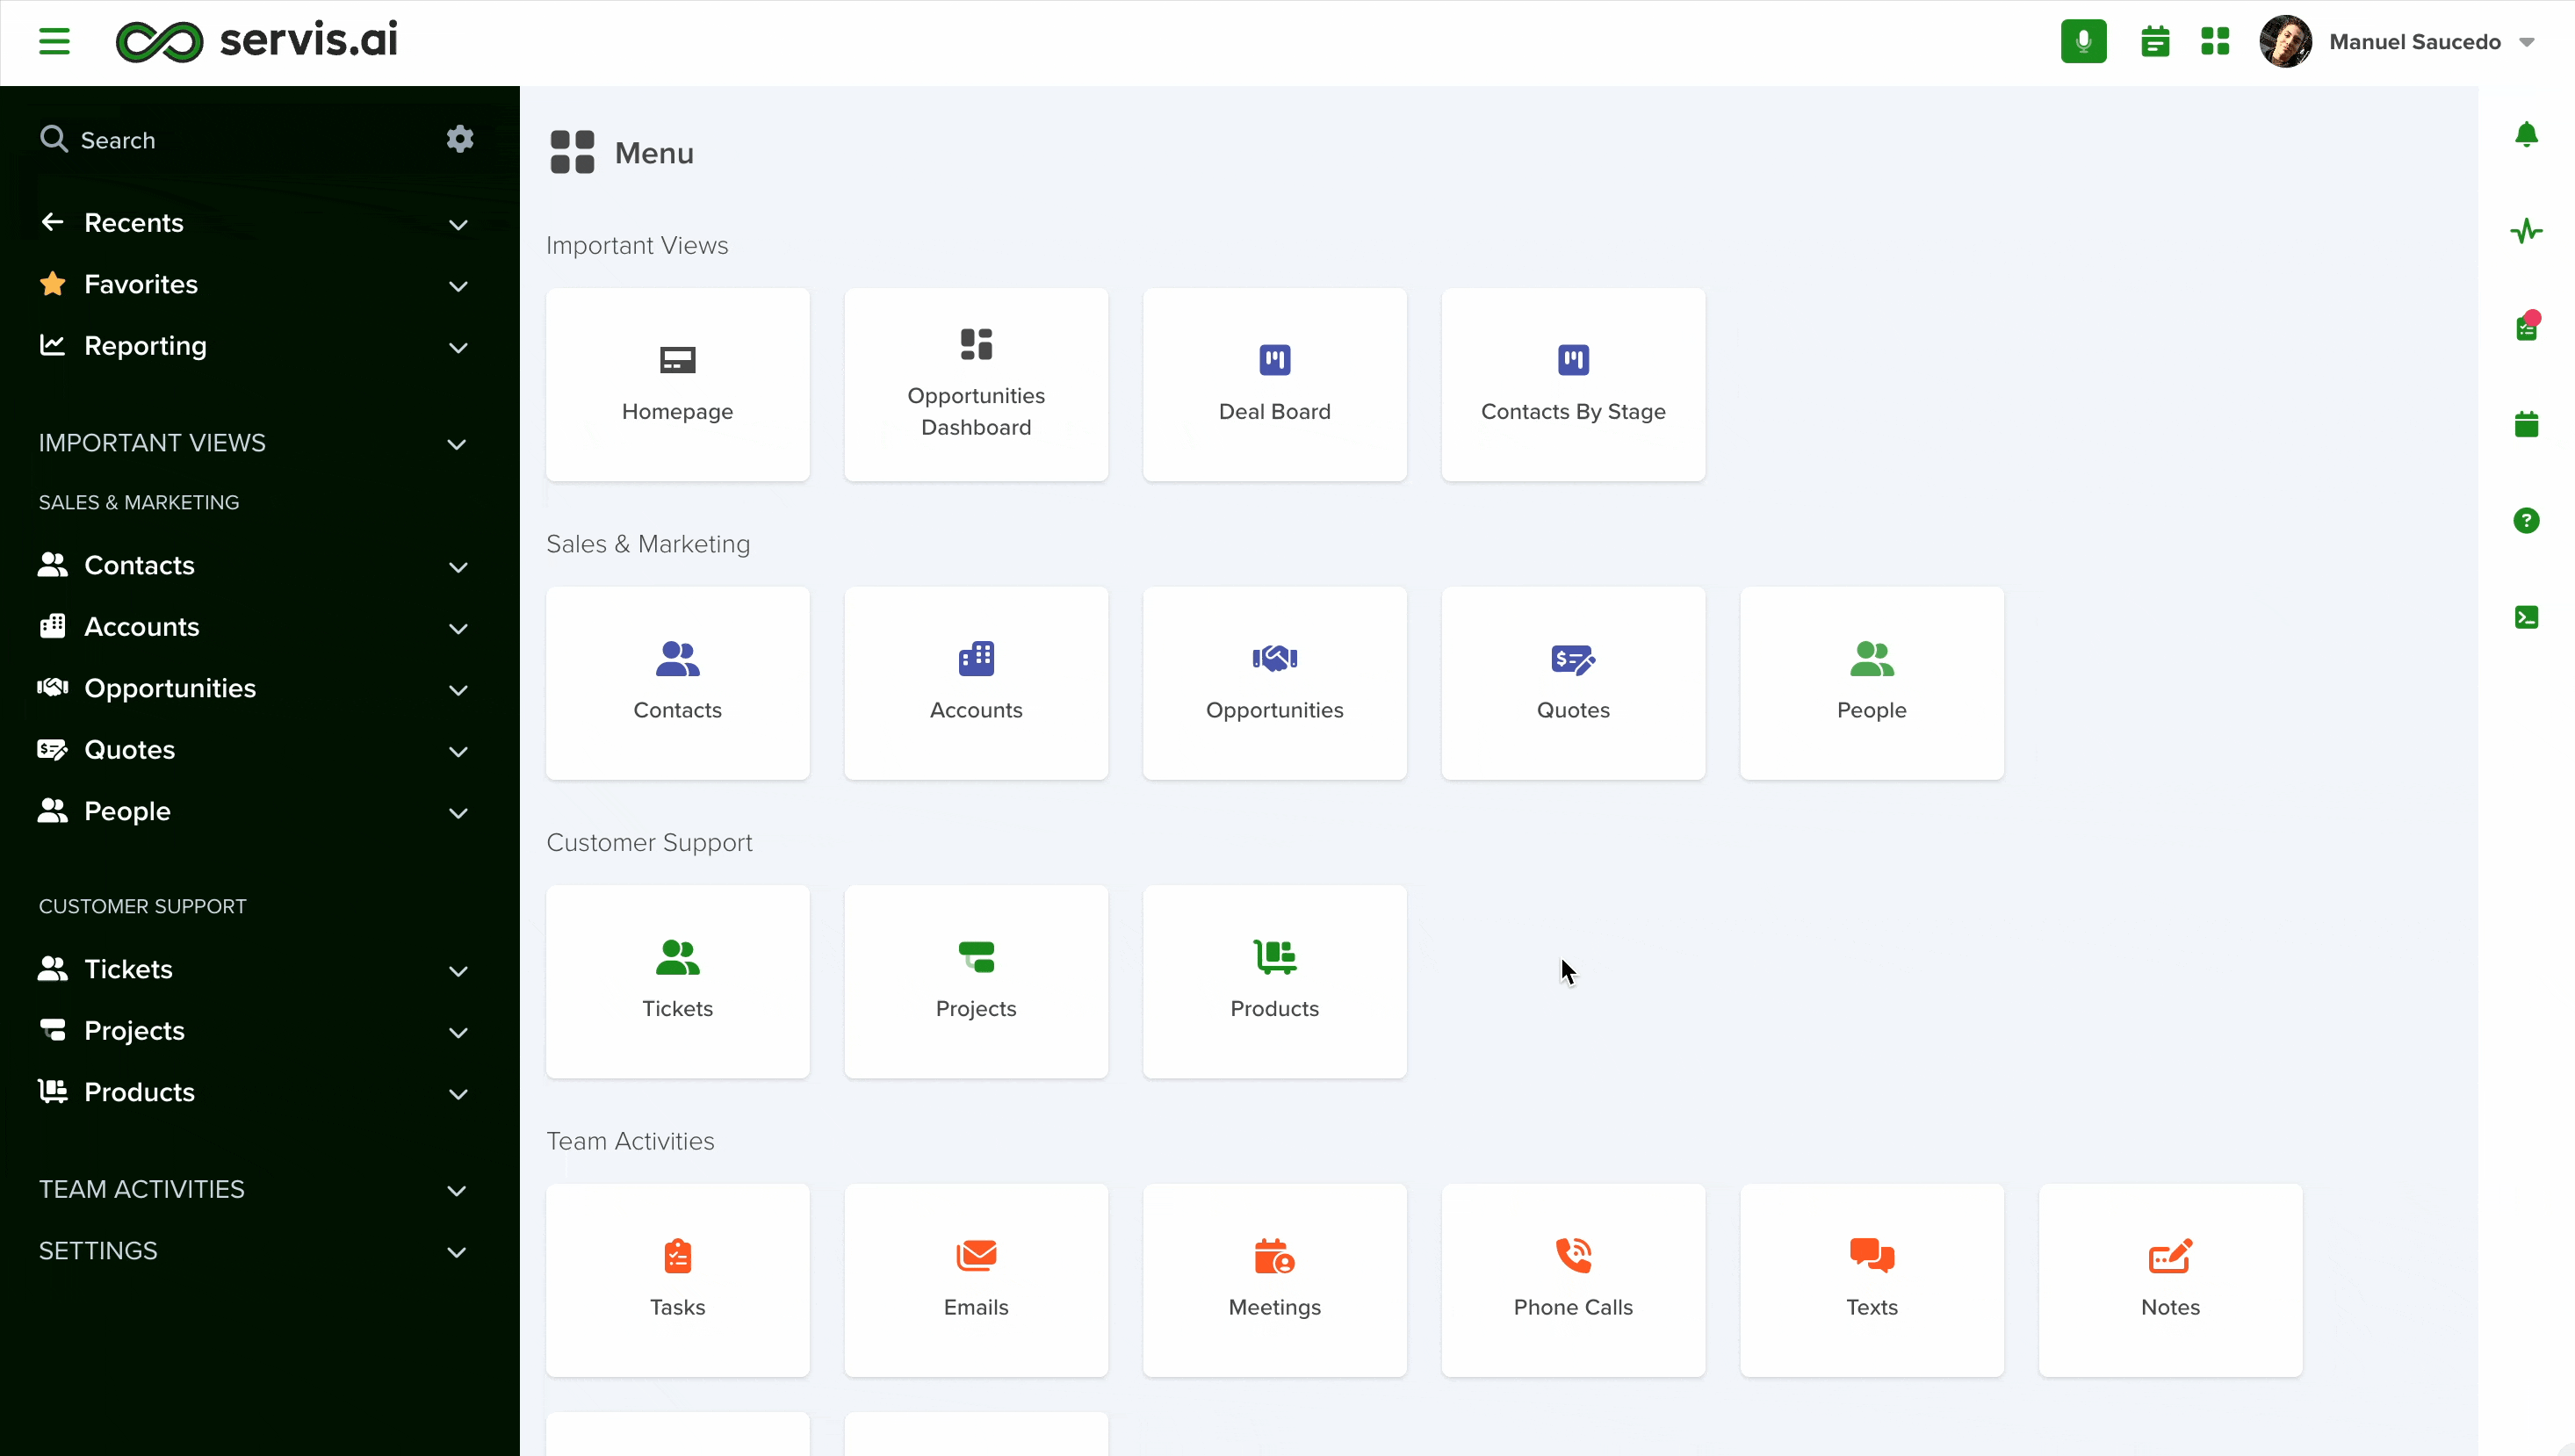
Add an email account
Click on the ‘Add Group Email’ button at the top of the screen.

The following panel will then appear.

Simply choose the option that matches your email provider and follow the steps to add your group email to servis.ai. The group email will then appear in the list view.

You can also specify what roles are able to access each group email that you add.
Send Email
Now your users will be able to choose what email account they would like to use when responding or drafting a new email.

Note: To re-authenticate a Group Email, simply delete the existing Group Email and set it up again as if you’re creating it for the first time. Once done, all features will be fully restored and ready to use.
Editing a Group Email
To make changes to a Group Email:
- Click the pencil icon next to the Group Email you want to edit.
- This will open the Edit form, where you can update all the necessary details.

1. Name
The name you assign to your Group Email is important—it will appear as the sender name when emails are delivered to recipients.
Note: If this field is left blank, the sender name will automatically default to the portion of the email address before the “@”. For example: support@servis.ai → sender name will appear as “support”.
Troubleshooting Unexpected Sender Names
If you’re seeing an unexpected sender name:
- Check if your Group Email has a name set.
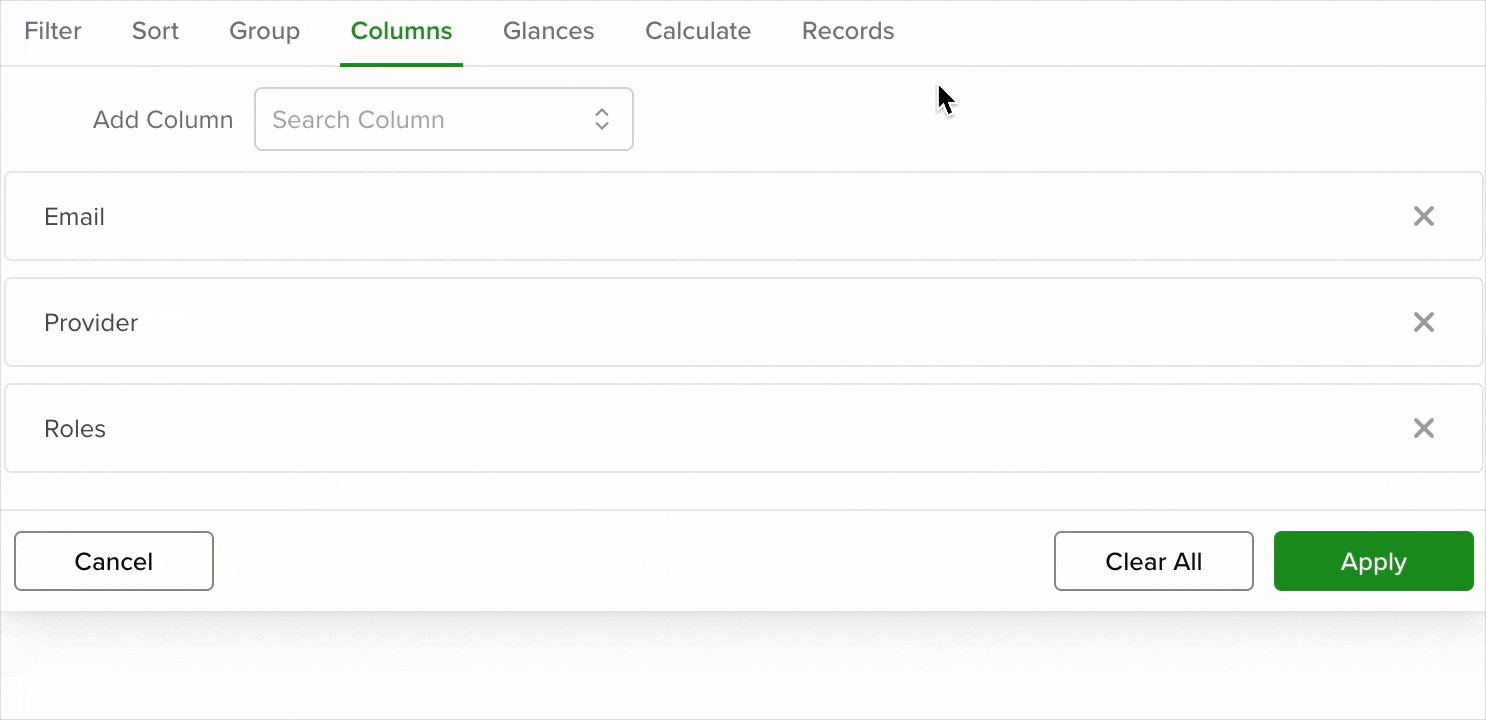
- Go to the List View of your Group Emails.
- Look for the Name column—this shows which Group Emails have a name assigned.
- If you don’t see the Name column, click the Filter button, go to the Columns tab, and add the Name column from the dropdown.
2. Roles
- Use this dropdown to select which roles are allowed to use the Group Email.

- You can select multiple roles to ensure that only the users who need access to this feature are allowed to use it.

Using the Group Email
Once your Group Email is properly set up, you can use it to send emails from the Floating Panel.
- In the From field, you’ll be able to choose from any of the email addresses configured under your Group Email.

