You can learn how to create a new Form Field from this article.
The File Upload field allows team members to attach various types of files to records, including images, videos, audio files, documents, and more.
Navigating to Form Fields
Go to Settings > Apps, select the app you’d like to add the field to, and select the ‘Form Fields’ tab.
Configuring a File Field
To set up a File field in your app, follow these steps:
- Add a New Field: Click the Add Field button to open the Field Type selection window.

- Select Choice Type: From the list of available field types, choose the File option.
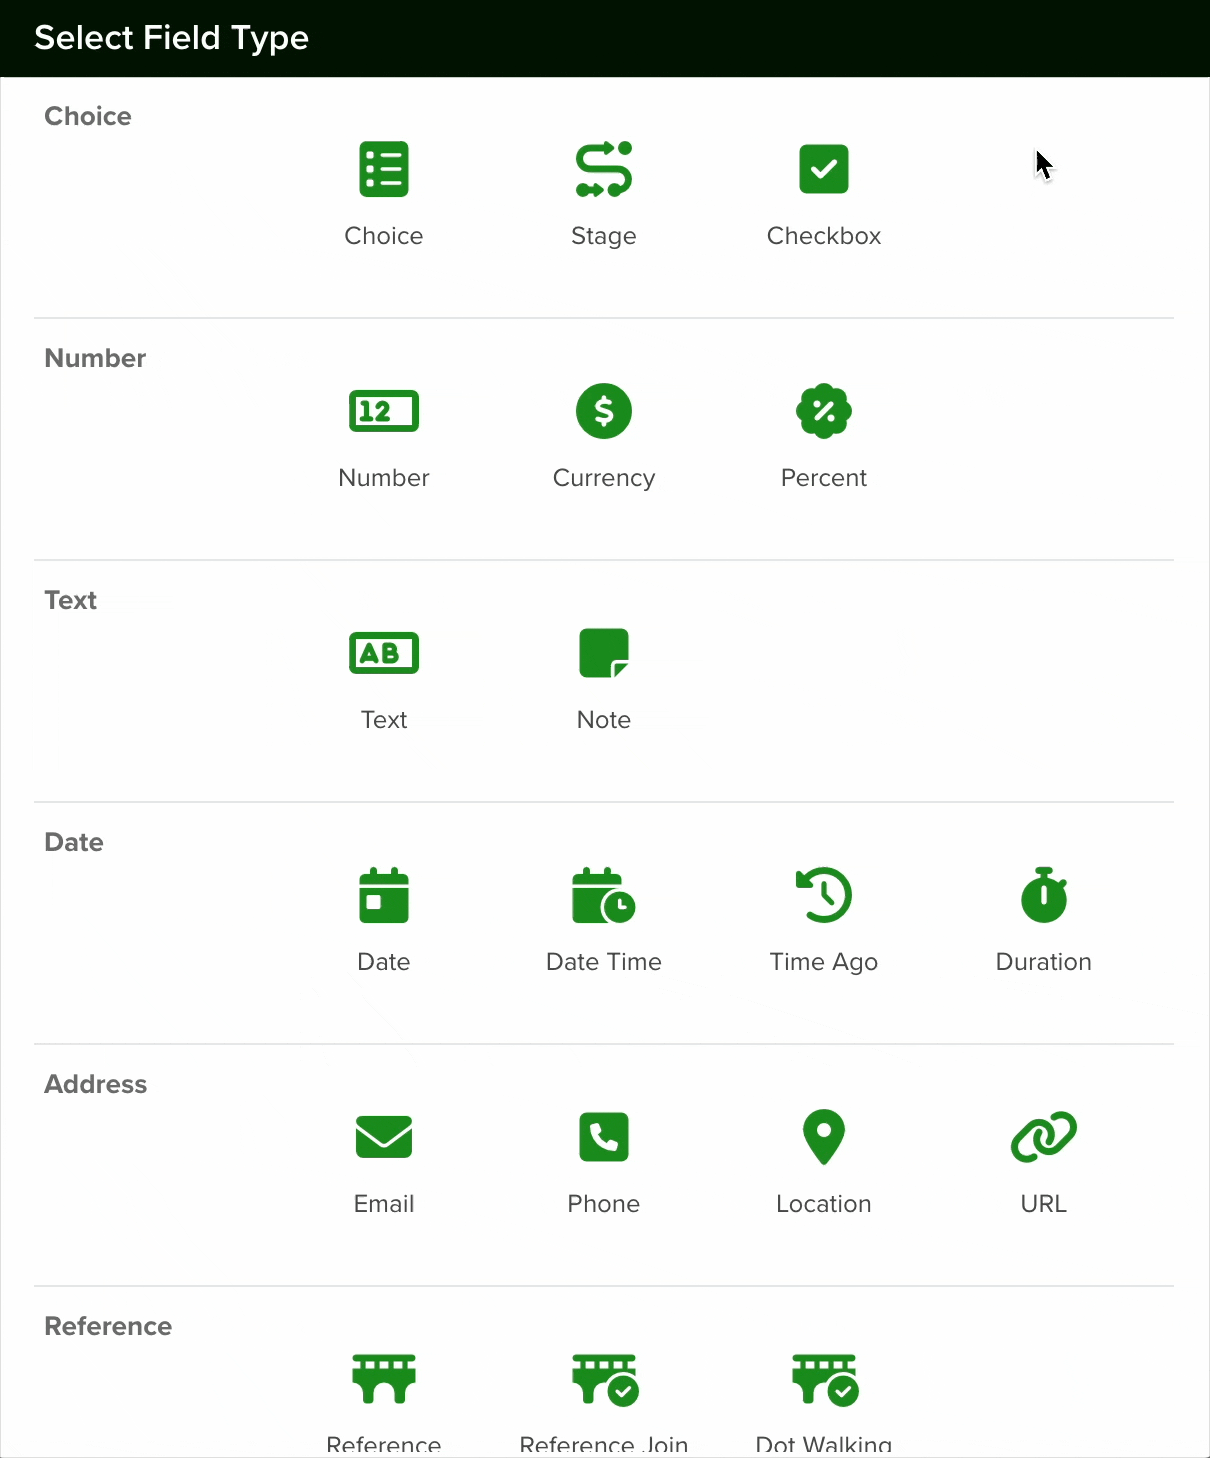

- Configure the Field: After selecting the File field, proceed with the configuration settings as needed.

To set up a File field:
- Name the Field: Assign a clear, descriptive name.
- Add a Hint (Optional): Guide the field’s purpose.
- Choose a Section: Decide where the field will appear (from the Form Builder tab sections) or use the default placement.
- Set Field Type to ‘File’: Ensure the field is configured to accept file uploads.

- Set a Default File (Optional): Upload a default file that will automatically attach to all new records. Team members can replace this file if necessary.
- Mark as Required (If Needed): Enable the ‘Required’ option to ensure users must upload a file when creating a new record.
- Enable ‘Lock After Create’ (Optional): Activate this setting to prevent edits to the file after the record is saved.
Once you are done setting your field, click the save button.
Note: All new fields are added at the bottom of the form.
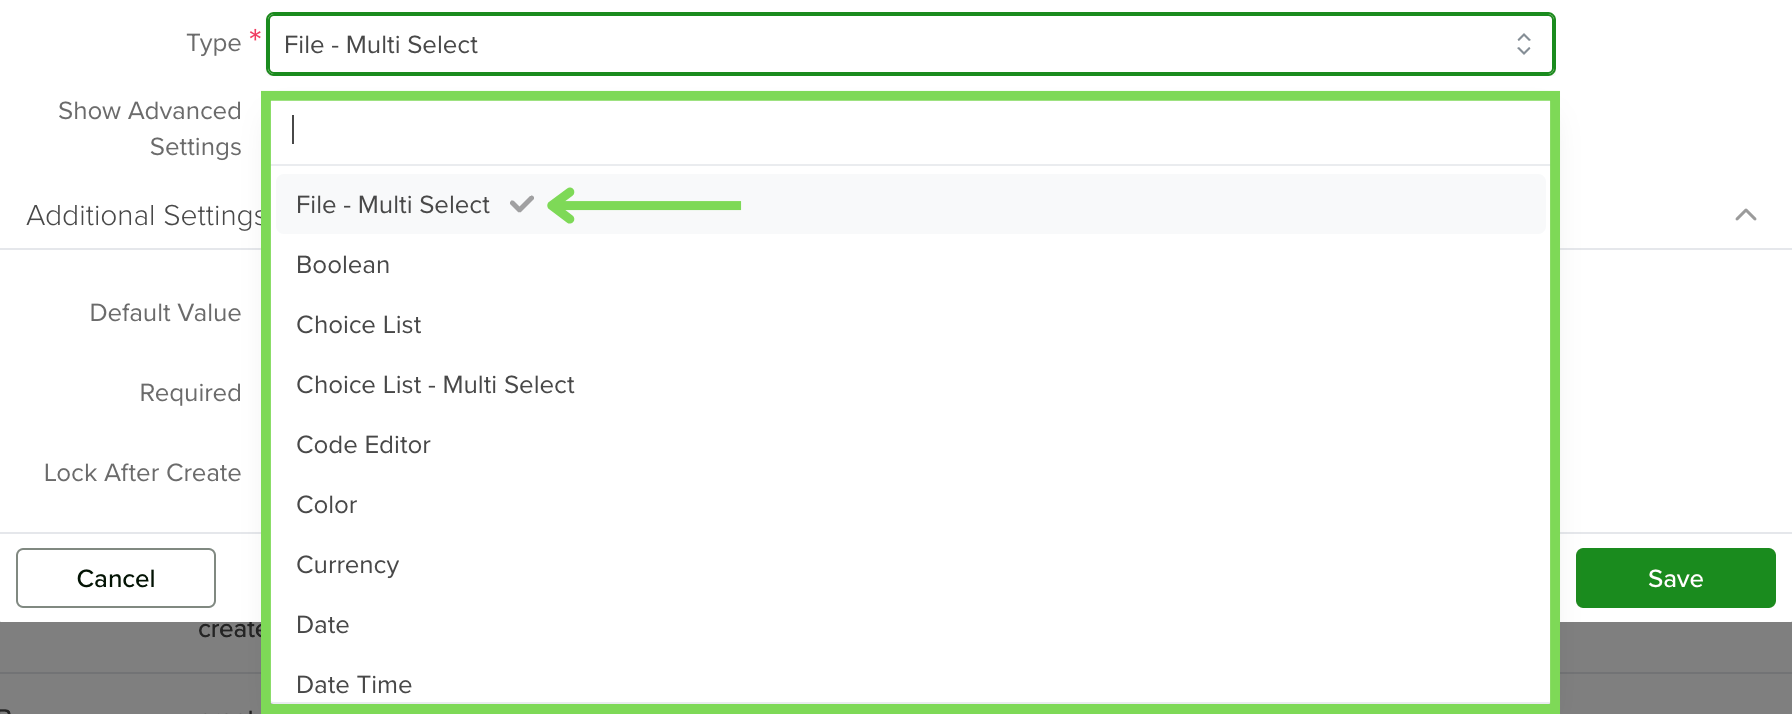
Configuring a File-Multi Select Field
Follow the same steps described in the section above; the only difference should be the type, which must be set to ‘File – Multi Select’.
With this field type, you will be able to upload multiple files in a single field for the same record.
Note: The size limit is 25MB per file. This means that for File-Multi Select fields, you can add multiple 25MB files.
Uploading a File to a File Field via API
To upload a file to a File Field using the API, the recommended approach is to first upload the document to our S3 bucket using the createAttachmentFromURL mutation. The file URL must be publicly accessible.
GraphQL Parameters
| Parameter | Type | Description |
|---|---|---|
url |
String | Public URL of the file to be uploaded |
file_name |
String | Name the file that will have after being uploaded |
entity |
String | (Optional) Name of the entity the file is linked to. Found in App Configuration. |
Example Request
mutation createAttachmentFromURL($url: String!, $entity: String!, $file_name: String!) {
 createAttachmentFromURL(
   url: $url,
   entity: $entity,
   file_name: $file_name
) {
   id
   file_name
   file_url
   extension
 }
}
Example Variables
{
  "url": "https://www.cte.iup.edu/cte/Resources/PDF_TestPage.pdf",
  "entity": "ticket",
  "file_name": "TestFile.pdf"
}
Example Response
{
  "data": {
    "createAttachmentFromURL": {
      "id": "2646dddf-c498-46af-b091-67c7bad06ecb",
      "file_name": "TestFile.pdf",
      "file_url": "https://freeagent-network-public.s3.us-west-2.amazonaws.com/863f78e4-d050-4c51-8238-4bd286ea6004/1751929868216",
      "extension": "pdf"
    }
  }
}
Linking the Uploaded File to a Record
Once the file is uploaded to S3, you can link it to a record using the updateEntity mutation. This process is the same as described in the Update App Record article section.
Example Request
mutation updateEntity($entity: String!, $id: String!, $field_values: JSON!) {
  updateEntity(entity: $entity, id: $id, field_values: $field_values) {
    entity_value {
      id
      seq_id
      field_values
    }
  }
}
Example Variables
{
  "id": "2d772f92-a243-4f3e-ab18-5d5b5aaec438",
  "entity": "ticket",
  "field_values": {
    "document": [
      {
        "type": "application/pdf",
        "url": "https://freeagent-network-public.s3.us-west-2.amazonaws.com/863f78e4-d050-4c51-8238-4bd286ea6004/1751929868216",
        "extension": "pdf",
        "name": "TestFile.pdf",
        "category": "document"
      }
    ]
  }
}
Explanation
In this example, the document field belongs to the Ticket app. The mutation updates this field with an array of objects, each containing:
-
url: from thecreateAttachmentFromURLresponse -
type: file MIME type -
extension: file format -
name: display name of the file -
category: type or classification of the file
Note: File fields must always be saved as an array of objects. However, only Multi-File fields support multiple objects. If a Single-File field receives multiple files, only the first object in the array will be used.
Changing a Field’s Type
In servis.ai, once a field is created, its type (e.g., text, number, date, or boolean) cannot be modified directly. This limitation helps ensure data consistency and prevents errors that could arise from incompatible data formats.
If you need to change the type of an existing field, you’ll need to follow these steps:
- Create a New Field: Go to the Form Fields tab on your App’s Settings and create a new field with the desired type (for example, switching from a text field to a number field).
- Deactivate the Old Field: Once the transition is complete, you can choose to delete the original field or simply hide it from views to avoid confusion.
