In servis.ai, you can’t talk about Access Control Lists without talking about Roles. They work together and you need to understand both to use them properly. That’s why we’ve put both in one article.
What Are Access Control Lists?
ACLs are what define the access within each role. You’re assigning ACLs to each role you’ve created. Except for Admins, they have access to everything.
With servis.ai Access Control List (ACLs) you have the option to limit the access your team members have in your Apps, based on their Roles, in two different levels:
- Field – Limits write or read access to a specific field.
- Record – Limits create, delete, update, or read access to the records.
- Section – Limits write or read access to a specific section containing fields.
You can use conditions to further specify when a role should have limited access to those operations.
User Permissions: Only Administrators can use this feature.
Navigating to ACLs

Navigate to Admin Settings > Company > Roles. Select and edit the specific role for which you want to apply the ACLs. Under the ‘Apps’ tab, locate the desired app and click the ‘Advanced’ button. Click on the pencil icon to modify the ACLs for that app. Please note that ACLs are configured on a per-app basis to ensure precise control over access permissions.
What’s the difference between Roles and Access Control Lists?
Here’s a simple definition of each:
Roles: These are titles you can give to your users that define what actions they can take in servis.ai.
Access Control List: These can be applied to Roles and define the access each Role has within servis.ai. This access can be different on a per-app basis.
Create a new ACL
To get started, click the “Add Access Control List” button.

Here is a list of the information needed to create an ACL:
| Field | Description |
| App | Select the App for which you want to create the ACL. |
| Type |
Field – The Access level will apply at the field level (selected field*). Record – The Access Level restriction will apply for the selected records. Section – The Access Level will apply to one or more App’s Sections. |
| Fields |
You can select multiple Fields to use for the ACL. |
| Field Operation (only appears when ‘Field’ is chosen for the type) |
Operations can be Read-Only & Hidden |
| Record Operation (only appears when ‘Record’ is chosen for the type) |
Operations can be CREATE, READ, UPDATE, DELETE |
| Section Operation (only appears when ‘Record’ is chosen for the type) | Operations can be Read-Only & Hidden |
Next, if needed, you can create Conditions. These are especially useful when you expect the ACL to work only when certain circumstances occur.
Conditions
Note: Conditions can only be created for Records.
Workaround for ACL Conditions That Use Dot-Walking
When setting up conditions for an Access Control List (ACL), you might be tempted to use dot-walking (e.g. Account.Contact.Contact Owner) to define access rules based on related records. However, this approach doesn’t work as expected within ACL conditions and can cause the configuration to fail.
Example Scenario
You want to apply a Read restriction to records in the Quotes app, with the following condition:
That logic would translate to:
Account.Contact.Contact Owner is Current User
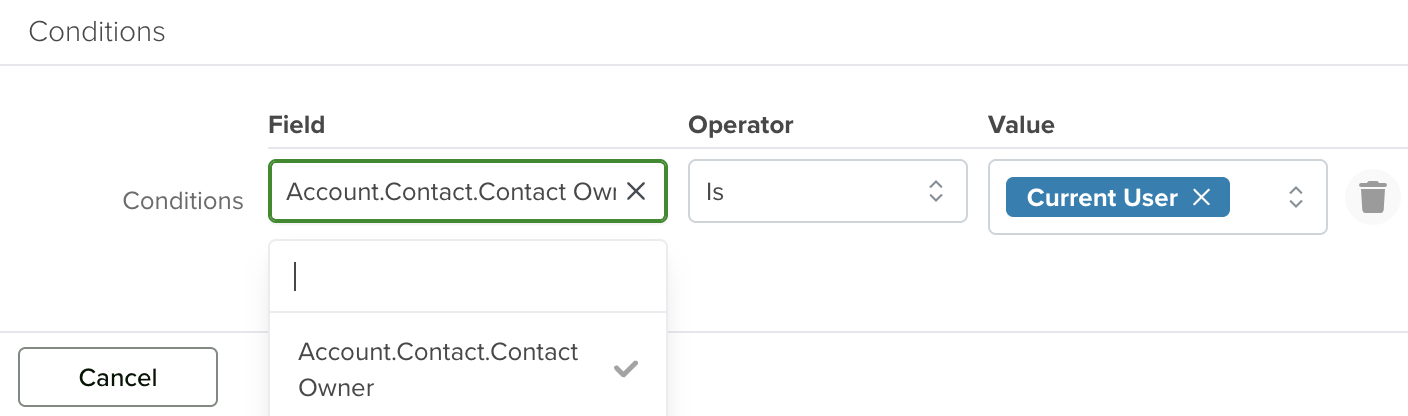
While this makes sense logically, attempting to set it up using dot-walking will not work within the ACL condition.
Work Around
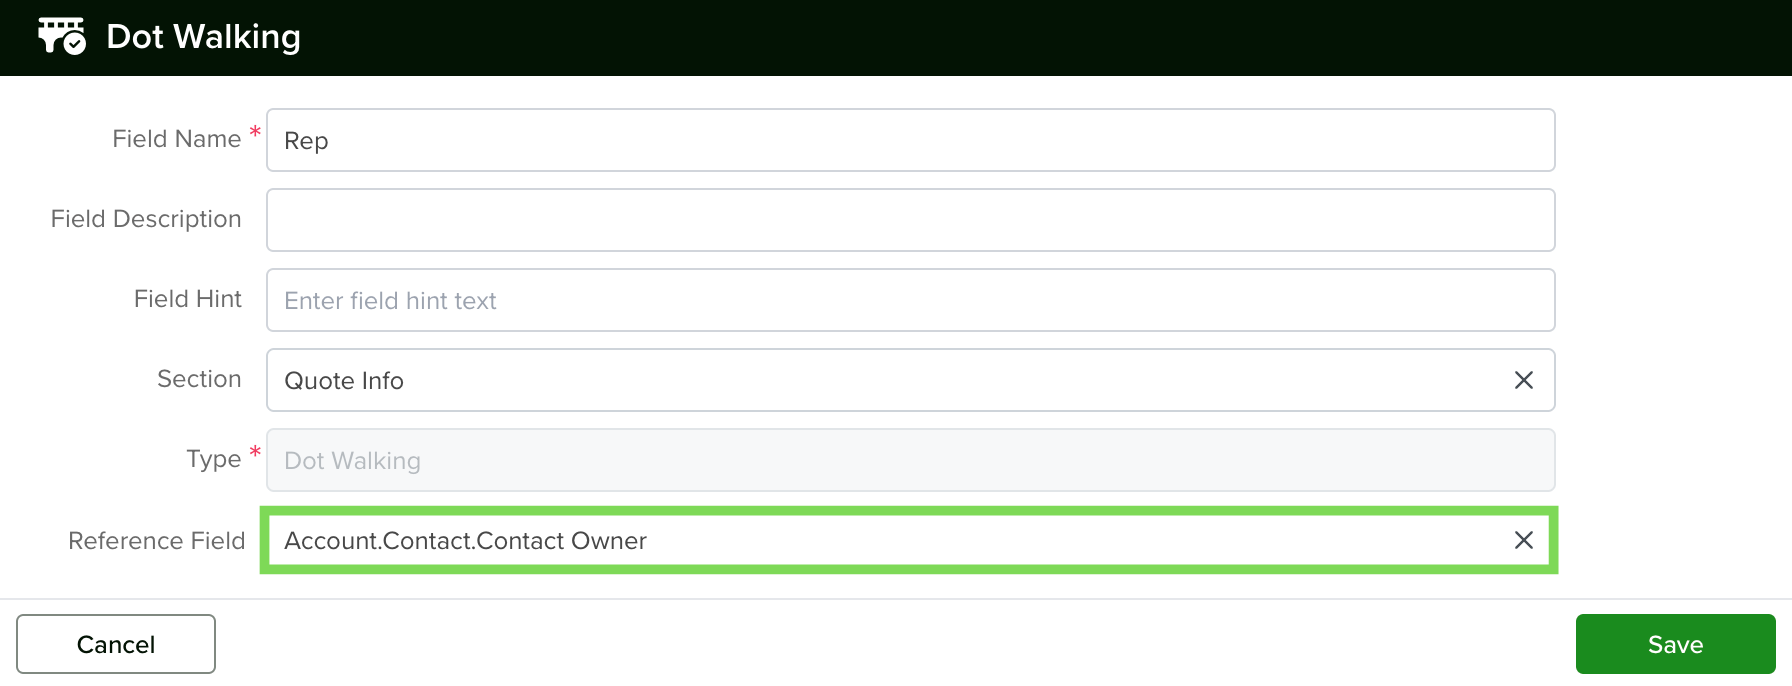
The solution is to create a custom field that holds the needed reference directly:
-
Create a Dot Walking field type in the Quotes app.
-
Set its reference path to:
Account.Contact.Contact Owner
-
Once created, this field will pull the Contact Owner into the Quote record directly.
-
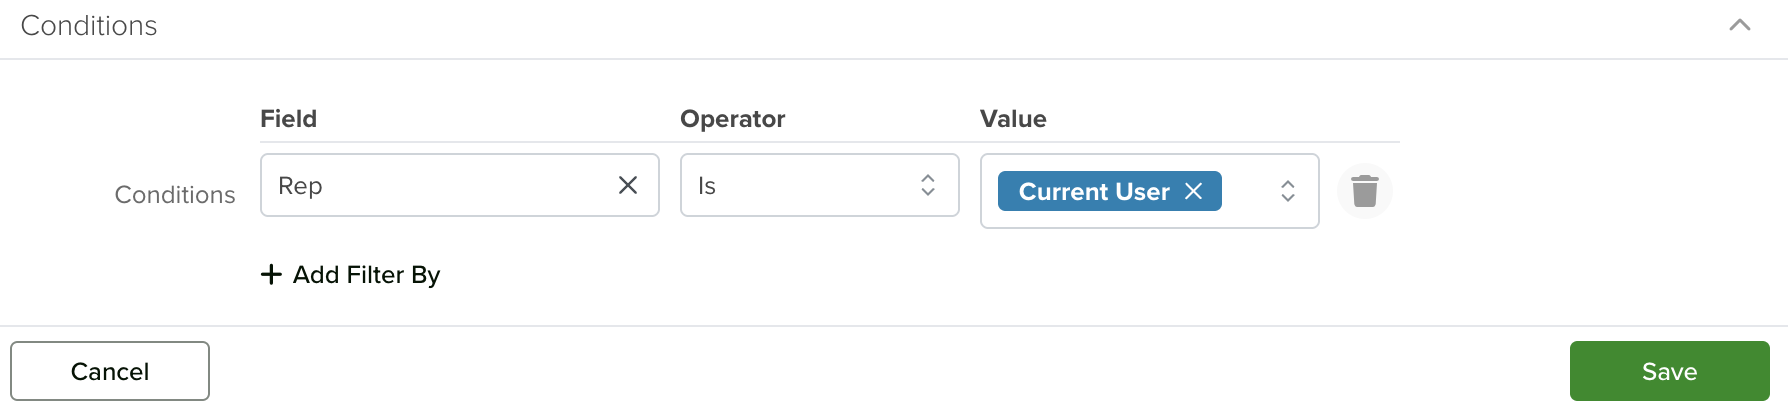
Now, instead of using the full dot-walking path in the ACL condition, you can simply select this new custom field.
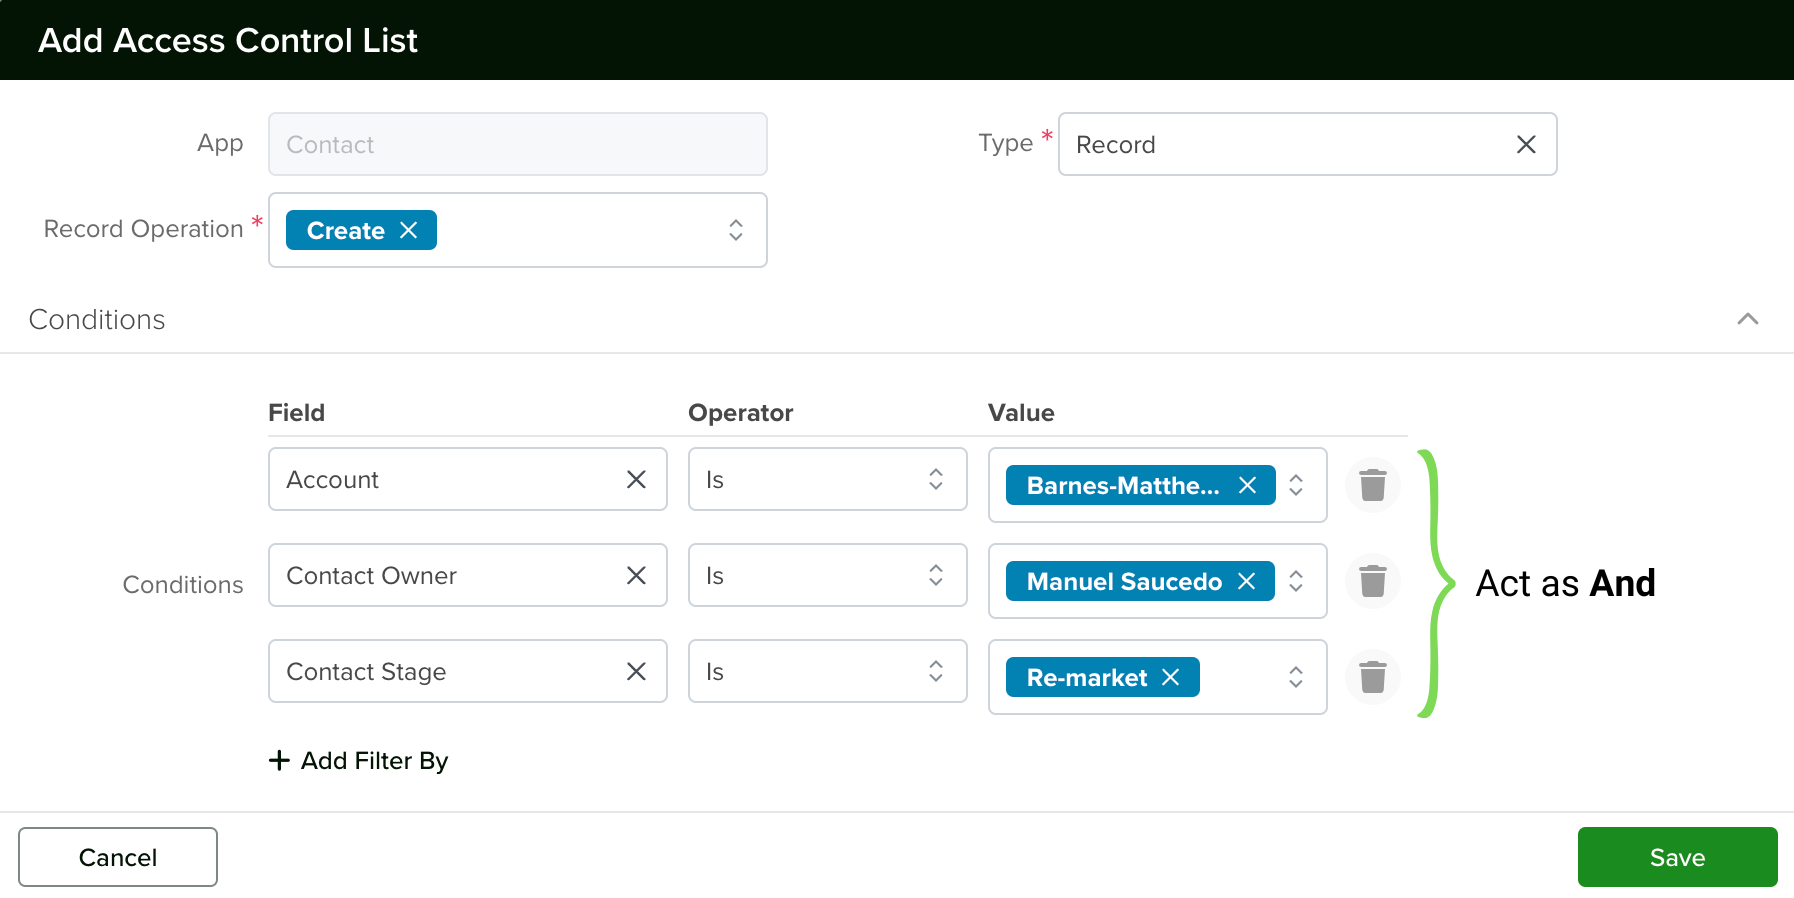
You can define conditions for Access Control Lists to tailor access permissions precisely. These conditions are inclusive, meaning all specified rules must be met for the ACL to take effect. To create conditions, select ‘Records’ from the ‘Type’ dropdown, and then click ‘+ Add Filter By’ to configure your custom rule set.
The operators will vary according to the type of field selected. Here is the list of those available:
| Operator | Description |
| Is, Is Not |
The selected value is included (IS) or excluded (IS NOT) from the filter results.
|
| Exists, Does not Exist |
(Exists) can be any value for the selected record. (Does not Exist) no value exists for the selected record., |
|
Contains, Does not Contain |
Filters results based on whether the selected field includes (Contains) or excludes (Does not Contain) the specified value. |
| Starts With |
Filters results to include only records where the selected field begins with the specified value. |
For a full list and guide with Operators and Filters take a look at Filter, Sort & More.
Special Considerations
There are some things to keep in mind when creating ACLs.
- When creating an ACL of Record type, remember to include ‘Read’ permissions for create operations if the goal is to allow users to view the newly created record.
- When creating an ACL of Record type, remember to include ‘Read’ permissions for delete operations.
- When creating an ACL of Record type, remember to include ‘Read’ permissions for update operations.
- Each row in the conditions acts as an ‘And’.
- If you create multiple ACLs, they will act as an ‘Or’.

Note: In Boolean algebra, logical AND is treated like multiplication, and logical OR is treated like addition. As a result, logical AND has higher precedence, just as multiplication is prioritized over addition in arithmetic.
Handling Access of Sensitive Record Information
Establishing an ACL is a great way to limit access to certain sensitive information within a record while still allowing other team members to work with that record. This will function at the Field level, so each Field that contains sensitive information will require its own ACL.
Create an ACL, and choose the Field you wish to restrict access to. As a reminder, ‘Read-Only’ and ‘Hidden’ are the two Field Operations available for the ‘Field’ Type.
When creating or editing an ACL, you can select multiple Fields instead of being limited to just one. This allows for greater flexibility and efficiency in defining permissions at the field level, making it easier to manage complex access requirements.
Enforcing Team & Ownership-Based Restrictions
Within the Edit ACL screen, you’ll find two options to enforce restrictions based on Team Membership or Ownership:
- Enforce User is Not in Team: When this option is checked, the ACL restriction will apply to users who are not part of the Users on the Role’s specified Team.
- Enforce User is Not the Owner: Selecting this option ensures that ACL restrictions apply to all users who are not the Owner of the Record.
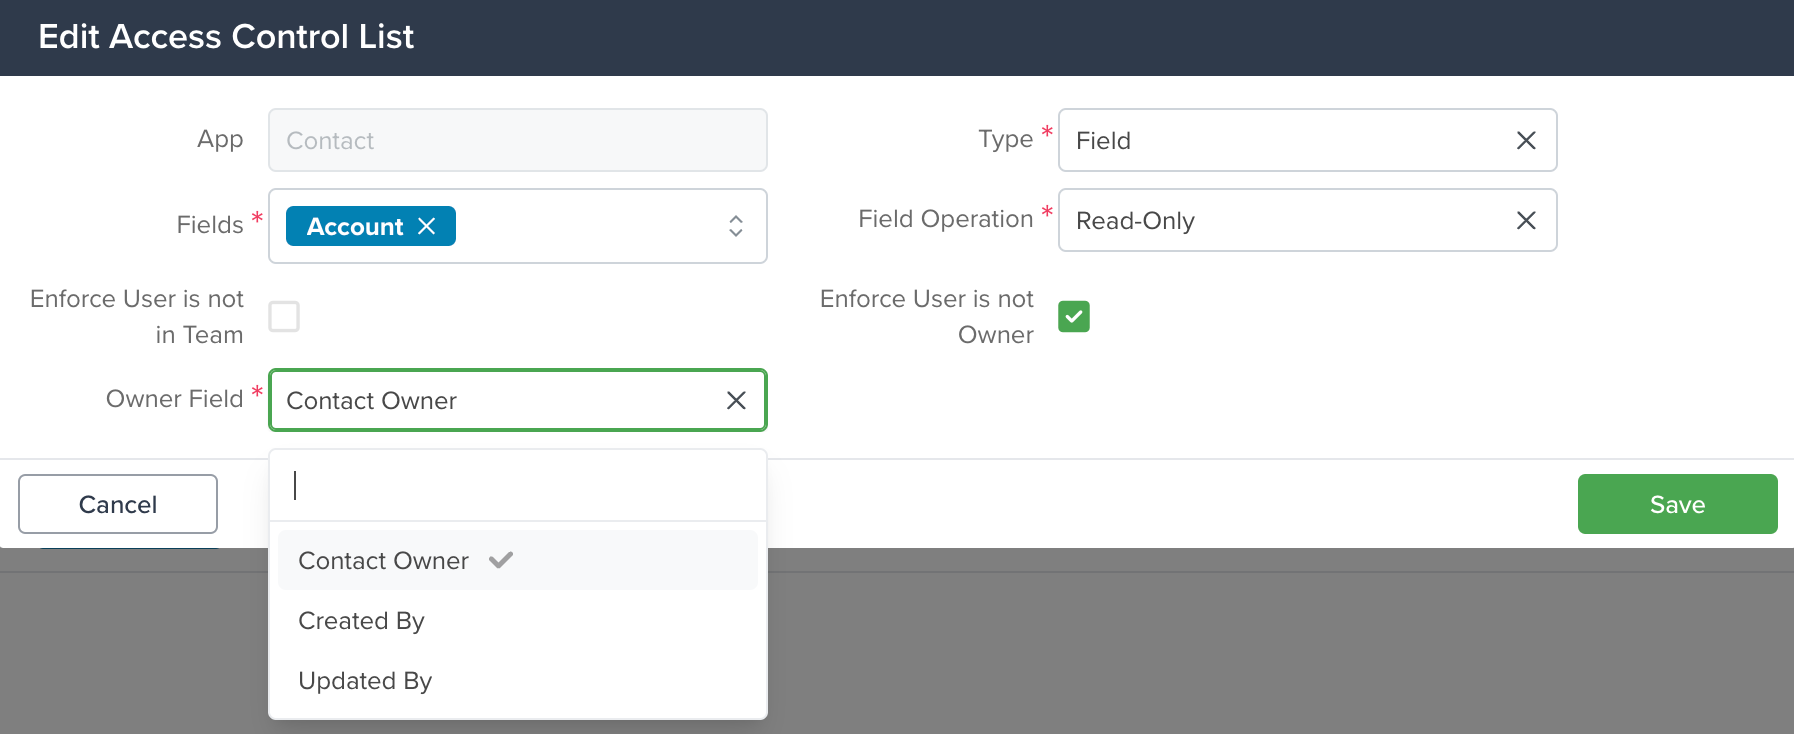
Owner Field Feature
The “Enforce User is Not Owner” checkbox in the Access Control List (ACL) settings includes a powerful feature: a mandatory “Owner Field” dropdown menu. This allows you to specify which User-Referencing Field in the App the ACL should evaluate for Ownership-based restrictions.
These features provide added flexibility for fine-tuning access control and ensuring permissions align with your organizational structure.
To learn everything about creating new Fields please visit this article.
How It Works
1.Checkbox Activation:
- When you check the “Enforce User is Not Owner” box, the new “Owner Field” dropdown menu will appear.
- Selecting a field in this dropdown is mandatory to save the ACL.
2.Available Fields:
The dropdown will list all fields in the App that Reference Users.
The selectable fields include standard User-Referencing Fields such as:
- Owner
- Updated By
- Created By
Fields Referencing Users (e.g., Developers for the Tickets app).
Creating Custom Fields Referencing Users
You can add custom fields to the “Owner Field” dropdown menu by creating fields that reference users in the app receiving the ACL.
Steps for Reference Fields:
- Navigate to the Settings of the app receiving the ACL.
- Under the Form Fields tab, click “Add Field.”
- In the Select Field Type window, choose “Reference.”
- Fill out the details for the new field, ensuring you set the “Reference Object” to ‘User.’
- This makes the field reference users and makes it selectable in the “Owner Field” dropdown
Steps for Reference Join Fields:
- Navigate to the Settings of the app receiving the ACL.
- Under the Form Fields tab, click “Add Field.”
- In the Select Field Type window, choose “Reference Join.”
- Under the Reference tab, select a previously created Reference Field from the app.
- Example: In the Contacts app, if the Account app has a Reference Field (e.g., Owner), you can link to it.
- 5.Choose the specific field you want to join, such as Owner of the Record in the referenced app.
- 6.Save the new field.
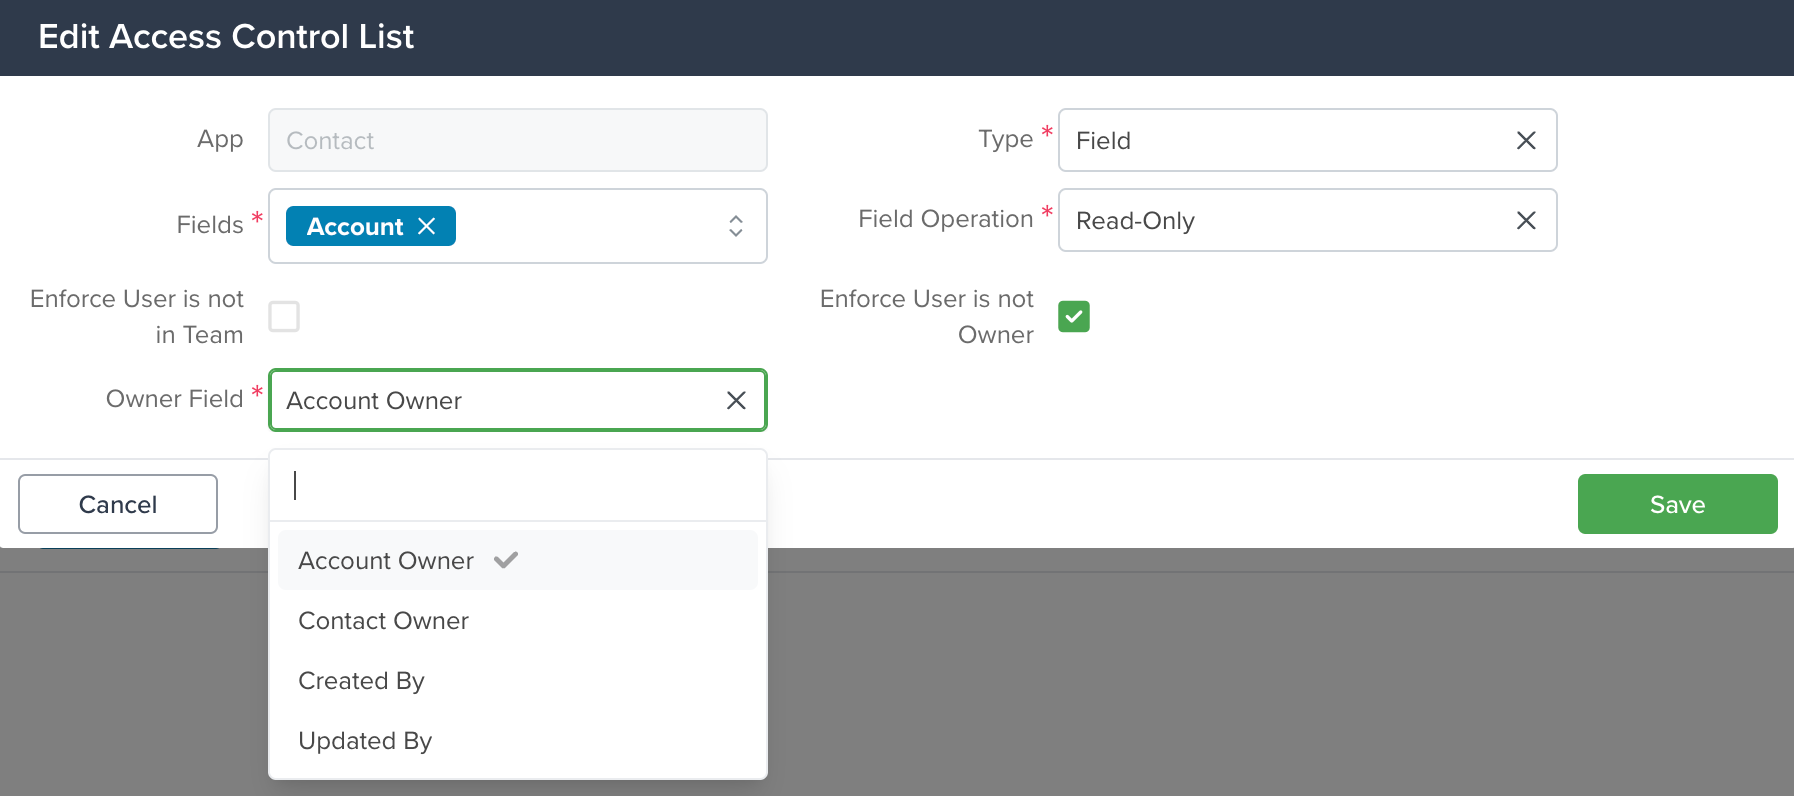
Once the new field is created, return to the Edit ACL window. You’ll see that the new field is now included in the Owner Field dropdown menu. In this example, we created the “Account Owner” field. This means that any user who is not the Account Owner will have the restrictions defined by the ACL applied. This restriction also extends to the Owner of the Contact in the Contacts app.
How do the Team & Ownership-Based Restrictions Work? Here are a couple of examples
In servis.ai, Access Control Lists (ACLs) give you the flexibility to control who can see or modify specific fields based on Ownership or Team Membership. Here’s how you can use ACLs to restrict access to Fields in the ‘Contacts’ app.
Scenario 1: Restricting Access Based on Ownership
Imagine you’re an administrator, and you want to ensure that only the Owner of a Contact Record can fully access specific Fields in the ‘Contacts’ app:
- The ‘Account’ Field should be ‘Read-Only’ (non-editable) for everyone except the Owner.
- The ‘Contact Stage’ Field should be completely ‘Hidden’ (blank) from users who are not the Record Owner.
Here’s how to set this up:
Step 1: Restrict the ‘Account’ Field
- Go to ACLs and click ‘Add Access Control List’.
- Select ‘Field’ Type.
- Choose ‘Account’ as the Field you want to restrict.
- Set the Field Operation to ‘Read-Only’.
- Check the box labeled ‘Enforce User is not Owner’ to apply the restriction to Non-Owners.
- Click Save to confirm.
Step 2: Restrict the ‘Contact Stage’ Field
- Click ‘Add Access Control List’ again to create another ACL.
- Select ‘Field’ Type.
- Choose ‘Contact Stage’ as the field to restrict.
- Set the Field Operation to ‘Hidden’.
- Check the box labeled ‘Enforce User is not Owner’ to apply the restriction to Non-Owners.
- Click Save to confirm.
Step 3: Save the Role Settings
- After creating the ACLs, close the ACL window to return to the Role’s Settings page.
- Click the Save button at the bottom of the page to apply all changes.
Result:
- The ‘Account‘ Field will be ‘Read-Only’ (non-editable) for users who are not the Owner of the Contact Record.
- The ‘Contact Stage‘ Field will be ‘Hidden’ (blank) for users who are not the Owner of the contact record.
If someone without the required permissions tries to check these fields:
•The ‘Contact Stage’ Field will appear blank.
•The ‘Account’ Field will be visible but unmodifiable.
Scenario 2: Restricting Access Based on Team Membership
Now, let’s say you want to apply the same restrictions, but instead of Ownership, you want to control access based on whether a user belongs to the Team managing the Contact Record:
•The ‘Account‘ Field should be ‘Read-Only’ (non-editable) for users not part of the Team.
•The ‘Contact Stage‘ Field should be ‘Hidden’ (blank) from users not part of the Team.
Here’s how to set this up:
Step 1: Restrict the ‘Account’ Field
- Go to ACLs and click ‘Add Access Control List’.
- Select ‘Field’ Type.
- Choose ‘Account’ as the field you want to restrict.
- Set the Field Operation to ‘Read-Only’.
- Check the box labeled ‘Enforce User is not in Team’ to apply the restriction to non-Team members.
- Click Save to confirm.
Step 2: Restrict the ‘Contact Stage’ Field
- Click ‘Add Access Control List’ again to create another ACL.
- Select ‘Field’ Type.
- Choose ‘Contact Stage’ as the field to restrict.
- Set the Field Operation to ‘Hidden’.
- Check the box labeled ‘Enforce User is not in Team’ to apply the restriction to non-Team members.
- Click Save to confirm.
Step 3: Ensure Team Field is Active
- Make sure the Team Field is active and properly assigned to Contact (Form Fields) Records. This is crucial for the ACLs to recognize a user’s Team membership and apply the restrictions correctly.
Step 4: Save the Role Settings
- After creating the ACLs, close the ACL window to return to the Role’s Settings page.
- Click the Save button at the bottom of the page to apply all changes.
Result:
•The ‘Account‘ Field will be ‘Read-Only’ (non-editable) for users who are not part of the Team managing the Contact Record.
•The ‘Contact Stage‘ Field will be ‘Hidden’ (blank) for users who are not part of the Team.
If someone outside the Team tries to access these fields:
•The ‘Contact Stage‘ Field will appear blank.
•The ‘Account‘ Field will be visible but unmodifiable.
By setting up these ACLs, you can ensure sensitive Fields in the ‘Contacts’ app are accessible only to the appropriate Users, whether based on Ownership or Team Membership. This gives you granular control to meet your organization’s access requirements in a secure and efficient way.
Editing an ACL

Existing ACLs can be edited in case you want to change them. To do this, simply click the ‘Edit’ button.
Here you will be able to change everything, from the Type and Conditions (only for Records Type) and change the actions they will be able to perform. Just make your changes and click the ‘Save’ button when you are done.
Adding Users to an ACL
Adding users to each of the Roles for your company is quite simple. First, navigate to Settings > Company > Roles. Then choose a Role and select ‘Edit’.
Click on the ‘Users‘ field to get the dropdown list with your available Users to choose from. You can assign multiple users to a Role.
Search ACLs
To find a specific ACL, you can use the search box available at the top of the page. You can also use the advanced search to narrow them down and display only those you need. To learn more about the advanced search, please visit the ‘Advanced Search’ section of the following tutorial:
Global Search
Duplicating Roles and ACLs
Servis.ai provides a quick and efficient way to duplicate Roles and ACLs, saving you time when setting up similar permissions or configurations for your team. Here’s how you can duplicate them:
Duplicating Roles
To duplicate an existing Role:
- Navigate to Settings > Company > Roles.
- Click on the three dots next to the Role you want to duplicate.
- Select ‘Duplicate’ from the dropdown menu.
When duplicating a Role:
- All associated members of the original Role will be retained in the duplicate.
- It’s recommended to rename the duplicated Role or update its description to avoid confusion.
Duplicating ACLs
To duplicate an ACL:
- Navigate to Settings > Company > Roles.
- Select and edit the specific Role for which you want to duplicate an ACL.
- Under the ‘Apps’ tab, locate the desired app and click the ‘Advanced’ button.
- Click on the pencil icon to access the ACL editor for the app.
- Click on the three dots next to the ACL you want to duplicate.
- Select ‘Duplicate’ from the dropdown menu.
When duplicating an ACL:
•All configurations will be copied, including Conditions, Fields, Checkboxes, and Operators.
•You can then adjust the duplicated ACL as needed to fit your requirements
By using the duplication feature, you can easily replicate Roles and ACLs while maintaining consistent settings across your team, streamlining your administrative workflow and saving valuable time.
Deleting an ACL
If you created an ACL for a really specific purpose but eventually decide that you don’t need it anymore, you can always delete it. Click on the three dots next to the role and select ‘Delete’. If you try to delete a ‘Role’ that has users assigned, you will receive an error message, as it is required that you remove the users from the role before deleting it.
Edit the ‘Role’ to remove any active user and click the ‘Save’ button before attempting to delete the Role. Once you do the role will no longer be active and will not appear on the list.
Access Control Lists (ACLs) are a powerful tool in servis.ai that enable you to define precise access permissions for your team, tailored to their roles and responsibilities. By understanding how ACLs interact with Roles, you can create a secure and efficient workflow, ensuring that team members have access only to what they need.
Remember, only Administrators have access to create, edit, and manage ACLs.
ACLs & Lines
When working with apps with Lines, ACLs don’t automatically apply to those lines. To ensure consistent access control:
-
Go to the ACLs configuration tab within your app, there will be one tab for each line.
-
Create the necessary ACLs directly in each of those tabs.
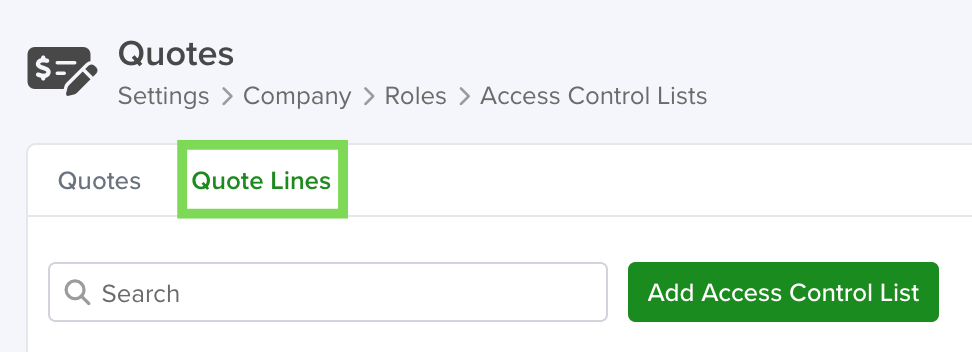
For example, the Quotes app includes line items by default. You can create and apply ACLs specifically for those lines to control access just like you would on the main app.
